Agenda is more than just a basic note taking app. It has powerful features for organizing notes, task management, and cross referencing. In this section, we introduce these features.
Tags
Tags are labels which can be directly inserted into the text of a note. They are useful for imparting extra information into content, but also for search purposes, and creating saved searches.
The tags in Agenda may contain parameters, and even dates.
Creating a Tag
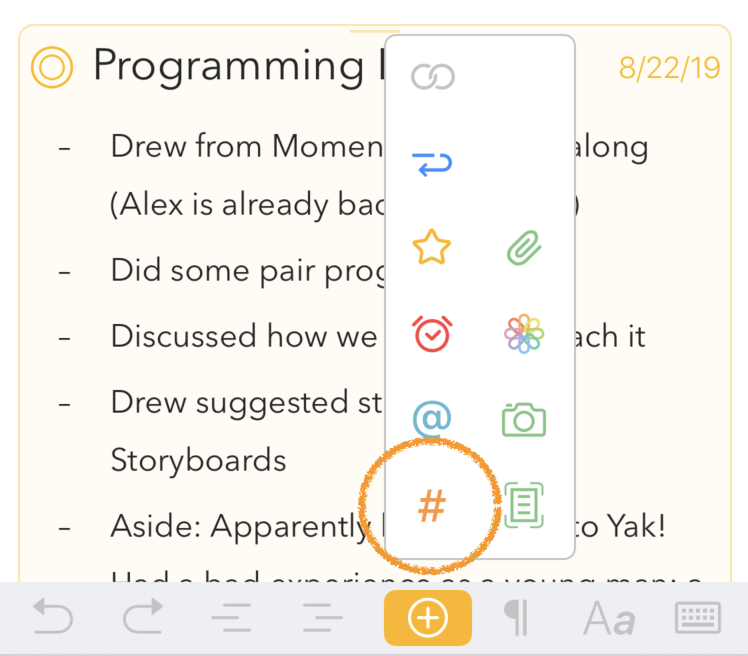
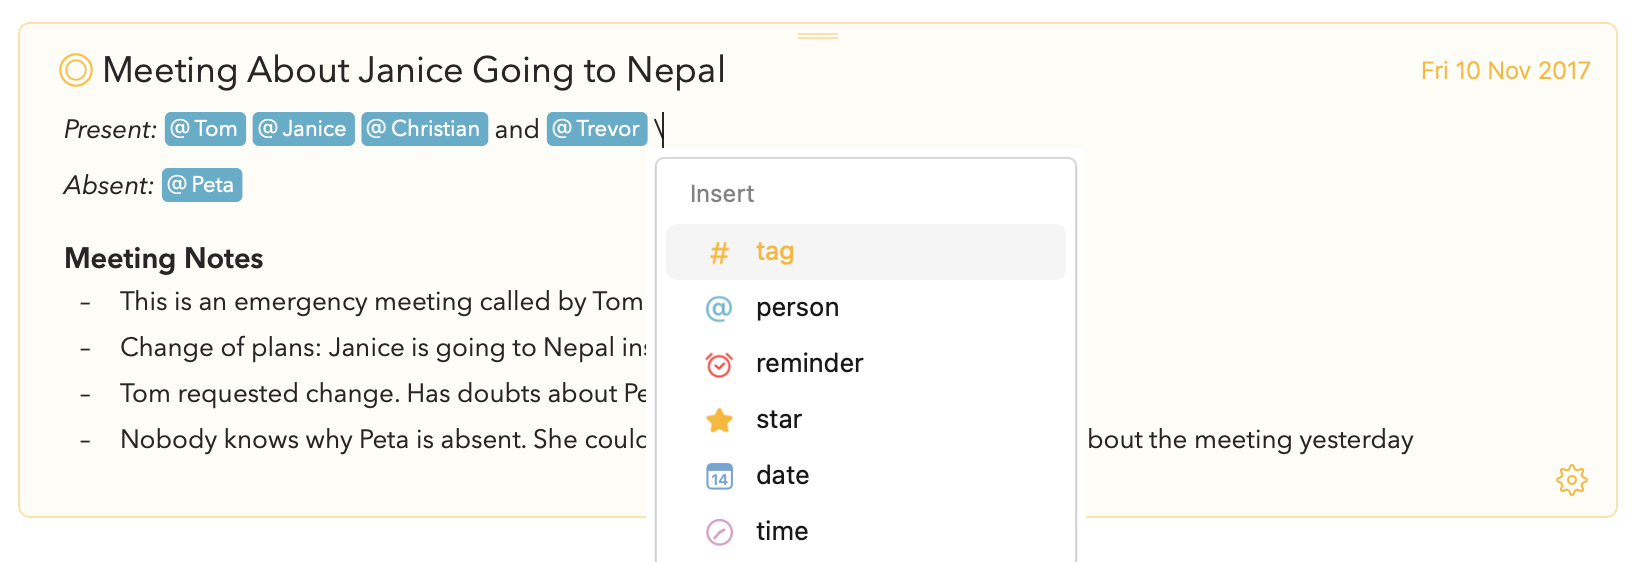
To start entering a tag, on macOS you can use the menu Insert > Tag, and then type the tag. On iOS and iPadOS you can create one by tapping the hash (#) icon in the popup menu that shows after tapping the plus button in the bar above the keyboard:
There is also support for creating tags with a textual shortcut: you can type the hash symbol (#) followed by the tag, e.g. #important.
The standard tag can contain letters, digits, and symbols, but no spaces, commas or periods. To complete the tag, simply enter a character that doesn’t belong in a tag, such as a space, or move the cursor elsewhere.
If you want to create tags that contain spaces or special characters you can use a slightly different syntax where you enclose the name of the tag in parentheses, like this: #(Current Beta Release) or #(Version 2.5)
Tip: If you do not want to have a # be recognised as a tag, for instance when typing a CSS color like #FFF, you can prefix it with a backslash character like this
\#FFFand it will not be turned into a tag.
Autocompletion of tags
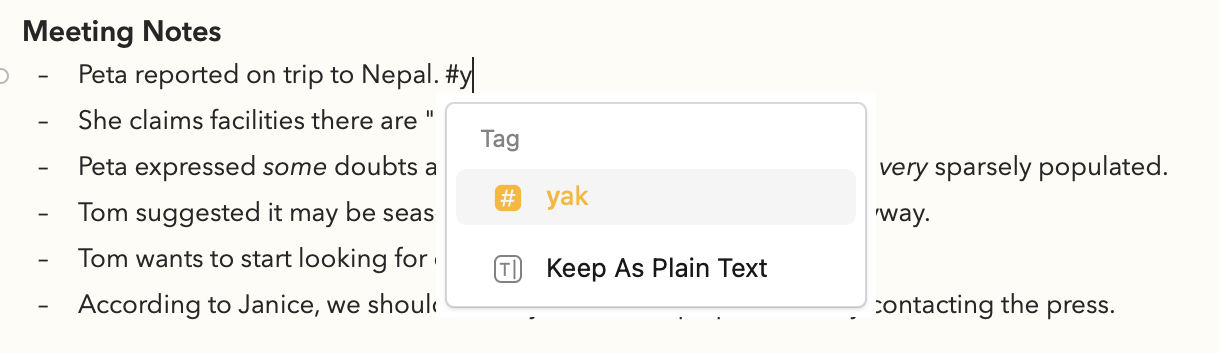
When you start typing a hash symbol in the text editor you will notice that Agenda will auto-complete the tags. On Mac the suggested tags that match your typing are shown in a popover below the text you are editing:
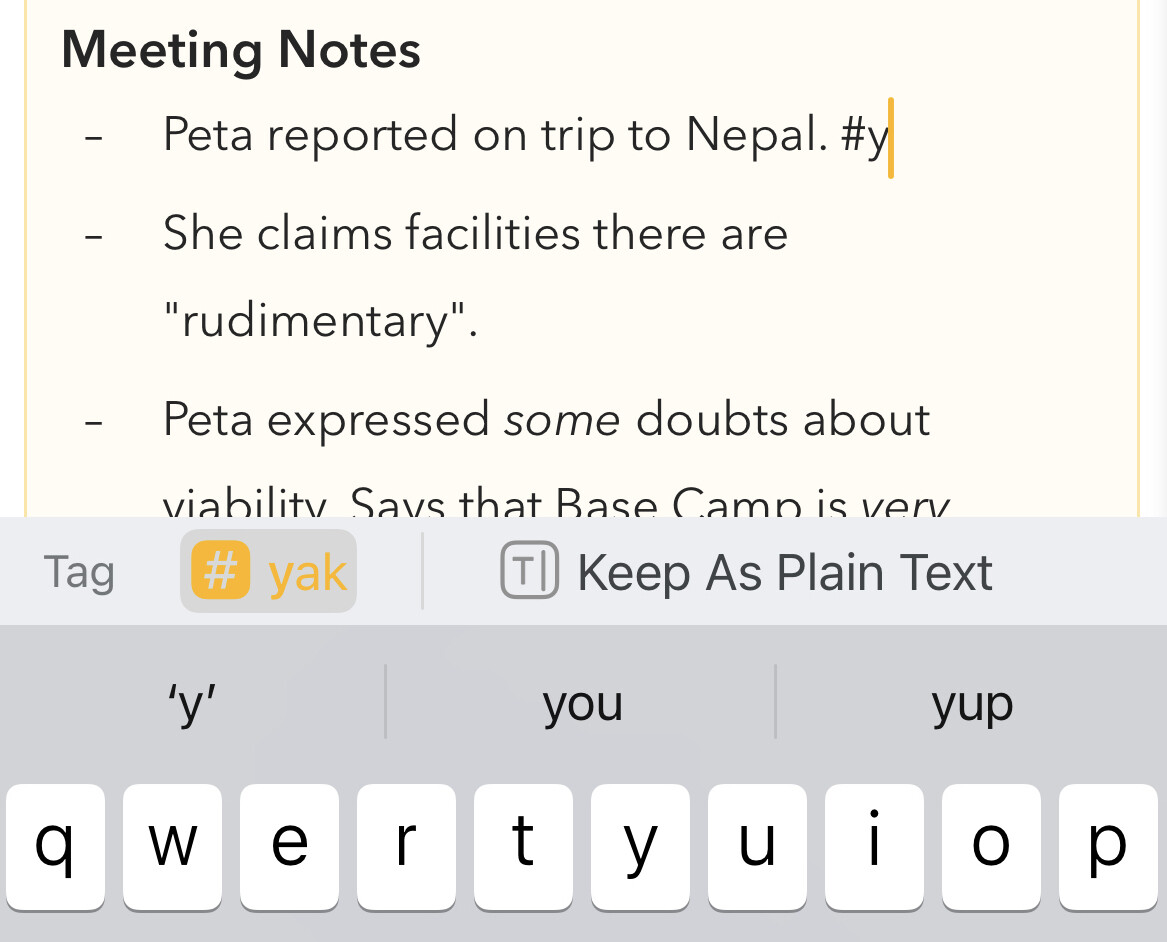
On iPhone and iPad the suggestions will be shown in the bar above the keyboard:
If there’s a complete match or only single match the suggestion will immediately be selected, if there’s more than one matching tag you can use the down-arrow key to move into the suggestion list to select the one you want (or you can continue to type until only a single match remains). Hitting the return key will insert the selected tag into the text.
Using auto-completion greatly helps keeping a consistent set of tags and making it more effective. Notice how it also contains the option to keep the text as-is if you don’t want the text to be recognised as a tag.
You can see auto-completion in action, as well as how to work with tags here:

Editing an Existing Tag
To edit an existing tag, simply click or tap inside of the tag to trigger a popover that allows you to edit the tag.
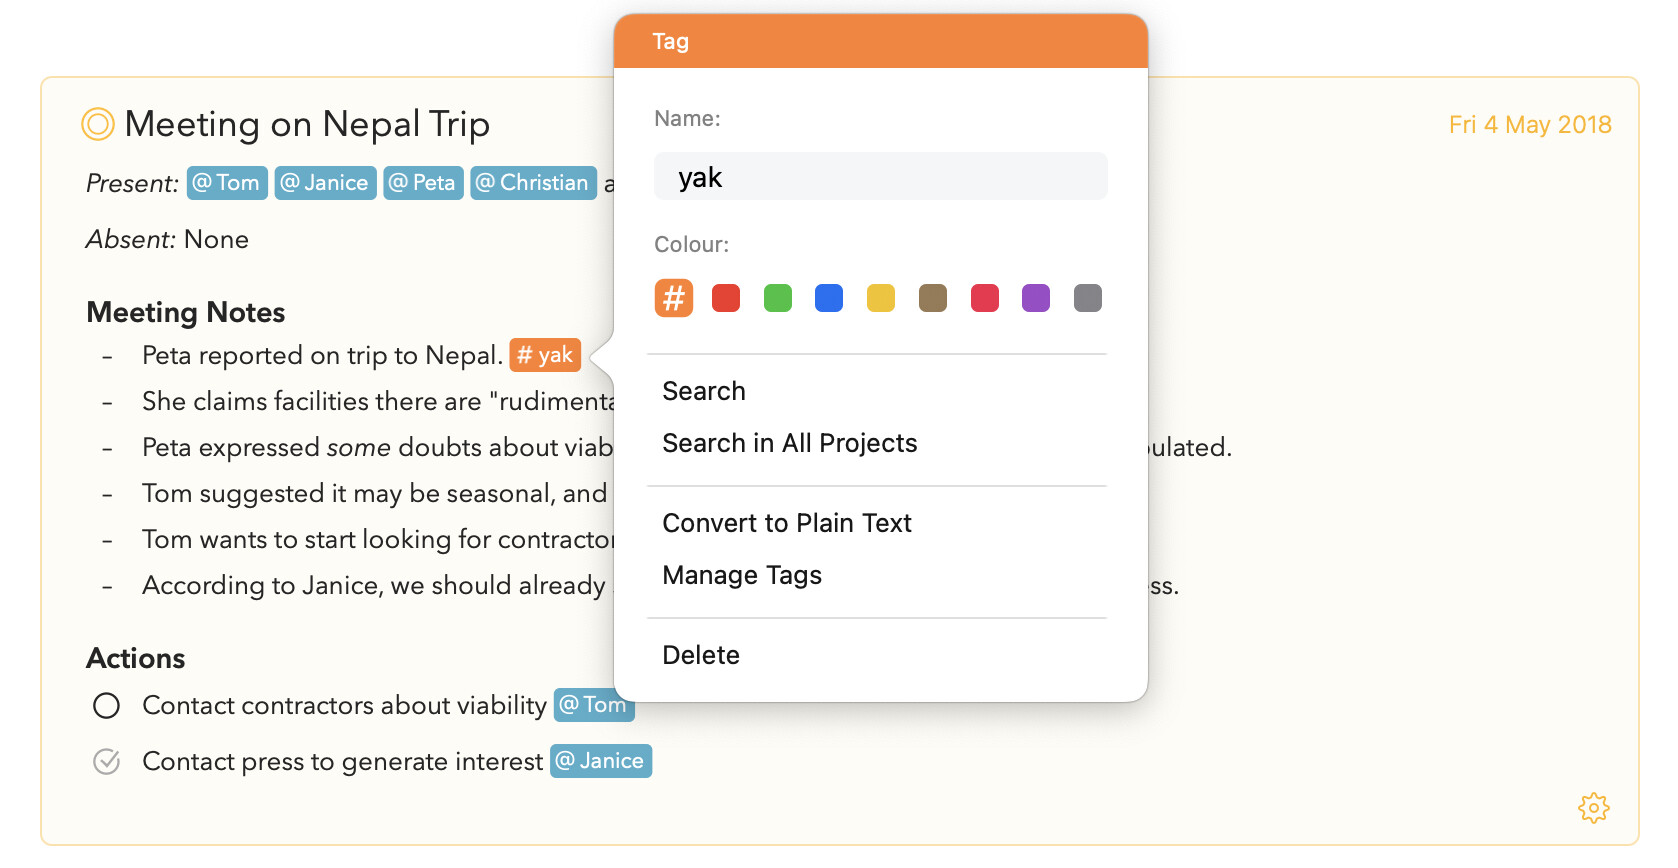
In the tag popover you can:
-
Edit the name of the tag
-
Change the color of the tag (this is a premium feature)
-
Search for the tag in the current or all projects
-
Convert the tag back into normal text
-
Open the tag manager (see below)
-
Delete the tag from the text
Managing Tags using the Tag Manager
To get an overview of all your tags you can use the Tag Manager, either via the above popover, or on macOS by going to the Window menu in the main menu bar.
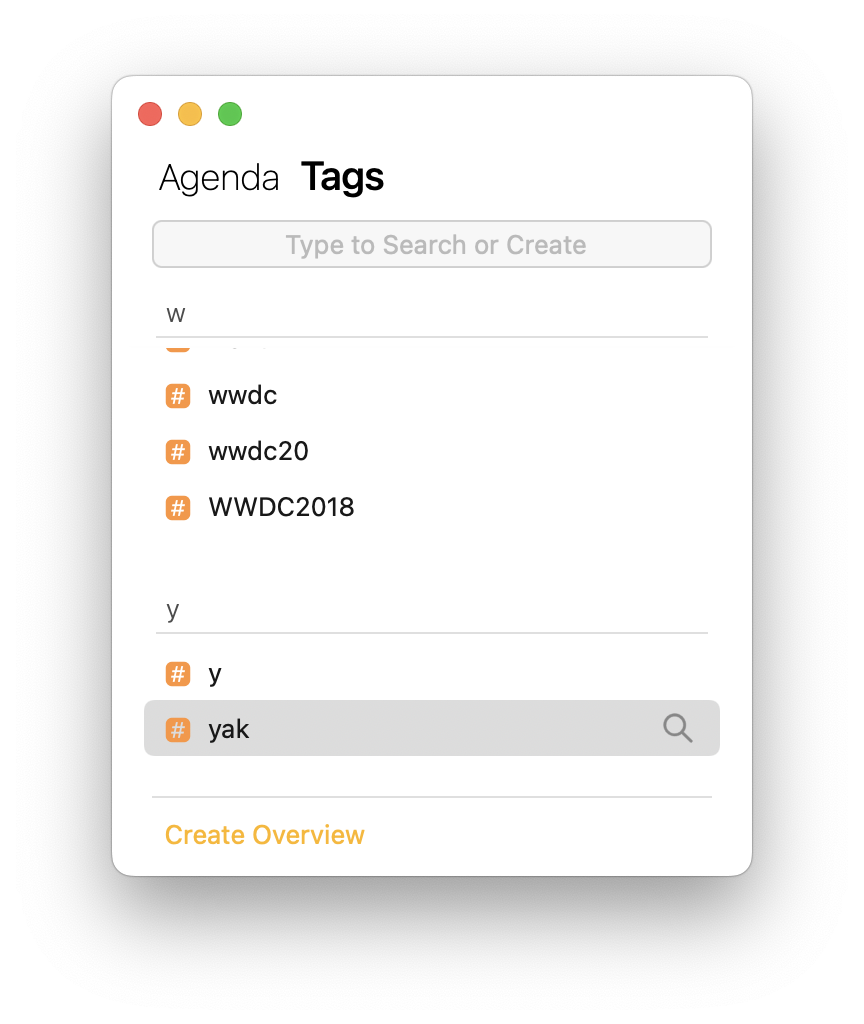
You can search for a tag or scroll through the list of your tags. By clicking the search icon you can search for a tag in your library.
To edit a tag’s name or color you can double click in on the Mac. On iOS and iPadOS you can select the three dots next to selected tag to do the same.
If you select multiple tags you can merge them into one, which is great to reduce the number of variations of a tag you might have created.
Finally, you can create an overview from one or more tags using the Create Overview button at the bottom. You can learn more about smart overviews here: Organizing Projects
Tip: on macOS you can keep the tag manager open next to the main window for quick access to your tags, clicking the search loupe will search for the selected tag in your library, or when holding the alt/option key in the currently selected project only.
Tag Parameters
Most tags are simple labels, but it is possible to use parameters within tags. For example, you could use the tag importance with different parameters for each level of importance. So one piece of text might contain the tag #importance(low), and another #importance(high).
You can mix and match as well: a tag can be just the tag ( #priority , #important , etc), or can have a value associated with it in brackets following the tag, these values can be:
- text, e.g.
#priority(high),#priority(low) - numbers, e.g.
#priority(1),#priority(2) - dates, e.g.
#priority(today),#priority(2 days)
The advantage of using these values is that you can then search both for all notes with a #priority tag in them, or specifically for notes of say high priority by searching for #priority(high) . In the future we aim at extending this functionality such that you could do a search for medium priority and higher for example.
Did you know? The way parameters work here is the same as it works for the Text Actions that Agenda support, a powerful set of actions you can invoke through a combination of typing and autocompletion. In fact, creating a tag using the hash tag symbol, like
#priority(high)in the above example, is just a shorthand for the\tag(name: priority, value: high). You can learn more about Text Actions and how they work in the section below.
Due Tag
You may want to give list items or other paragraphs a due date; you can do this with the due tag. If you use the tag label ‘due’, and give it a date as parameter, you can later search for notes that have due items. For example, you could enter a tag like #due(3/3/2018) in a list item, indicating it is due on the 3rd of March, 2018.
To search for notes with due items, enter a due tag with date into the search field. For example, if you want to see all notes containing items due on or before today, enter #due(today) in the search field. You can even save this search as an overview in the sidebar (requires premium purchase).
As you may have noted, you can enter dates in a variety of forms, including informal variants like today, tomorrow, 2 days and so forth.
Note that the due tag is just an example of a type of tag you can create with dates as values. The keyword is up to you, can also be say deadline(2 days) .
Note: Searches currently show whole notes, not only the matching item or paragraph. In future, we hope to allow a summarized form where only the items that match are included in the results.
Symbolic Tags (e.g. star)
There are a few tags reserved for special uses. For example, if you enter #star, the current paragraph will get starred status. On Mac you can also apply a star using menus or the paragraph styling popover, which appears when you click the small button to the left of a paragraph. While on iOS you can insert a star via the plus button in bar above the keyboard.
Saving a Tag Search as Overview
Searching for tags is as easy as entering the tag, and then clicking Search for Tags in the menu that appears. But even more powerful is to save your most common searches as saved searches.
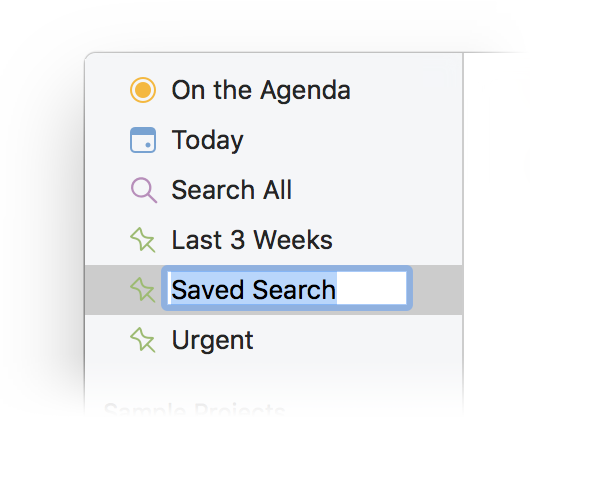
If you find yourself repeating a search often, to save it as an overview in the sidebar, click Search in All Projects, and then Save Search as Overview. You can give your search a name, and it will appear in the left column.
If your search includes a date or range of dates, you will get the option to indicate whether that date should be fixed, or if it should be relative to the current date, moving with time. As an example, imagine it is the 1st of January, and you have selected the 3rd of January in the search. When you save the search, you can choose to have it always search for the 3rd of January, or to search for 2 days from whatever the current date is.
Premium: This feature is only available after you purchase the premium feature pack.
Learn more on how to search and filtering your notes in Searching and Filtering
Choosing between prominent or subdued tags
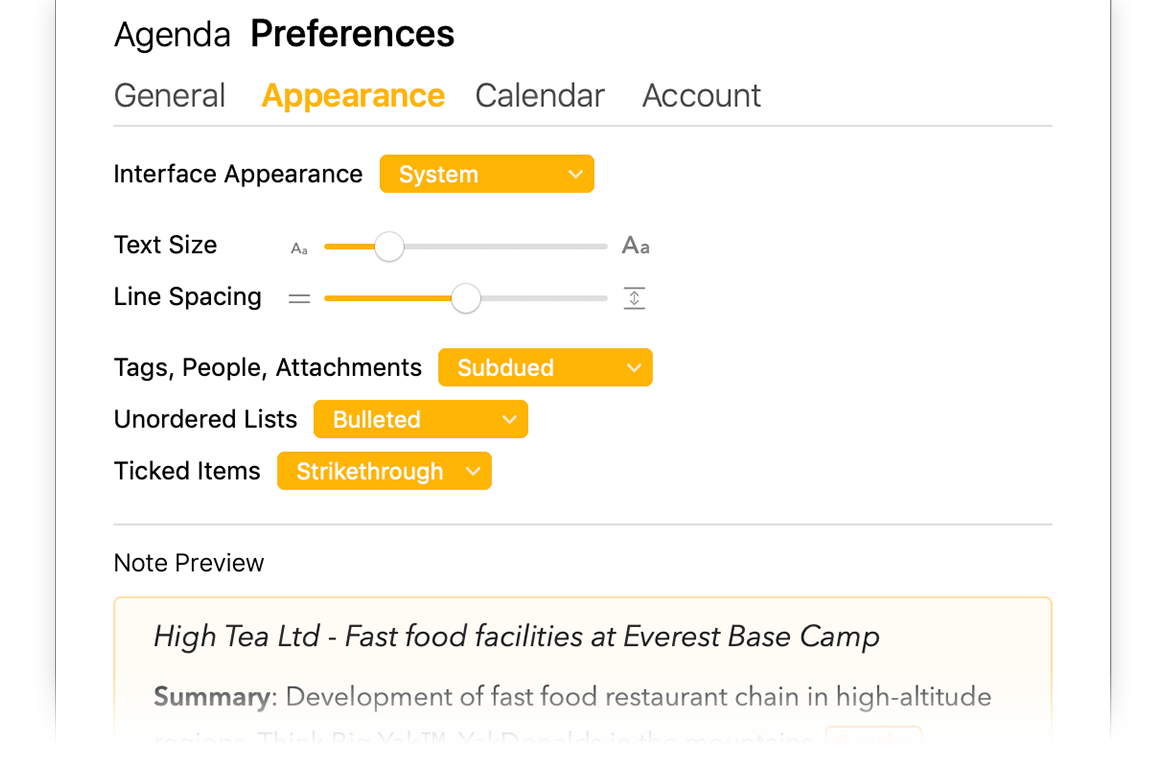
You can choose whether you would like to have tags stand out with a bright background color (the default) or have a more subdued look, which you might prefer if your notes contain a lot of tags for example. You can change the look of tags in the Agenda Preferences.
Premium: This feature is only available after you purchase the premium feature pack.
People
Because the people you deal with are so important in your notes, Agenda includes a special type of tag just for them. The rules for entering person tags are very similar to standard tags.
Creating a Person Tag
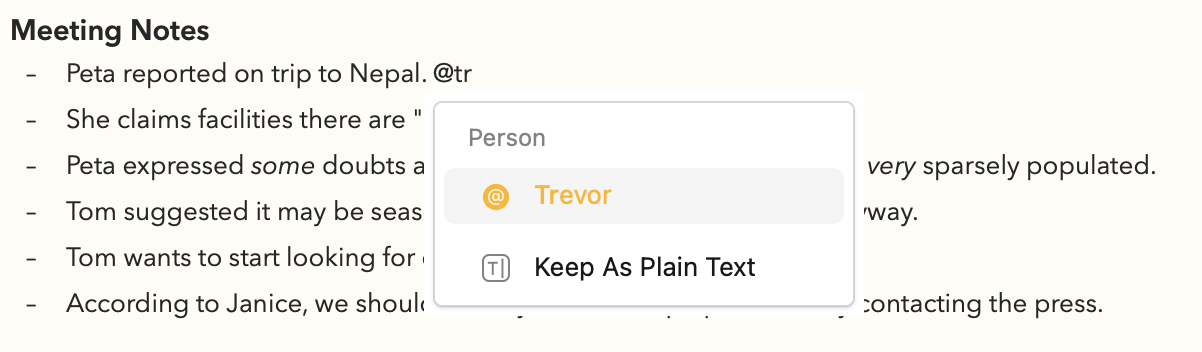
To start entering a person tag, on macOS you can use the menu Insert > Person, and then type the name or initial of the person. On iOS and iPadOS you can use the bar above the on screen keyboard:

There is also support for creating tags with a textual shortcut: you can type the ‘at’ symbol (@) followed by the name, e.g. @Tom.
The name you use can contain letters, digits, and symbols, but no spaces, commas or periods. To complete the tag, simply enter a character that doesn’t belong in a tag, such as a space, or move the cursor elsewhere.
If you want to create person tags that contain spaces or special characters you can use a slightly different syntax where you enclose the name of the person in parentheses, like this: #(Tom Groothuis)
The name you use can contain letters, digits, and symbols, but no spaces, commas or periods. To complete the person tag, simply enter a character that doesn’t belong in a tag, such as a space, or move the cursor elsewhere.
Tip: If you do not want to have a # be recognised as a tag, for instance when typing a CSS color like #FFF, you can prefix it with a backslash character like this
\#FFFand it will not be turned into a tag.
Autocompletion of People
When you start typing an @ symbol in the text editor you will notice that Agenda will auto-complete the people. On Mac the suggested tags that match your typing are shown in a popover below the text you are editing:
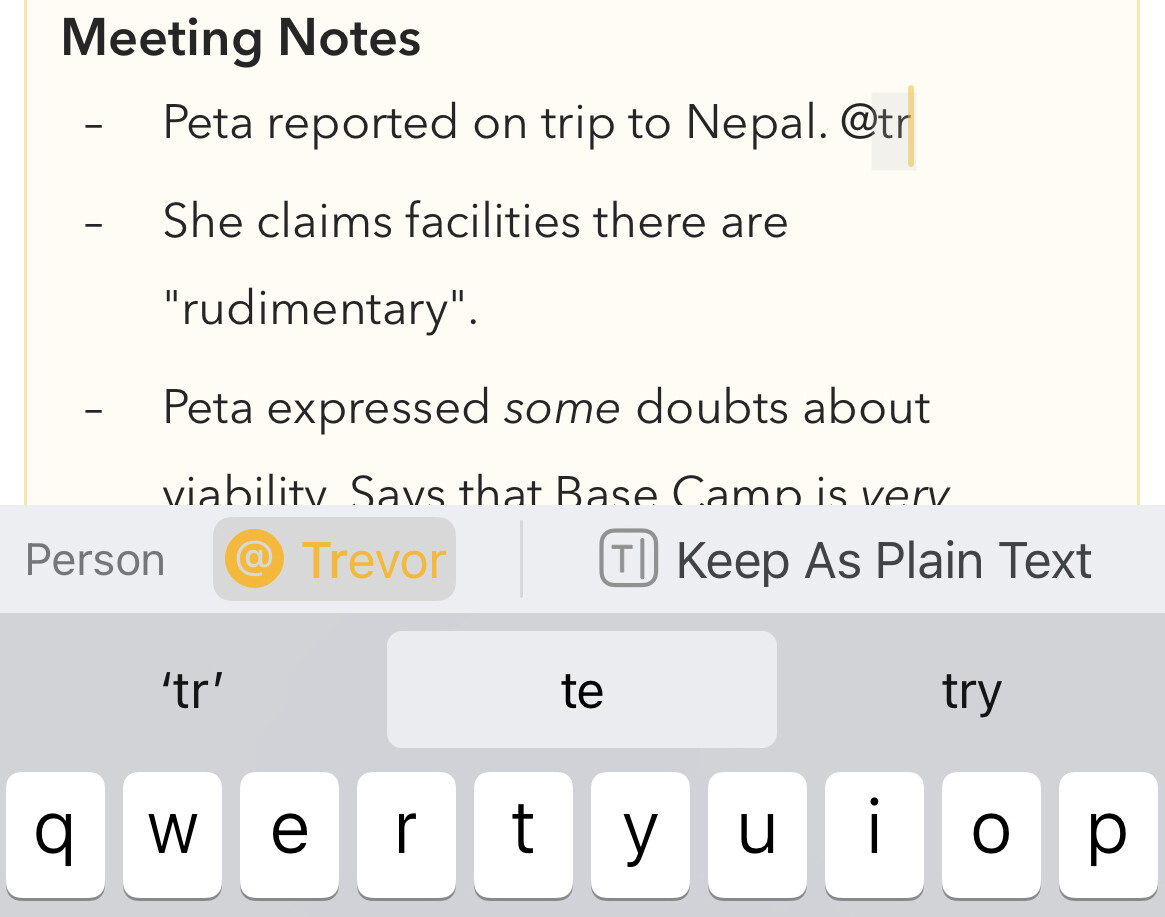
On iPhone and iPad the suggestions will be shown in the bar above the keyboard:
If there’s a complete match or only single match the suggestion will immediately be selected, if there’s more than one matching person you can use the down-arrow key to move into the suggestion list to select the one you want (or you can continue to type until only a single match remains). Hitting the return key will insert the selected person into the text.
Using auto-completion greatly helps keeping a consistent set of people and making it more effective. Notice how it also contains the option to keep the text as-is if you don’t want the text to be recognised as a tag.
You can see auto-completion in action, as well as how to work with people in this YouTube video
Editing an Existing Person Tag
To edit an existing person tag, simply click or tap inside of the person tag to trigger a popover that allows you to edit the person.
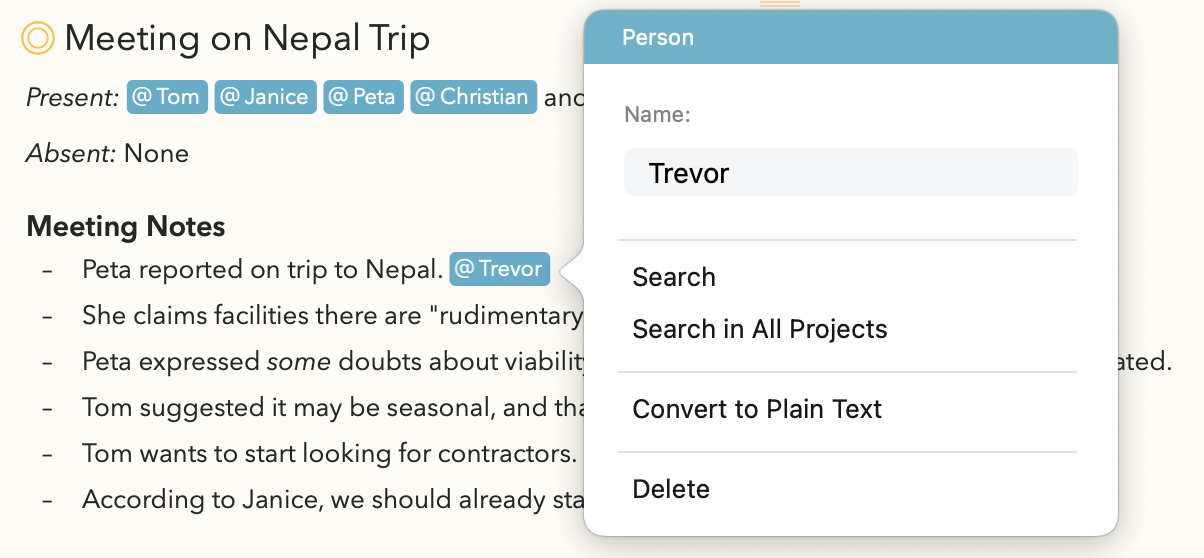
In the person popover you can:
-
Edit the name of the person
-
Search for the person in the current or all projects
-
Convert the person tag back into normal text
-
Delete the person from the text
Emojis
You can easily insert emoji’s in Agenda. Of course the standard way through the Edit > Emoji’s & Symbols on macOS and the emoji keyboard on iOS and iPadOS works, but there’s an even quicker way if you start typing a : (colon character) followed by the shorthand of the emoji, like this:
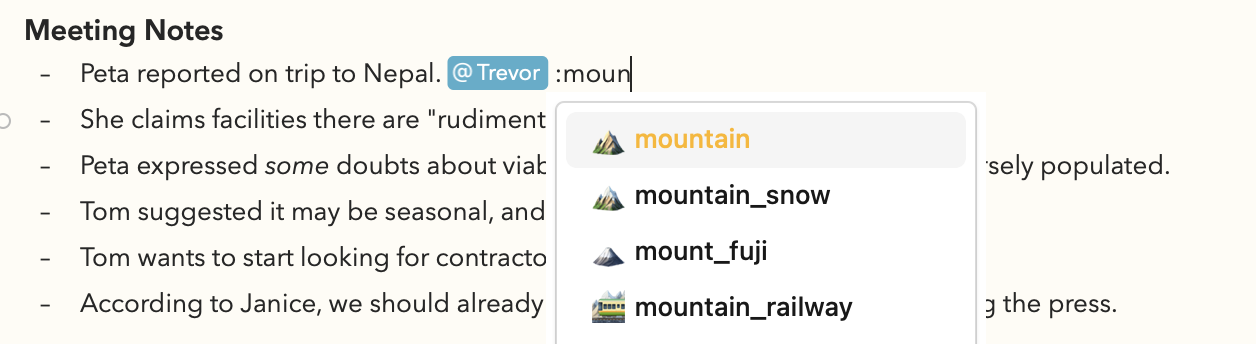
Emoji’s, just like tags and people are auto-completed when you start typing the colon character in the text editor.
Text Actions
Agenda supports a powerful system of text actions that allow you do things like inserting dates, tags, tables, etc, but also format text, and perform note-level actions by simply typing \date, \table, \heading, split, or \done. These will be expanded to the respective current date and/or time, insert a table, change the formatting to a heading, split a note in two or mark it as done, respectively. You can further tweak the behaviour of these actions using parameters, similar as when typing tags with parameters. For instance like this \date(short), \time(full), etc. You can even add timezones or locale parameters.
The easiest way to explore the available actions is by typing a backslash \ character in the text editor, it will then auto-complete the available actions and you can navigate the options by a combination of typing and using the arrow keys.
Tip: On some keyboards, like the Chinese or Japanese ones, it’s hard to type a backslash character, therefore wherever a backslash character is shown, you can also use two backticks (``) or two middle-dot characters (
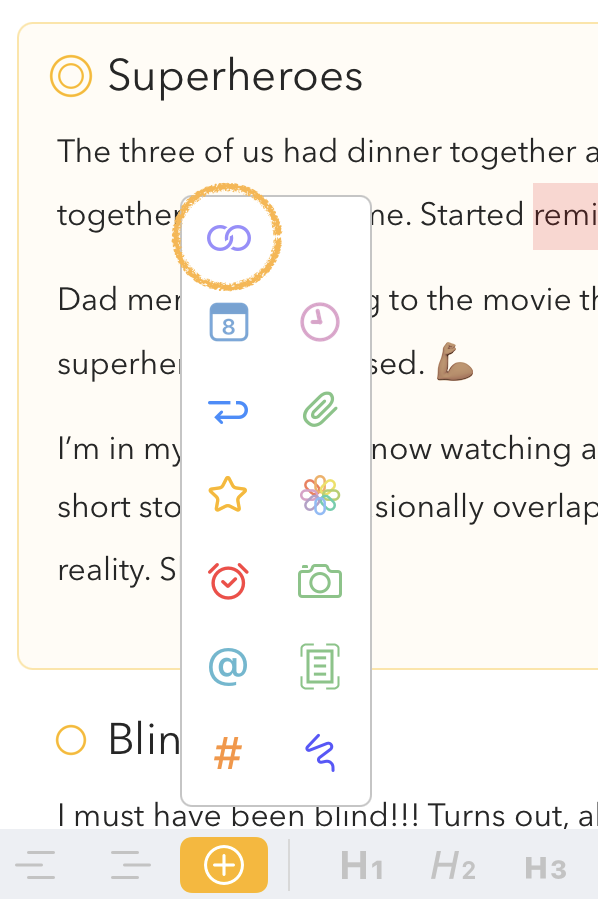
··). And because it’s also hard to type a backslash character on iPhone and iPad, you can quickly trigger the action menu by a tap-and-hold of the plus button in the keyboard bar as well.
You can see the text actions in action in this YouTube video:
Learn more on how to use text actions in your notes in Text Actions Cheat Sheet
Links
Agenda notes can include links to web sites, other Agenda notes, and even files in the Finder. Anything that can be represented with a link can be included.
Adding a Link
To add a link, on macOS you can use the menu Insert > Link To… > Add Link… This allows you to enter the URL for the link. On iOS and iPadOS you can use the plus button in the bar above the on screen keyboard.
But there are more ways. For example, just entering a link URL like http://agenda.com will be recognized as a link and converted for you. On macOS you can control this behavior in Edit > Substitutions.
Another way to link is using markdown syntax. Type the link anchor — the text that will be readable — in square brackets, followed by the URL address of the link in parentheses. For example, to link to the agenda web site, you might enter [Agenda Web Site](http://agenda.com), and Agenda will convert this to a link with the text “Agenda Web Site”. Clicking the link would take you to the web site.
Finally you can use the \link Text Action to insert a link into your text.
Tip: This Talk Article shows a number of handy examples where you can use this technique.
Learn more on how to use markdown syntax in your notes in Markdown Cheat Sheet
Link Shortening
If you type or paste a link into Agenda it will automatically shorten the link, removing the http:// or https:// scheme and superfluous tracking parameters etc. For example a link like https://www.google.com/?client=safari will simply be shown as www.google.com. Note that when you click the link, or copy it, it will retain and use all the information, so nothing will be lost, it’s purely for display purposes.
When you paste a link into Agenda it will even go one step further and fetch the title of the webpage you’re linking to, there’s no need for manual action, it’s all done automatically for you.
Tip: If you don’t want to have a link be shortened you can first type a backslash
\character and then paste the link, it will then be inserted as it is, in full, without changing to the website title. If you want to revert an already shortened link to be shown in full, you can do so in the editing popover shown below.
Editing Links
To edit a link, on macOS right/control-click the link and in the contextual menu choose Edit Link…. On iOS and iPadOS move your cursor after or before the link, then move it into the link using the arrow keys or by holding the space bar, use the plus button in the bar above the on screen keyboard to click on the link button, then select Edit Link. These actions will trigger the link popover:
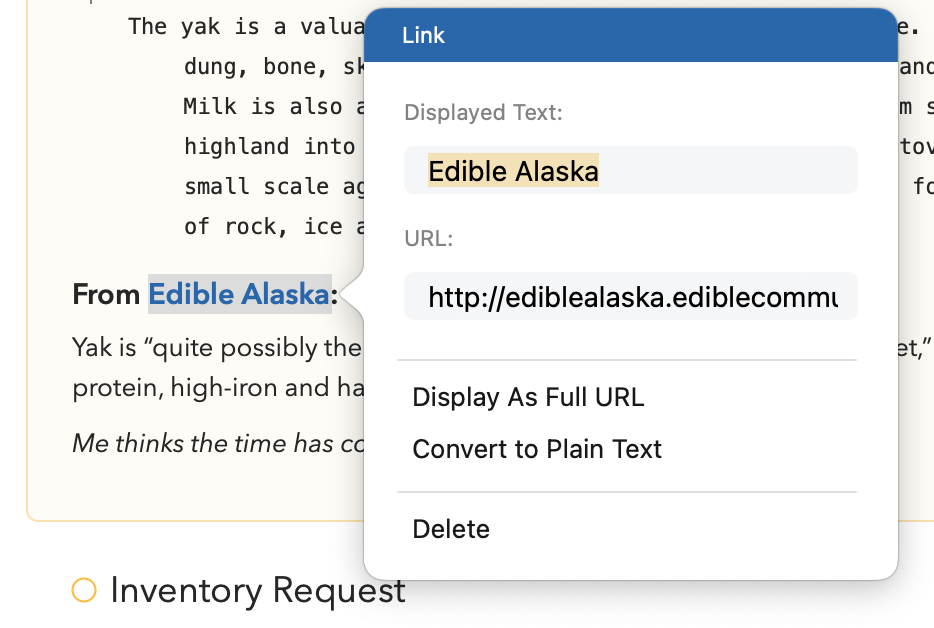
Here you can:
-
Edit the displayed text and URL of the link
-
Revert the link to be shown in full instead of being shortened
-
Convert the link back to plain text (removing the link from the text)
-
Delete the text containing the link
Linking to Files in Finder
You can create links to external files in Finder – as opposed to adding a copy as an attachment – by simply dragging the file into your Agenda notes and dropping it while holding the Control (⌃) key. When you click the link, Finder will open at the file.
Note: Due to security restrictions, Agenda cannot open the file for you — it can only bring you to the file so that you can open it yourself.
Learn more on how to add attachments to your notes in Attachments, Images and Drawings
Linking to Other Notes and Projects
Agenda supports special links for notes and projects in the app. You can use agenda links to reference other items in your Agenda notes, or you can insert them in other apps to open Agenda notes when clicked.
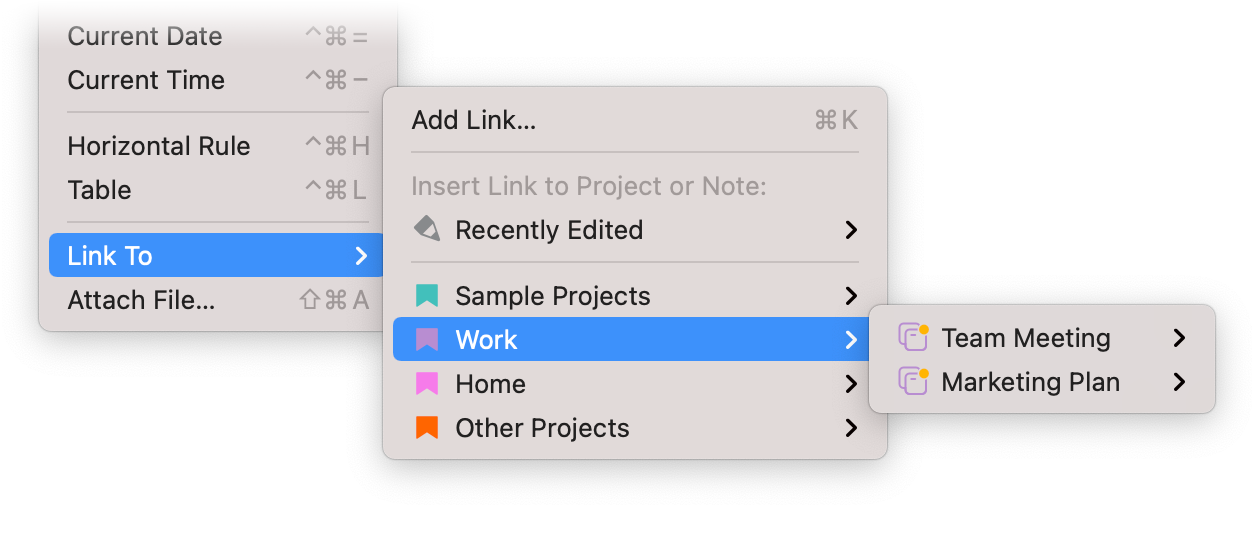
To insert a link to another note at the cursor, on macOS you can use Insert > Link To…, and choose a note or project.
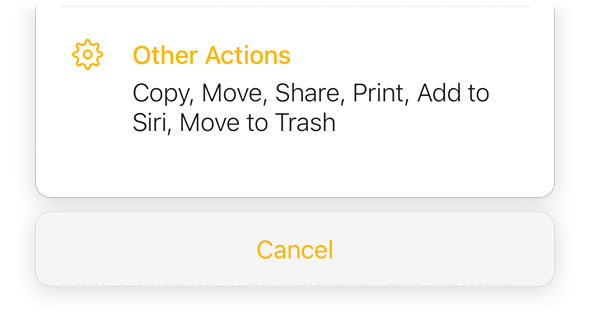
On iPadOS you’ll find the same option under the cog wheel menu in the lower right corner of the selected note, and on both iOS and iPadOS you will find the option as if you tap the orange dot next to the title and select Other Actions.
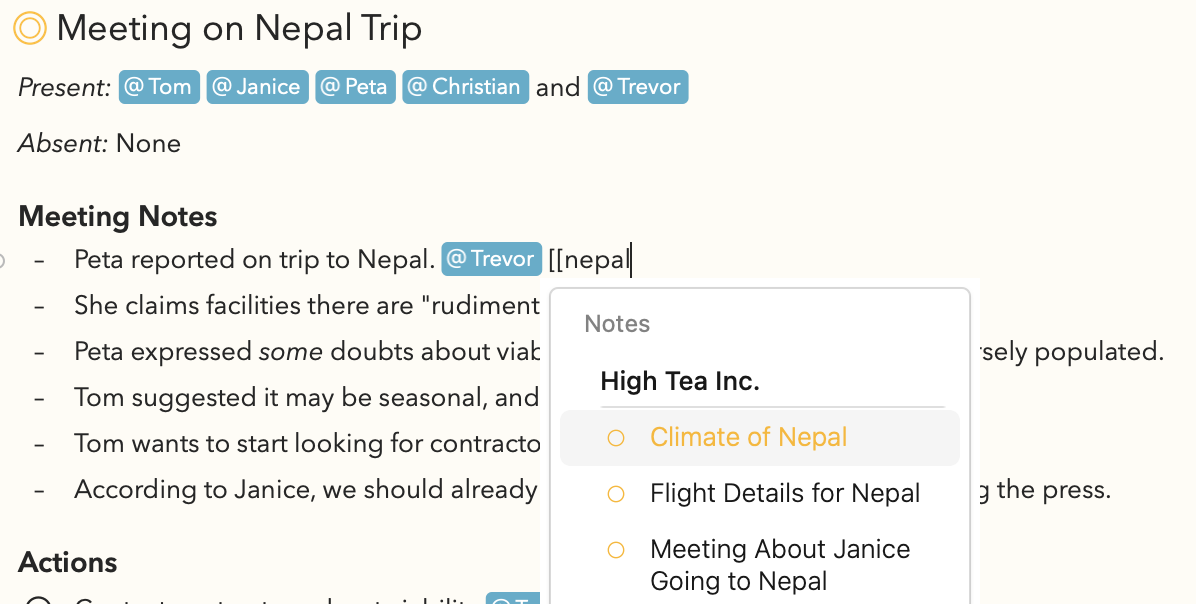
A much faster way to insert links to a note or project is using auto-completion by typing two square opening brackets [[, followed by the name of the note or project you want to link to:
Tip: On Asian language keyboards you can also use these square brackets【【 to trigger the auto-completion.
You can even start a new note directly this way by typing [[ followed by the title of the new note you would like to create. At the bottom of the suggestions you will find the option to create a new note. This will create a new note and add a link to it where you typed the command:
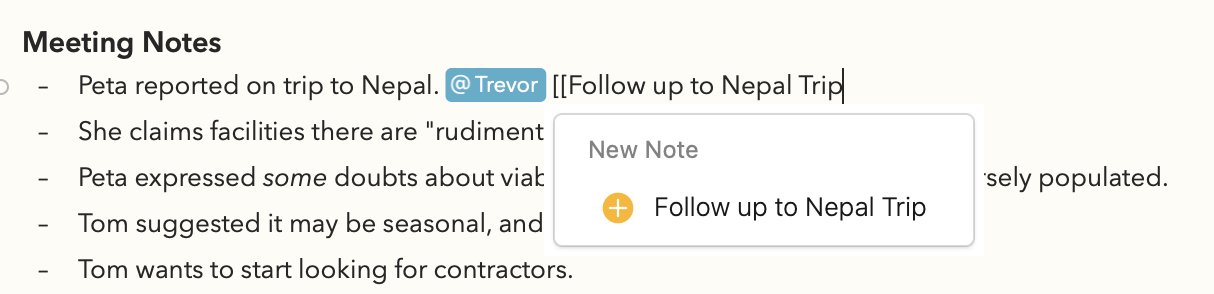
You can even prepare a new note this way by typing [[Follow up to Nepal Trip]] and when you’re ready to actually work on it you can click inside the text to activate again the auto-complete popover and click the option to create the note.
Using Back-links to linked Notes
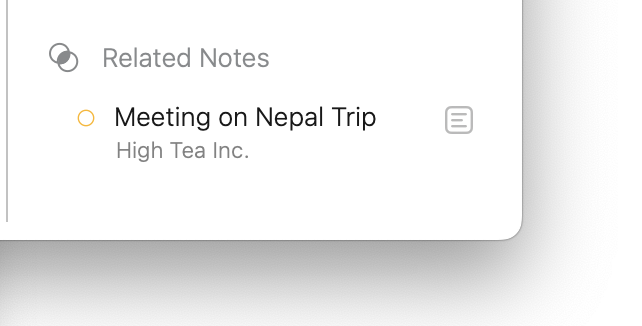
When creating a link to another note or project, Agenda automatically creates a so-called back-link. In the Related Notes panel in the inspector on the right you can see all the projects and notes that contain a link to the note you are in, making it super easy to jump back and forward between notes that you have linked together:
Linking from Other Apps to Agenda Notes and Projects
Links for notes and projects can be copied, and pasted into other apps, so that when you click them, Agenda is activated and the note or project in question is shown.
To copy the link of a note or project to the clipboard, select the note or project, and on Mac choose Edit > Copy As > Agenda Link. On iOS you find this option when you tap the three dots next to the selected project in the sidebar. Paste the copied link anywhere you like, and Agenda should open and show the item when you click it.
Creating Links in Other Apps using Share Menu
The Share menu allows you to share your Agenda notes and projects in many different formats, with any app that supports sharing extensions. On macOS this menu is in the main menu at the top of the screen.
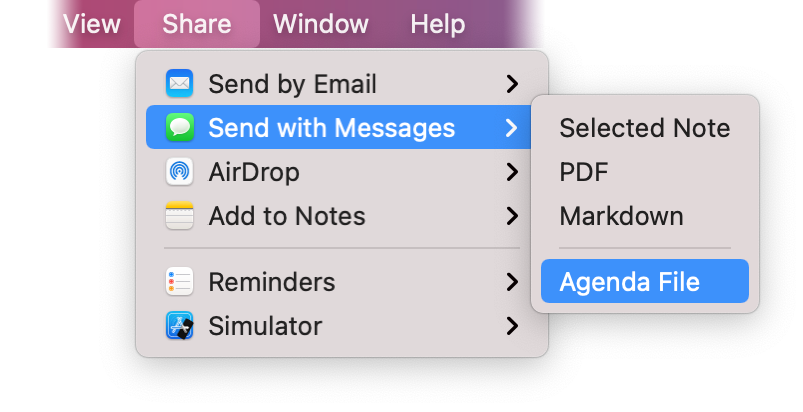
One of the options supported by many apps is sharing of an Agenda Link. The advantage of using this option is that you can easily find your way back to a particular or note or project from another app. You could, for example, add an Agenda Link to a task management app or to-do program, and have it link back to a particular note with more detail.
Another way to create such a link is to copy the selected note or project as an Agenda Link. On macOS you’ll find this option under the Edit > Copy As menu.

On iPadOS you will find the Copy As menu if you tap the cog wheel button at the bottom of a note.
On both iOS and iPadOS you will find it if you tap the orange dot next to the title of a note and select Other Actions from the menu.