Most of your time in Agenda will be spent creating and editing notes. In this section, we cover some of the most important aspects of taking notes in the app.
Managing Notes
Adding Notes
To create a new note in the selected project…
- Click/tap the large yellow + button at top-right of the notes list.
- Enter a title for the note, and press return.
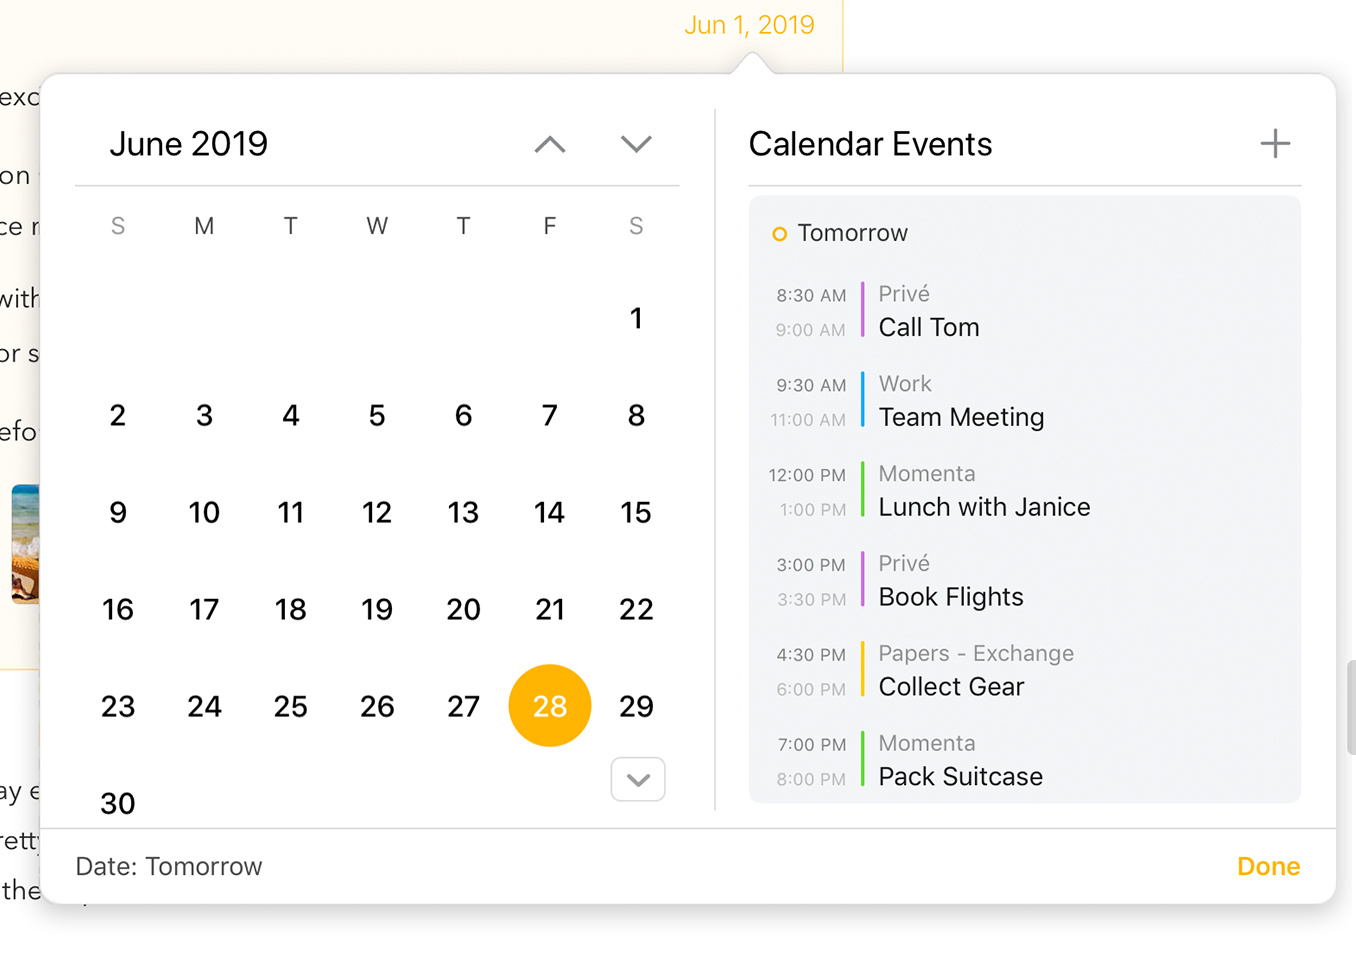
- If you wish to set a date for the note, click/tap the calendar button top-right on the note.
- Start editing the note text.
To create a note when no single project is selected…
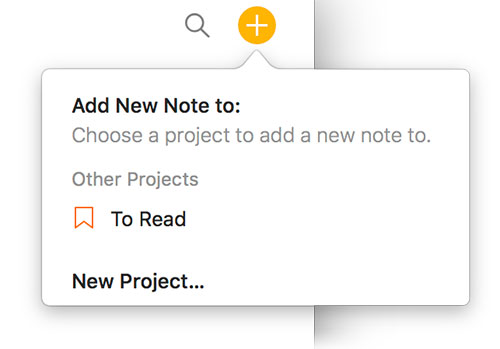
- Click/tap the large yellow + button at top-right of the notes list.
- Choose the project you want the note added to.
- Continue editing as before.
Tip: You can quickly navigate all popover menus (like the one shown in the above screenshot) using the arrow keys, and hit return/enter to select the desired action or item. You can also simply start typing on macOS to filter the down the menu to the item(s) you’re looking for, or drag the menu down on iOS and iPadOS to reveal a search field to do the same.
Creating a New Note Before or After the Current Note
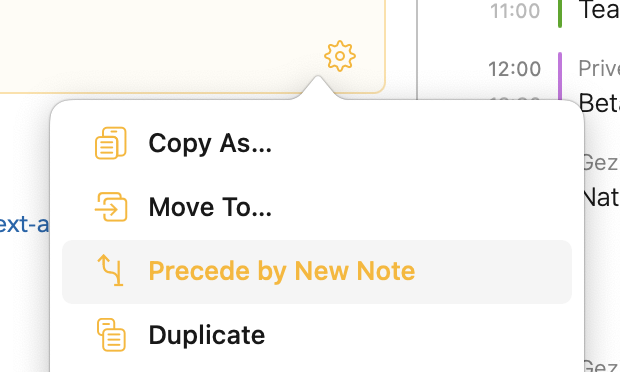
To create a new note before the one you are currently editing…
- Place the cursor at the very beginning of the text of the note you are currently editing
- Select Note > Precede by New Note or select Precede by New Note from the gear menu
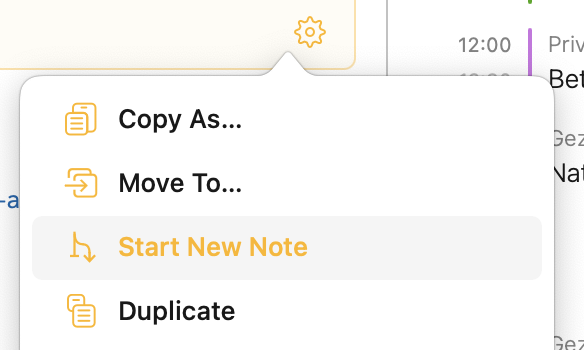
To create a new note after the one you are currently editing…
- Place the cursor at the very end of the text of the note you are currently editing
- Select Note > Start New Note or select Start New Note from the gear menu
Selecting Notes
Both on macOS and iOS/iPadOS you can select a note by tapping it. On Mac you can select multiple notes by holding the ⇧ or ⌘ key. Selected notes will get a light background color in the tint of the accent color (by default light orange). On iPadOS you can select multiple notes by first tapping and holding a single note until it starts to hover, then use a second finger (easiest using a finger from your other hand) to tap additional notes you’d like to add to the selection.
Adding Text to your Notes
On macOS and iPadOS it suffices to tap once in a note to select it and bring it into edit mode where the cursor starts blinking in either the title or text area of the note. Due to the smaller screen size and smaller free space around notes, note selection and editing are two different states on iOS. To edit a note on your iPhone, first tap a note to select it (it gets a yellow background), then tap again to start editing the title or body of the note (depending on where you tap).
To enter text you can either use a hardware keyboard (macOS, iPadOS), the on-screen keyboard (iOS, iPadOS), or you can use an Apple Pencil (iPadOS) to handwrite your notes and have the built-in Scribble feature convert your handwriting to text. If you use the Apple Pencil, Agenda will automatically add additional space to your note to make handwriting easier when you tap a note with the pencil.
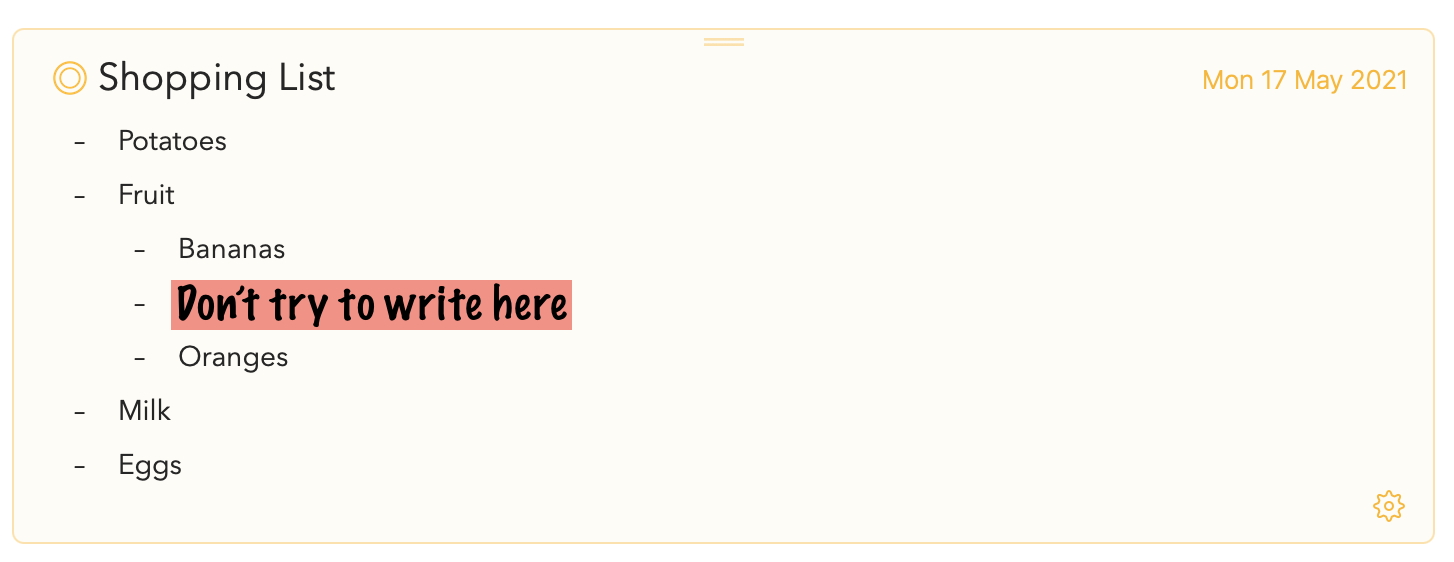
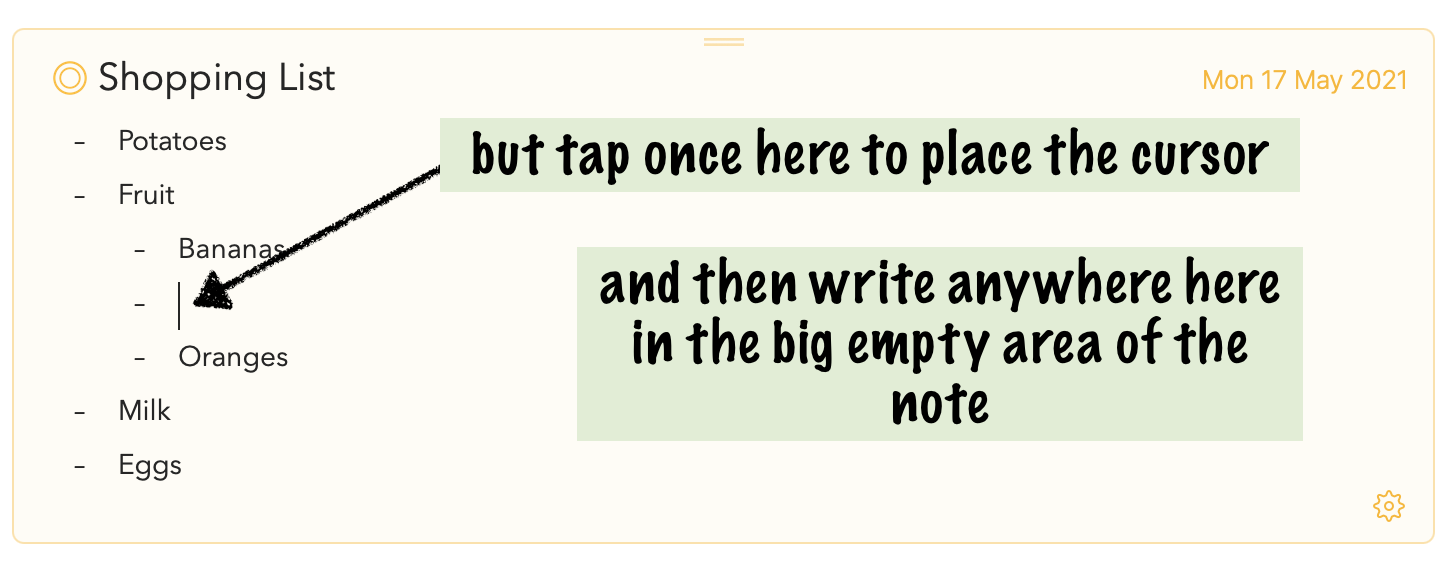
Tip: If you use the Scribble function where you use the Apple Pencil to handwrite your notes the easiest is to write in any part of the note that is empty. For example, take this shopping list where you would want to insert “Apples”. The instinctive action would be to do the same as on real paper and try to write small at the place you want the text to go. However this is a) not necessary and b) interferes with gestures to select and/or erase text if you hit the text around where you’re writing:
Instead just tap once with the pencil at the location where you’d like to insert the text so that the cursor starts blinking, and after that you can write anywhere in the big empty space at any size you like to insert the text:
This way it should work as advertised.
Deselecting Notes
To deselect a note click or tap outside the note in the white background of the note area or one of the sidebars. On iOS and iPadOS you can also deselect the note by tapping the Hide Keyboard button of the on-screen keyboard (iPadOS) or in the bar above the keyboard (iOS).
Deleting Notes
To delete an existing note on macOS…
- Select the note by clicking it at the top.
- Press ⌥⌘⌫ or select Note > Move to Trash or Edit > Delete
- If prompted, confirm the deletion.
To delete an existing note on iPadOS…
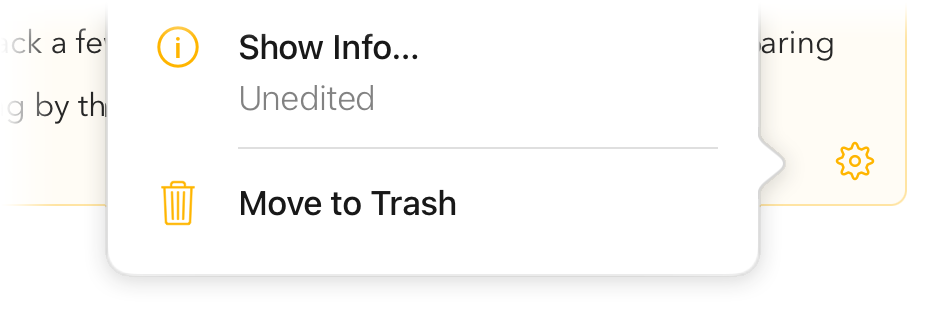
- Tap the cog button at the bottom of the note.
- Choose Move to Trash, or:
To delete an existing note on iOS and iPadOS…
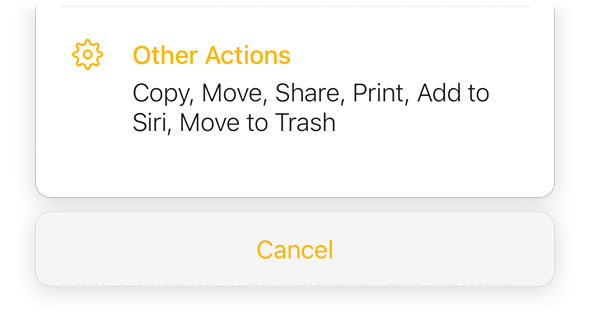
- Tap the orange dot button next to the title of the note.
- Choose Other Actions > Move to Trash
Notes will be moved to the trash, which you can select in the side bar. Only when you empty the trash the note will be permanently deleted.
You can also move notes to the trash by dragging the note to the left edge of the screen, which triggers the side bar to be shown. You can then drag the note onto the trash to move it there.
Note: you can undo the deletion if you wish, and the note will reappear. On iOS, you can use the undo/redo button in the bar above the keyboard.
Duplicating Notes
To duplicate a note…
- Select the note you want to duplicate
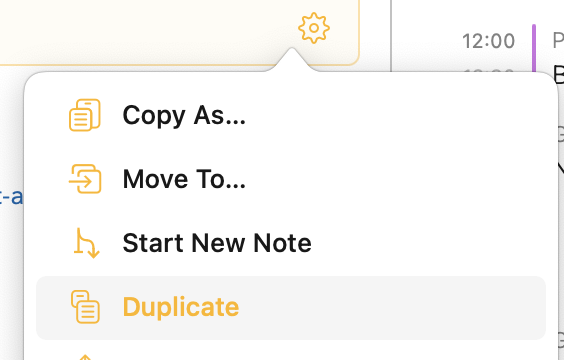
- Select Note > Duplicate or select Duplicate from the gear menu
Tip: If you like to duplicate the note into another project you can move the note to a different project (see below) while holding the alt/option key.
Moving Notes
To change the order of notes on macOS…
- Select the notes you want to drag by clicking their title bar at the top. (Hold ⇧ or ⌘ to click and select multiple notes.)
- Drag one of the selected notes by the title bar at the top of the note.
- Drop it in the list where you want the note to move to (indicated by the orange line).
To change the order of notes on iOS and iPadOS…
- Tap-and-hold at the top of the note until it pops up.
- Drag it up or down to the new location in the list.
Note: you may be prompted about removing dates on the notes when you move them. This is to keep the dates consistent with the list order. You can choose to cancel the move, or remove the dates from the dragged notes.
To move notes to another project…
- Select the notes you want to drag by clicking their title bar at the top. (Hold SHIFT or CMD to click and select multiple notes.)
- Drag one of the selected notes by the title bar at the top of the note.
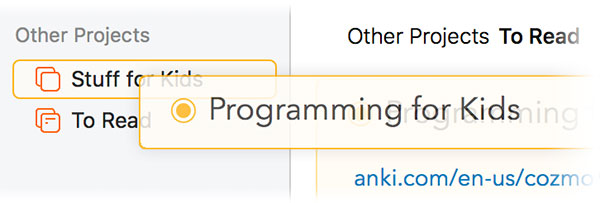
- Drop it in the destination project.
Tip: On macOS you can also use the Note > Move To menu command to move notes. If you hold the alt/option key it also allows you to quickly move a note to the beginning or the end of the project.
Splitting Notes or Moving Content to a New Note
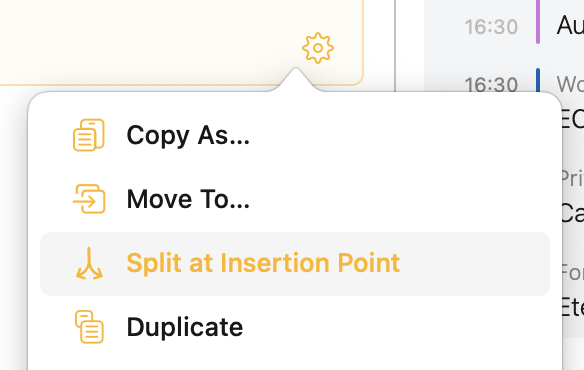
To split the note you are currently editing in two…
- Place the cursor at the place where you’d like to split the note
- Select Note > Split at Insertion Point or select Split at Insertion Point from the gear menu
This will move the content after the insertion point to a new note following the one you are currently editing.
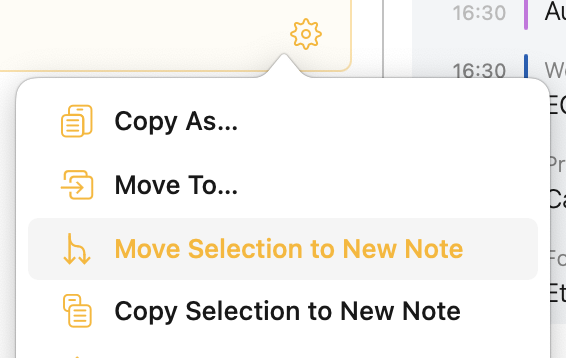
To move the selected content in the currently edited note to a new note…
- Select the content you wish to move to a new note
- Select Note > Move Selection to New Note or select Move Selection to New Note from the gear menu
This will move the selected content to a new note following the one you are currently editing, removing it from where it’s now
To copy the selected content in the currently edited note to a new note…
- Select the content you wish to move to a new note
- Select Note > Copy Selection to New Note or select Copy Selection to New Note from the gear menu
This will copy the selected content to a new note following the one you are currently editing, also leaving it where it’s now
Tip: To see how these features tie into your note taking workflow, check out this video on our YouTube Channel.
Merging Notes
To merge multiple notes into one…
- Select more than one note by clicking their title bar at the top, holding the ⇧ or ⌘ on macOS
- Select Note > Merge Notes
This will merge the content of notes into one, turning the title of the 2nd and following notes into H1 headings.
Marking notes as “On the Agenda”
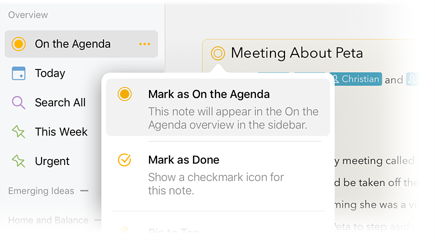
You can flag notes as On the Agenda to give them a special status. You can search for them more easily, and they get added to a special overview in the sidebar so you can find them in a flash.
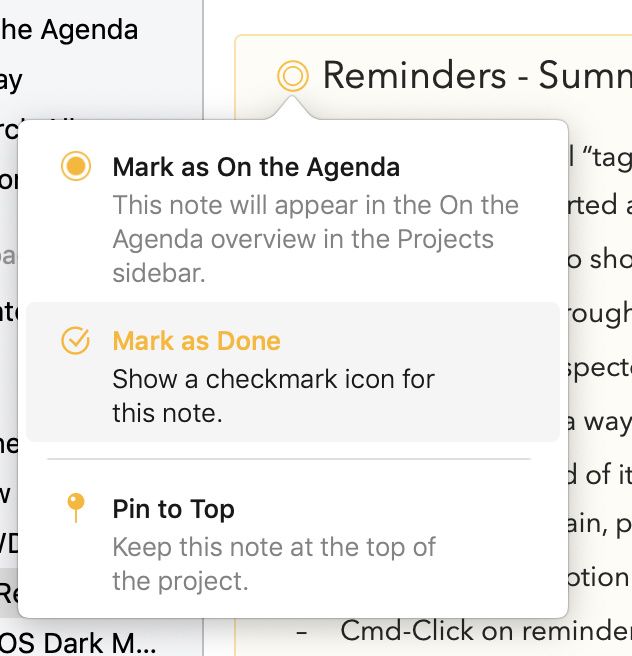
To mark a note as On the Agenda, you click/tap the orange dot in front of the note title and select Mark as On the Agenda. On macOS you can also use Note > Mark as On the Agenda menu command (⇧⌘ U). The orange dot will show as filled to indicate the note is marked as “On the Agenda” and it will appear in the similarly named overview in the sidebar.
Tip 1: A quick way to mark a note as On the Agenda on macOS is to hold the ⌘-key while clicking the orange dot. Alternatively you can on both macOS and iOS/iPadOS drag a note onto the On the Agenda entry in the sidebar, this can be especially efficient if you want to mark multiple notes as On the Agenda in one go.
Tip 2: If you don’t like the default behaviour of a new note automatically being added to On the Agenda, you can turn off this behaviour in the Agenda Preferences.
Setting Dates
You can apply dates or ranges of dates to your notes. Dates are used for ordering, but can also be used in searches.
To set the date on a note…
- Select the note by clicking or tapping on it.
- Click/tap the calendar button top-right on the note.
- On macOS, click a date, or drag across a range.
- On iOS and iPadOS, tap a date, or tap-hold-and-drag to select a range.
- You can also use the Preset button to choose common dates like “Today”.
- Click the Save button.
Learn more about dates and events in Dates, Events, and Reminders.
Marking notes as “done”
As you’ll see in Tags, People, Emoji's, Text Actions and Links you can add checklists to your notes. However it can also be useful to mark an entire note as “done”, for example if the note represents a certain task or event to organise.
To mark a note as done, you click/tap the orange dot in front of the note title and select Mark as Done. On macOS you can also use Note > Mark as Done menu command (⌘ ⏎). The orange dot will then gain a check mark to indicate the note is marked as “Done”.
Tip: You can mark notes as done and take them off the agenda in one go by using the ⌥⌘ ⏎ shortcut (Note > Mark as Done Completely on macOS). On macOS a quick way to mark a note as done is to hold the ⌥-key while clicking the orange dot.
Pinning Notes
To pin a note to the top of its project on macOS…
- Select the notes you want to pin to the top.
- Choose Note > Pin to Top (⇧⌘ K)
Alternatively drag the note to the top of the project and Agenda will ask if you’d like to Pin the note.
.To pin a note to the top on iOS and iPadOS…
- Tap the orange dot top-left on the note to bring up the options.
- Select Pin to Top.
To unpin a note and move it back to its original position on macOS…
- Select the notes you want to unpin from the top.
- Choose Note > Unpin from Top (⇧⌘ K)
To unpin on iOS…
- Tap the orange dot top-left on the note.
- Choose Unpin from Top in the menu.
Tip: Some examples of how you can use pinned notes are shown in this Talk article. Note that Pinning of notes is a premium feature and only available upon purchase.
Making notes into footnotes
Where pinning a note makes it stay at the top of its project, making a note into a footnote makes it stick to the bottom of its project. This can be useful for reference material at the end of the project for example.
To make a note into a footnote at the bottom of its project on macOS…
- Select the notes you want to pin to the top.
- Choose Note > Make into Footnote (⌥⇧⌘ K)
Alternatively drag the note to the bottom of the project and Agenda will ask if you’d like to turn the note into a footnote.
To make a note into a footnote at the bottom on iOS and iPadOS…
- Tap the orange dot top-left on the note to bring up the options.
- Select Make into Footnote.
To revert a footnote back to a regular note and move it back to its original position on macOS…
- Select the notes you want to unpin as footnote.
- Choose Note > Unpin as Footnote (⌥⇧⌘ K)
To unpin on iOS and iPadOS…
- Tap the orange dot top-left on the note.
- Choose Unpin as Footnote in the menu.
Note: Making notes into Footnotes is a premium feature and only available upon purchase.
Collapsing Notes
There are times when you don’t need to see all of the content in a note, and just want to hide it to better utilize your space.
To collapse a note, you can just double click/tap the title bar at the top of the note. To expand a collapsed note, double click it again, or click the orange dot next to the title and select the Expand option in the menu.
On iOS and iPadOS, you can also pinch inwards over the note to collapse it, and pinch out to expand. Or use the expand and collapse options when tapping the orange dot before the title.
Folding Note Sections
If you have long lists or notes with several sections, it can be handy to hide what you don’t need to see right now. Starting in Agenda 20, you can fold (collapse) sections within your notes.
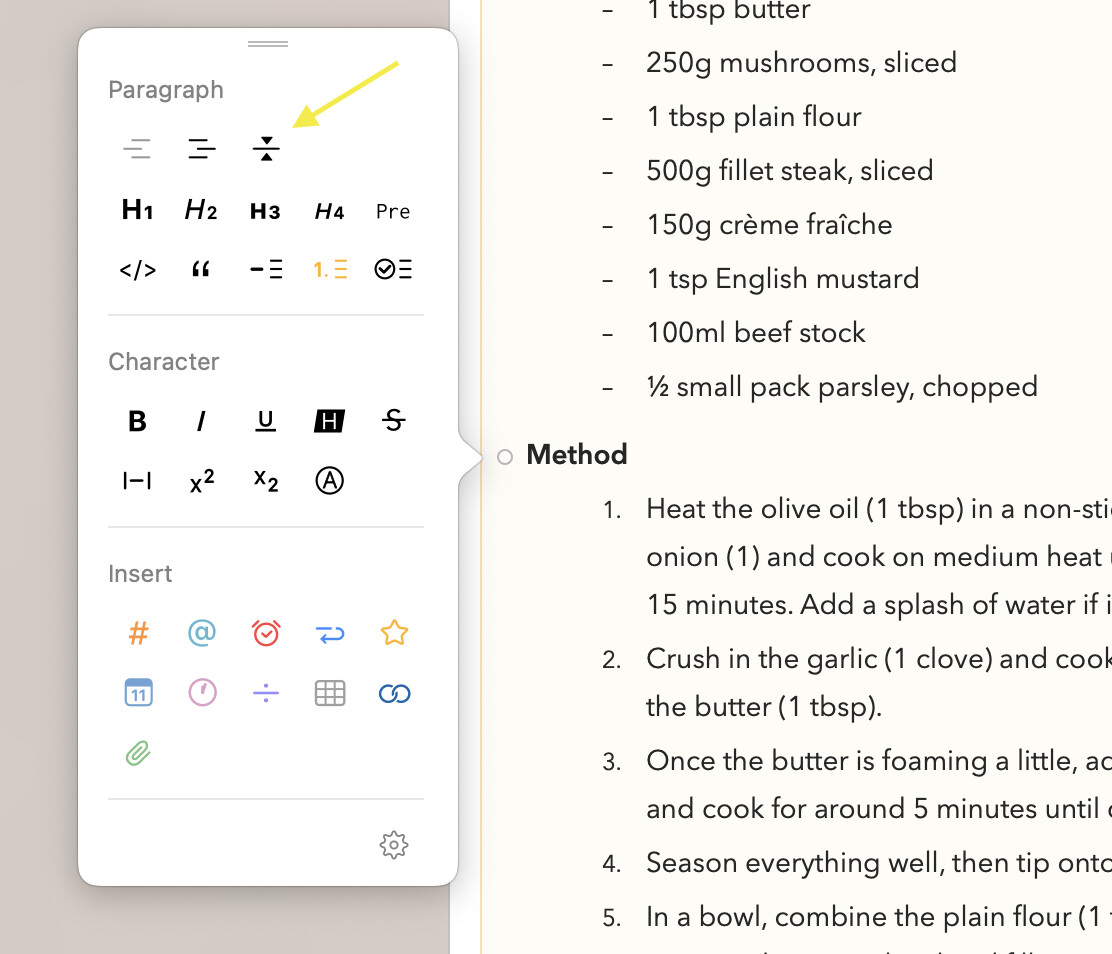
To collapse a section on macOS, hover over the heading or list item you want to collapse, and click on the small button to the left of the text. Click the 3rd button at the top to fold. (A shortcut is to use option-click on the round button to fold immediately.)
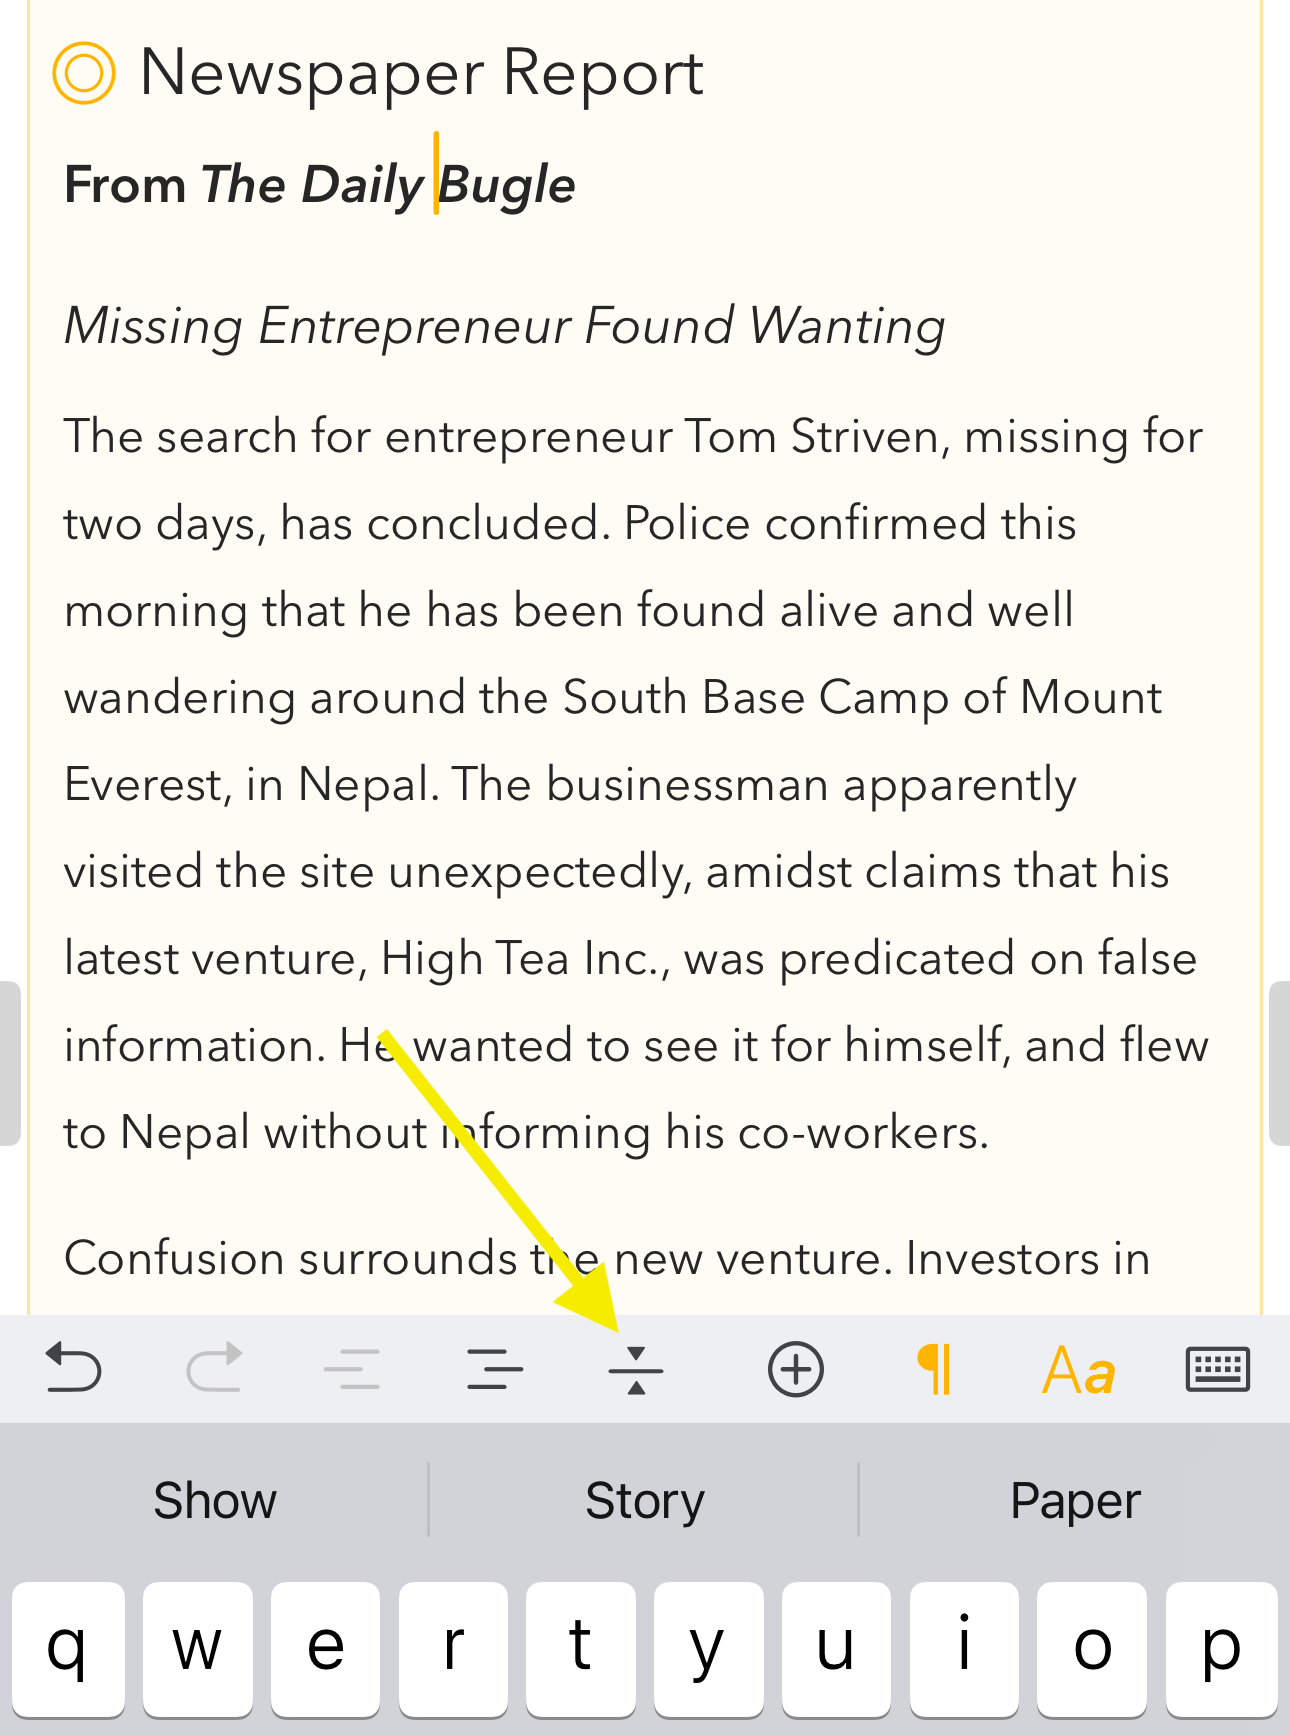
On iOS, put the cursor in the heading or list item you want to collapse, and use the fold button on the keyboard bar, which looks like a horizontal line with arrows.
Styled Text vs Rich Text
The Agenda editor works with styled text. Unlike rich text, you don’t set the fonts and appearance characteristics directly yourself. Instead you add styles to the text, such as a heading level or list style, to convey the intent of the text. Agenda takes the styles you choose, and updates the appearance to make things look attractive and consistent.
There are a few advantages of styled text…
- It can be presented in an attractive and consistent way.
- It is easier to edit than rich text, because you don’t have to worry about the appearance yourself.
- It can be very easily converted to and from other styled text formats like Markdown and HTML.
Adding Paragraph Styles (e.g. Heading)
Many styles are added to a particular paragraph. For example, you could have a paragraph of text that is the heading of the text. You could give that paragraph the Heading style. The following paragraphs contain paragraphs of text with the default Body style.
There are several ways you can apply paragraph styles to text.
On macOS, you can…
- Change the style of the selected text by choosing an item in the Format > Style menu.
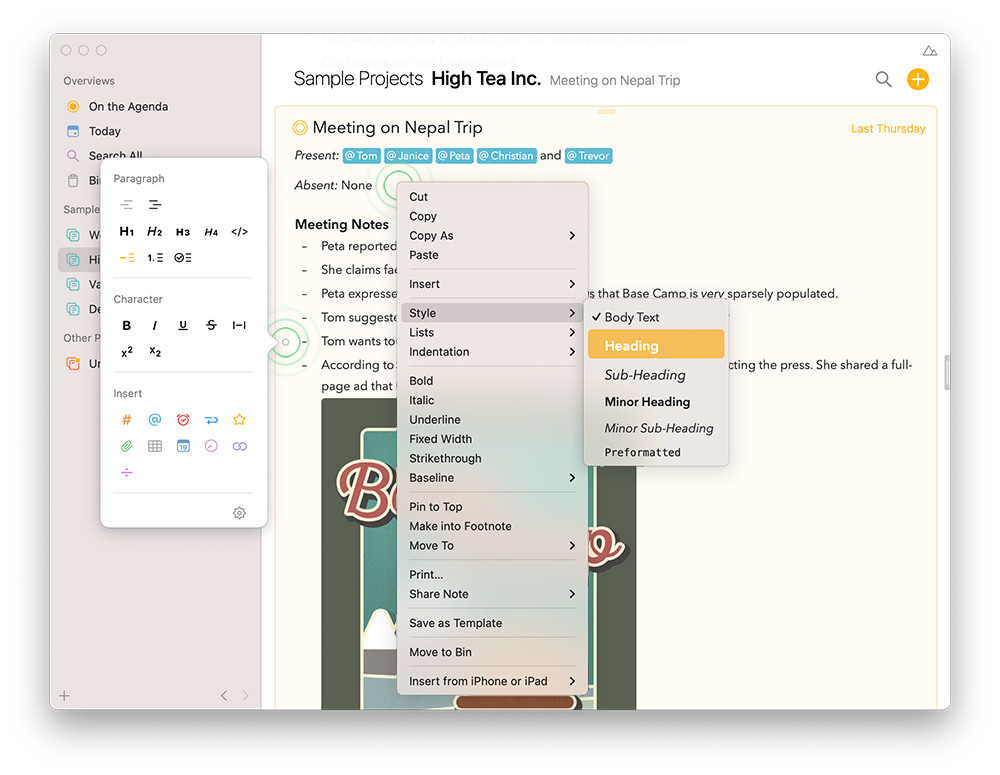
- Select the note, hover the cursor over a paragraph, and click the round button on the left. Use the popover that appears to choose a style.
- Right click on the selected text and choose a style in the contextual menu that appears.
- If you use Markdown shortcuts, the style will change automatically when you enter certain text. For example, if you start the line with “# Shopping List”, the text will be styled as a Heading due to the # symbol at the beginning.
Screenshot: Two of the ways how you can apply paragraph styles, through the style inspector popover or by contextual menu shown upon control/right-clicking the text.
On iOS and iPadOS, you can…
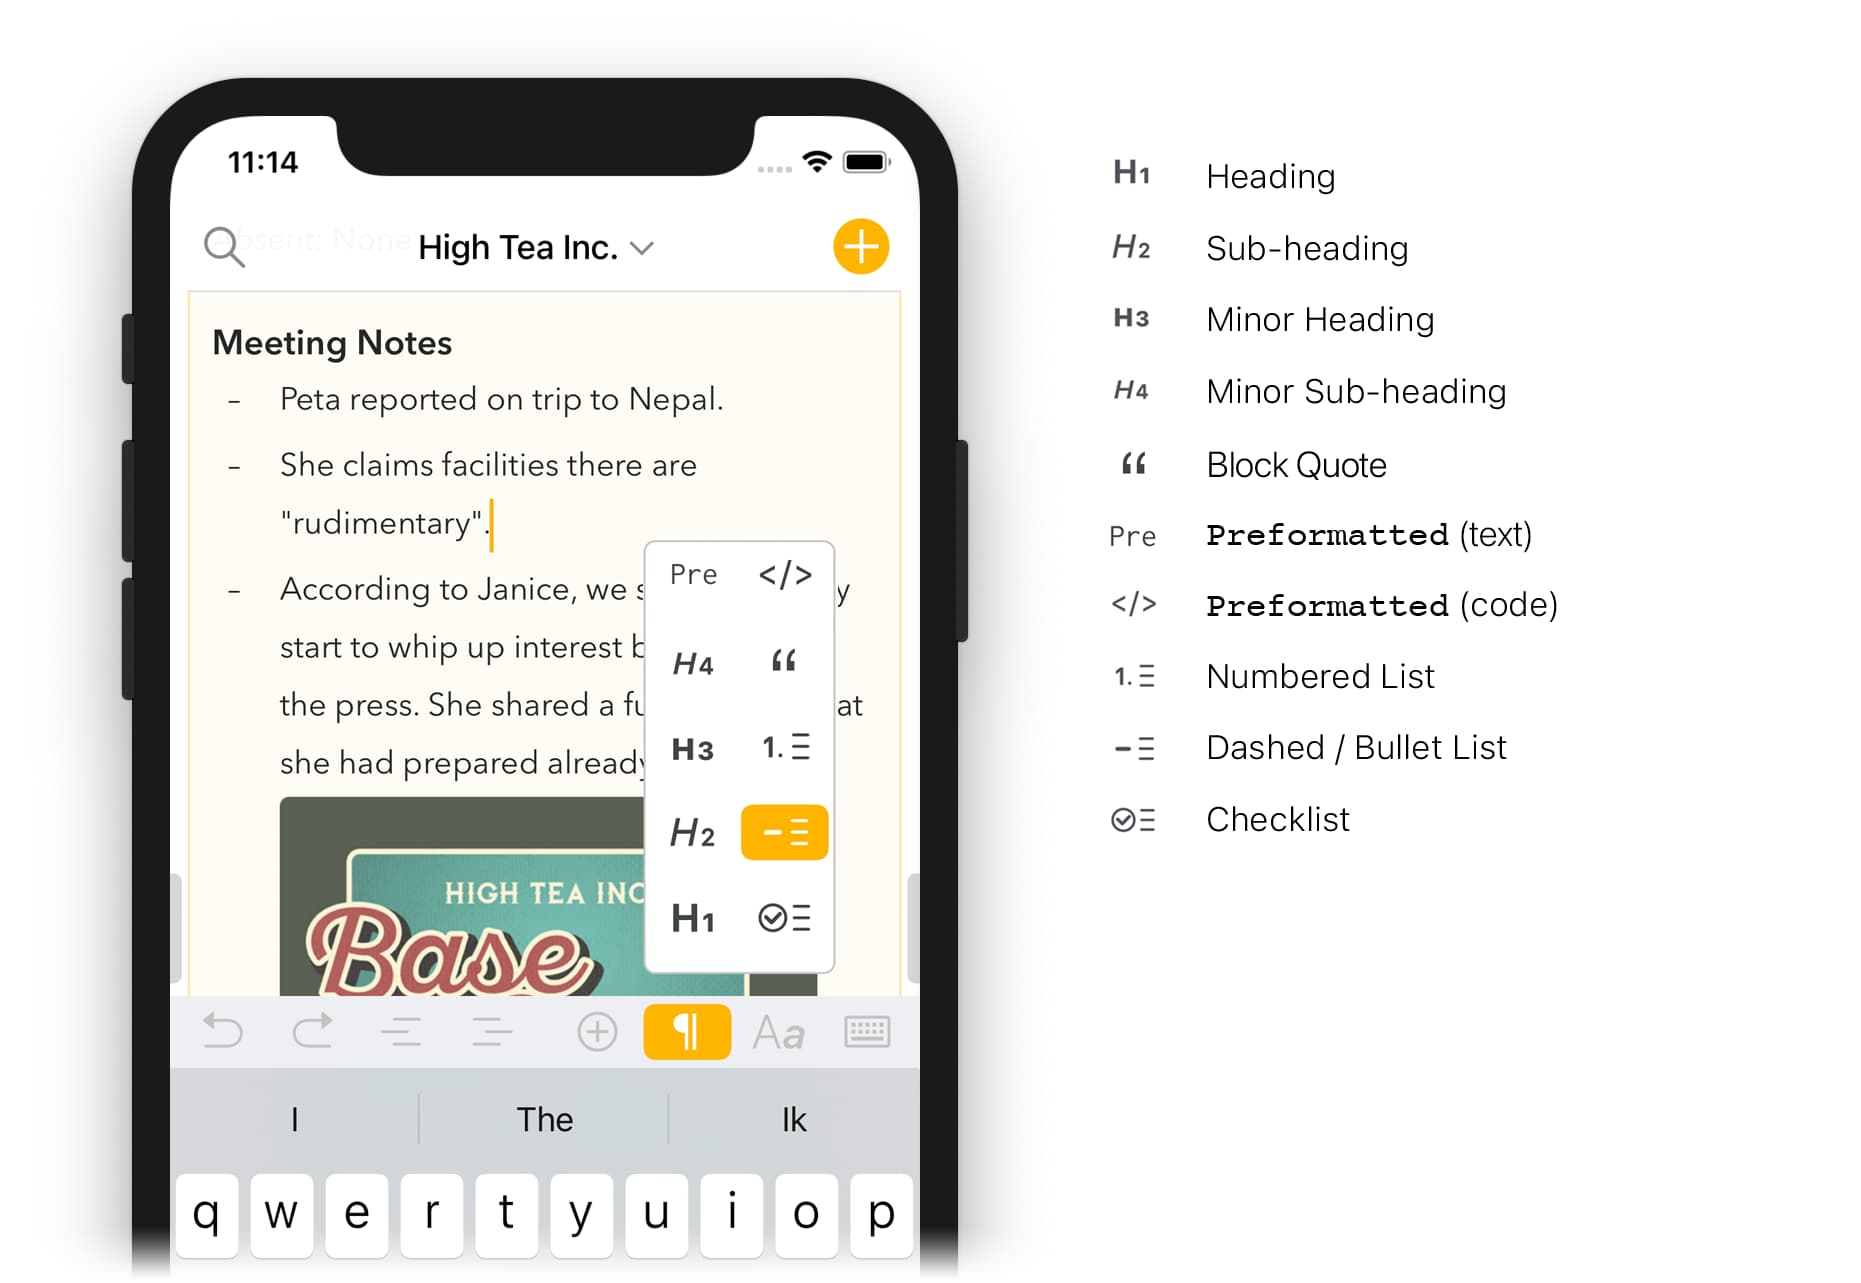
- Change the paragraph style of the selected text using the bar above the keyboard.
- If you use Markdown shortcuts, the style will change automatically when you enter certain text. For example, if you start the line with “# Shopping List”, the text will be styled as a Heading due to the # symbol at the beginning.
Tip: You’ll notice that each time you hit return Agenda will start a new paragraph and leave some space. If you feel you want a more compact look try using lists, or change the linespacing setting the Agenda Preferences. You can also insert a soft-return by typing ⇧⏎, ⌥⏎, or ⌃⏎ to go to the new line without starting a new paragraph.
Adding Lists
A special type of paragraph style are lists, which come in three flavours:
-
Bullet/Dashed lists (like this one)
-
Numbered lists (like 1., 2., 3. etc)
-
Checklists featuring a checkbox that can be marked as done.
Lists are created in the same way you format a heading as explained above.
Learn more on how to use lists in Lists, Tables, and Summaries
Adding Inline Styles (e.g. Bold and Italic)
In addition to paragraph level styles, there are also styles that are just applied to a part of the paragraph. For example, you could make a few of the words bold or italic. We call these inline styles.
Just as for paragraph styles, you can apply inline styles in a variety of ways.
On macOS, you can…
-
Select the text, and choose an option from the Format menu, such as Bold or Italic.
-
Select the text and right click to choose a style in the menu.
-
Use a markdown shortcut, such as entering “_Shopping List_” if you want the text “Shopping List” to be italicized.
On iOS and iPadOS you can…
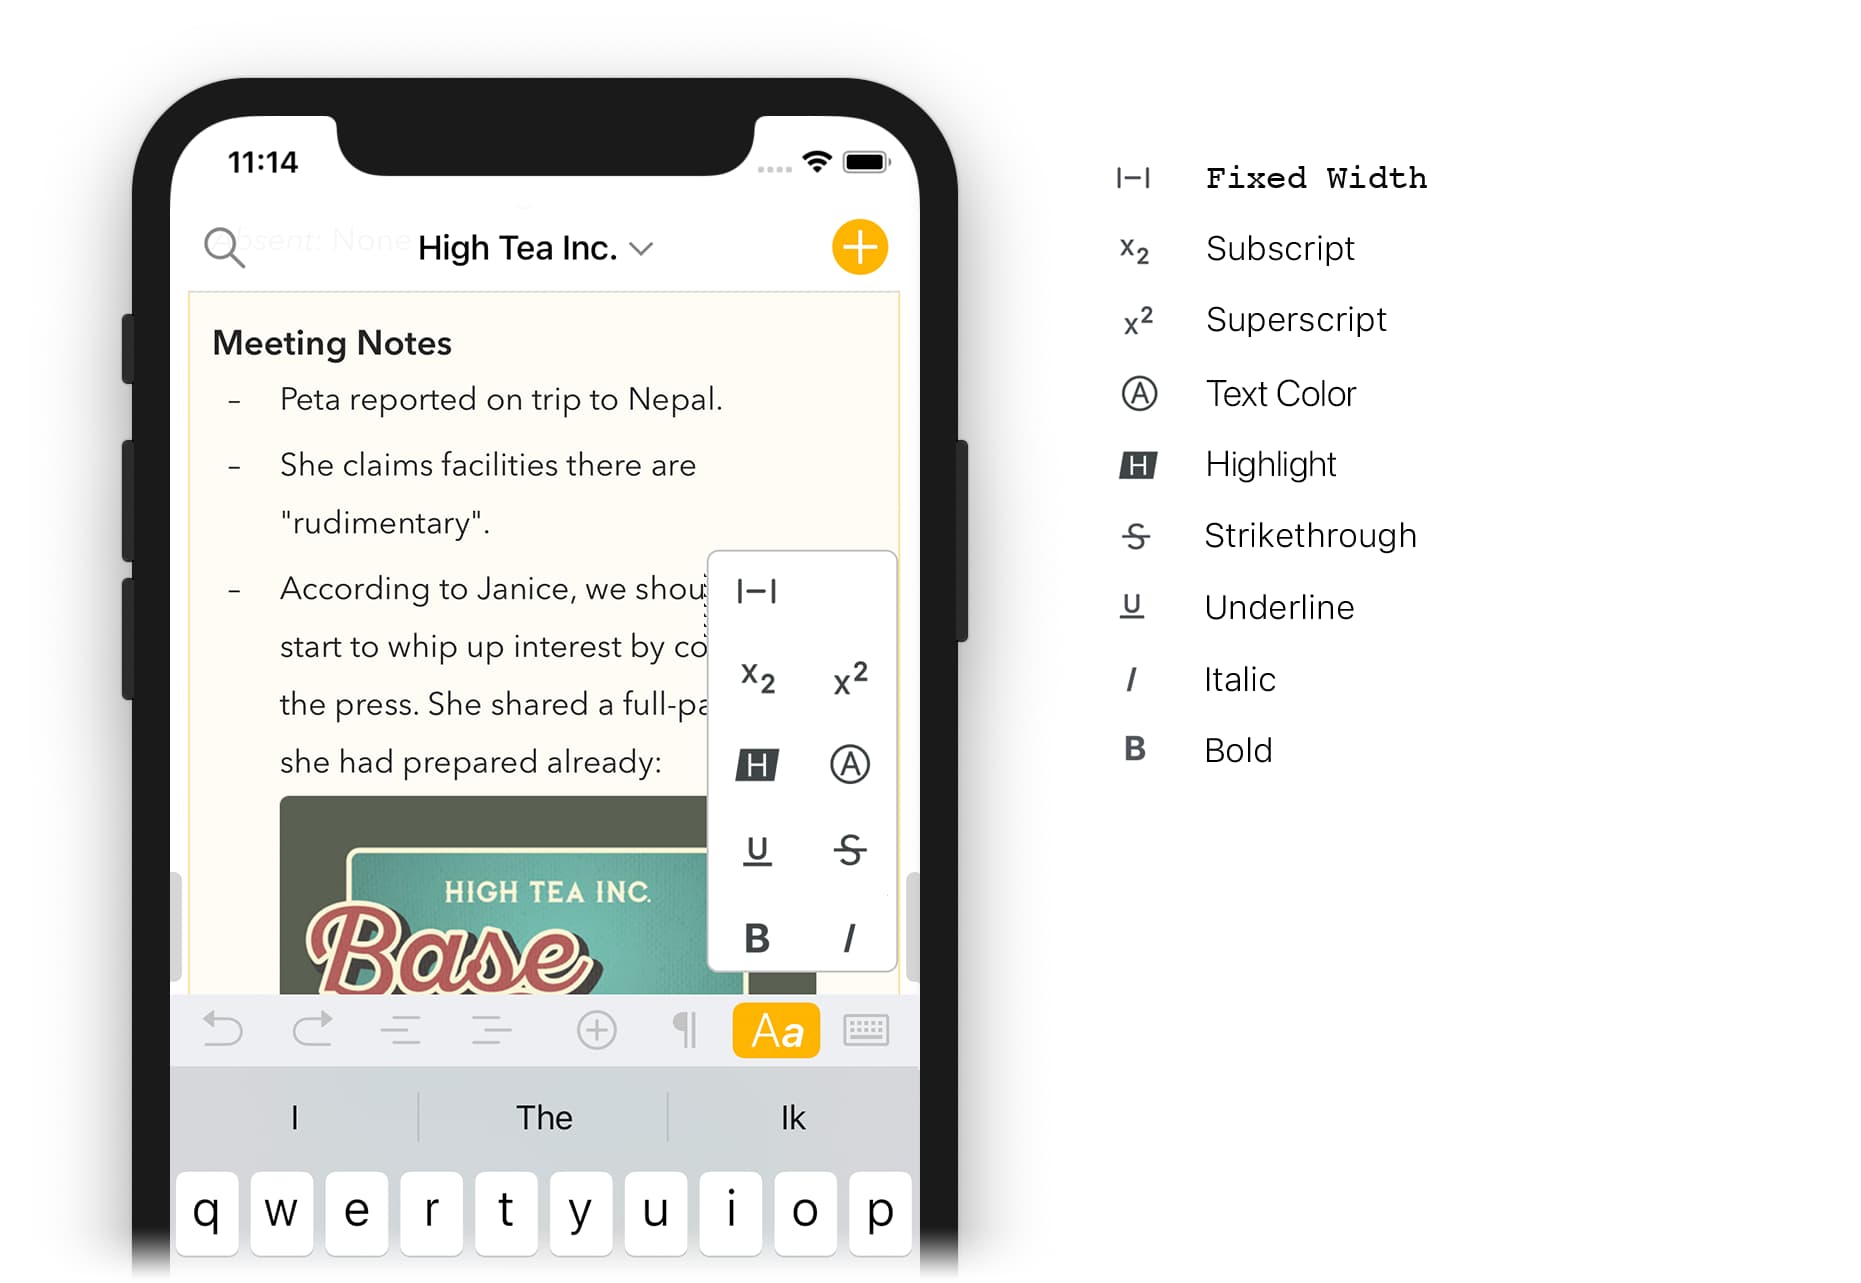
- Change the inline style of the selected text using the bar above the keyboard.
- Use a markdown shortcut, such as entering “_Shopping List_” if you want the text “Shopping List” to be italicized.
Tip: Agenda supports a complete set of keyboard shortcuts on both macOS and iOS for formatting text using both inline styles and paragraph styles.
Indentation
Several of the paragraph styles support indentation levels, including body text and list styles. To increase the indentation, on macOS you can…
- Type a tab.
- Choose the menu item Format > Indentation > Increase
- Use the keyboard shortcut ⌘ ]
- Click the cog button and choose Indentation > Increase
Decreasing indentation is similar. You can…
- Type ⇧ tab.
- Choose the menu item Format > Indentation > Decrease
- Use the keyboard shortcut ⌘ [
- Click the cog button and choose Indentation > Decrease
On iOS, you can also control indentation using the controls above the keyboard:
Tip: If you are used to type the tab (⇥) key to organise your text in columns instead of triggering indentation, you can type ⌥⇥ instead.
Non-breaking (Soft) Return
By default when you hit return a new paragraph is started, leaving some additional space between the lines. To prevent a return from breaking the paragraph you can insert a so-called soft return.
On macOS you can do so by typing any of the following:
- Type a ⇧⏎
- Type a ⌥⏎
- Type a _⌃⏎ _
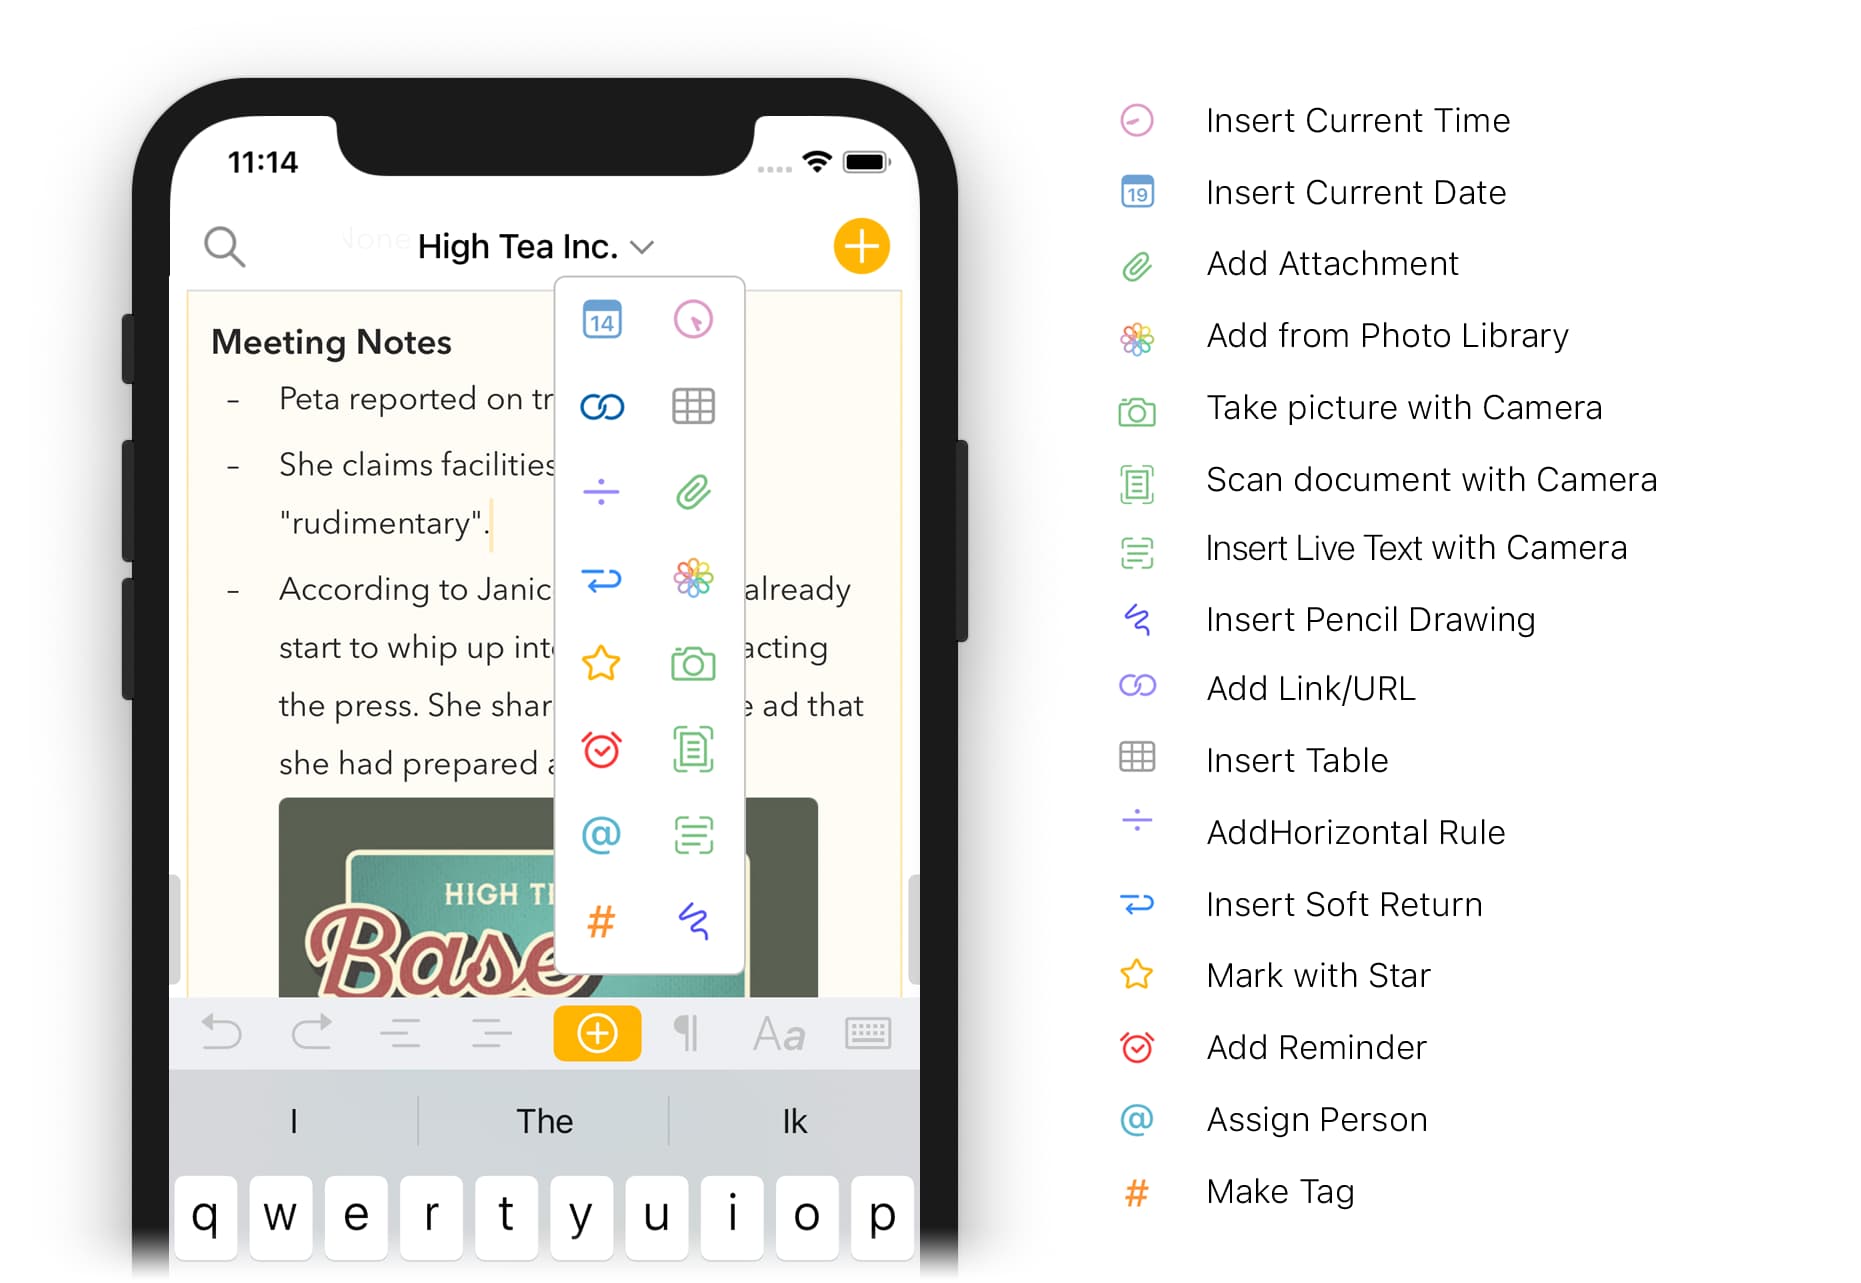
On iOS you can insert a soft return using the plus button in the keyboard bar followed by tapping the blue soft return button at the top.
Tip: You can control the amount of paragraph and line spacing in the Agenda Preferences and even remove all paragraph spacing if you want and use double-returns instead to delineate sections in your note.
Undo
Agenda supports the standard way to undo any typing and note moving actions, through Edit > Undo/Redo (⌘ Z) on macOS, the Undo/Redo buttons on iPad keyboard, and shake-to-undo on iPhone. In addition, on iPhone the keyboard bar features undo/redo buttons as well:
![]()
Tip: The keyboard bar on iPhone also features a button on the far-right to dismiss the keyboard and end the current text editing session, which can be useful to quickly hide the keyboard. On iPad this button is standard part of the keyboard itself and can be found in the bottom right corner.
Markdown Shortcuts
The Agenda editor supports a variety of Markdown shortcuts to apply styles to text content. For example, if you type **try this**, the text will become bold. You can also use Markdown shortcuts to apply paragraph styles like lists, or insert URLs.
Learn more: A list of all the shortcuts can be found in the Markdown Cheatsheet.
Pasting Styled Text
By default if you paste text into Agenda it will try to preserve formatting like bold, italic, but also text color and whether the text is fixed width (monospaced). If you do not want to preserve the formatting of any text you paste, then use the Edit > Paste and Match Style command.
Beyond just Text
Agenda allows you to go beyond just text and enrich your notes with a variety of in text metadata like tags, actions that automatically convert to dynamic text, attachments and integrations with other apps.
Adding Tags, People
You can label the text of your notes with tags and people in order to better organise them, mark certain actions or call out important information for attention. They can also be used for search purposes, and creating saved searches.
To add a tag, on Mac you can use the menu Insert > Tag , and then type the tag. On iOS and iPadOS you can make use of the bar above the on screen keyboard. The tag can contain letters, digits, and symbols, but no spaces, commas or periods. To complete the tag, simply enter a character that doesn’t belong in a tag, such as a space, or move the cursor elsewhere.
The same goes for adding a person label, which on Mac can be done through Insert > Person, and on iOS through the plus button in the keyboard bar.
There is also support for creating tags with a textual shortcut: you can type the hash symbol (#) followed by the tag, e.g. #important . And add people by starting to type an at sign (@) followed by the person name.
Learn more on how to use tags and people labels in Tags, People, Emoji's, Text Actions and Links
Adding the Current Date and Time
Using the Insert menu on macOS or the plus button in the bar above the keyboard on iOS and iPadOS you can quickly insert a date- or timestamp to your notes. The same can be achieved by typing a so-called text action, these begin with a backslash \ followed by a command. For example, typing \date inserts the current date, and \time the current time. They become much more powerful if you add so-called parameters, for example \time(format: short) or \date(in: 3 weeks).
Learn more on how to make full use of actions and the available parameters in Creating and Using Templates - #4 by system
Adding a Reminder
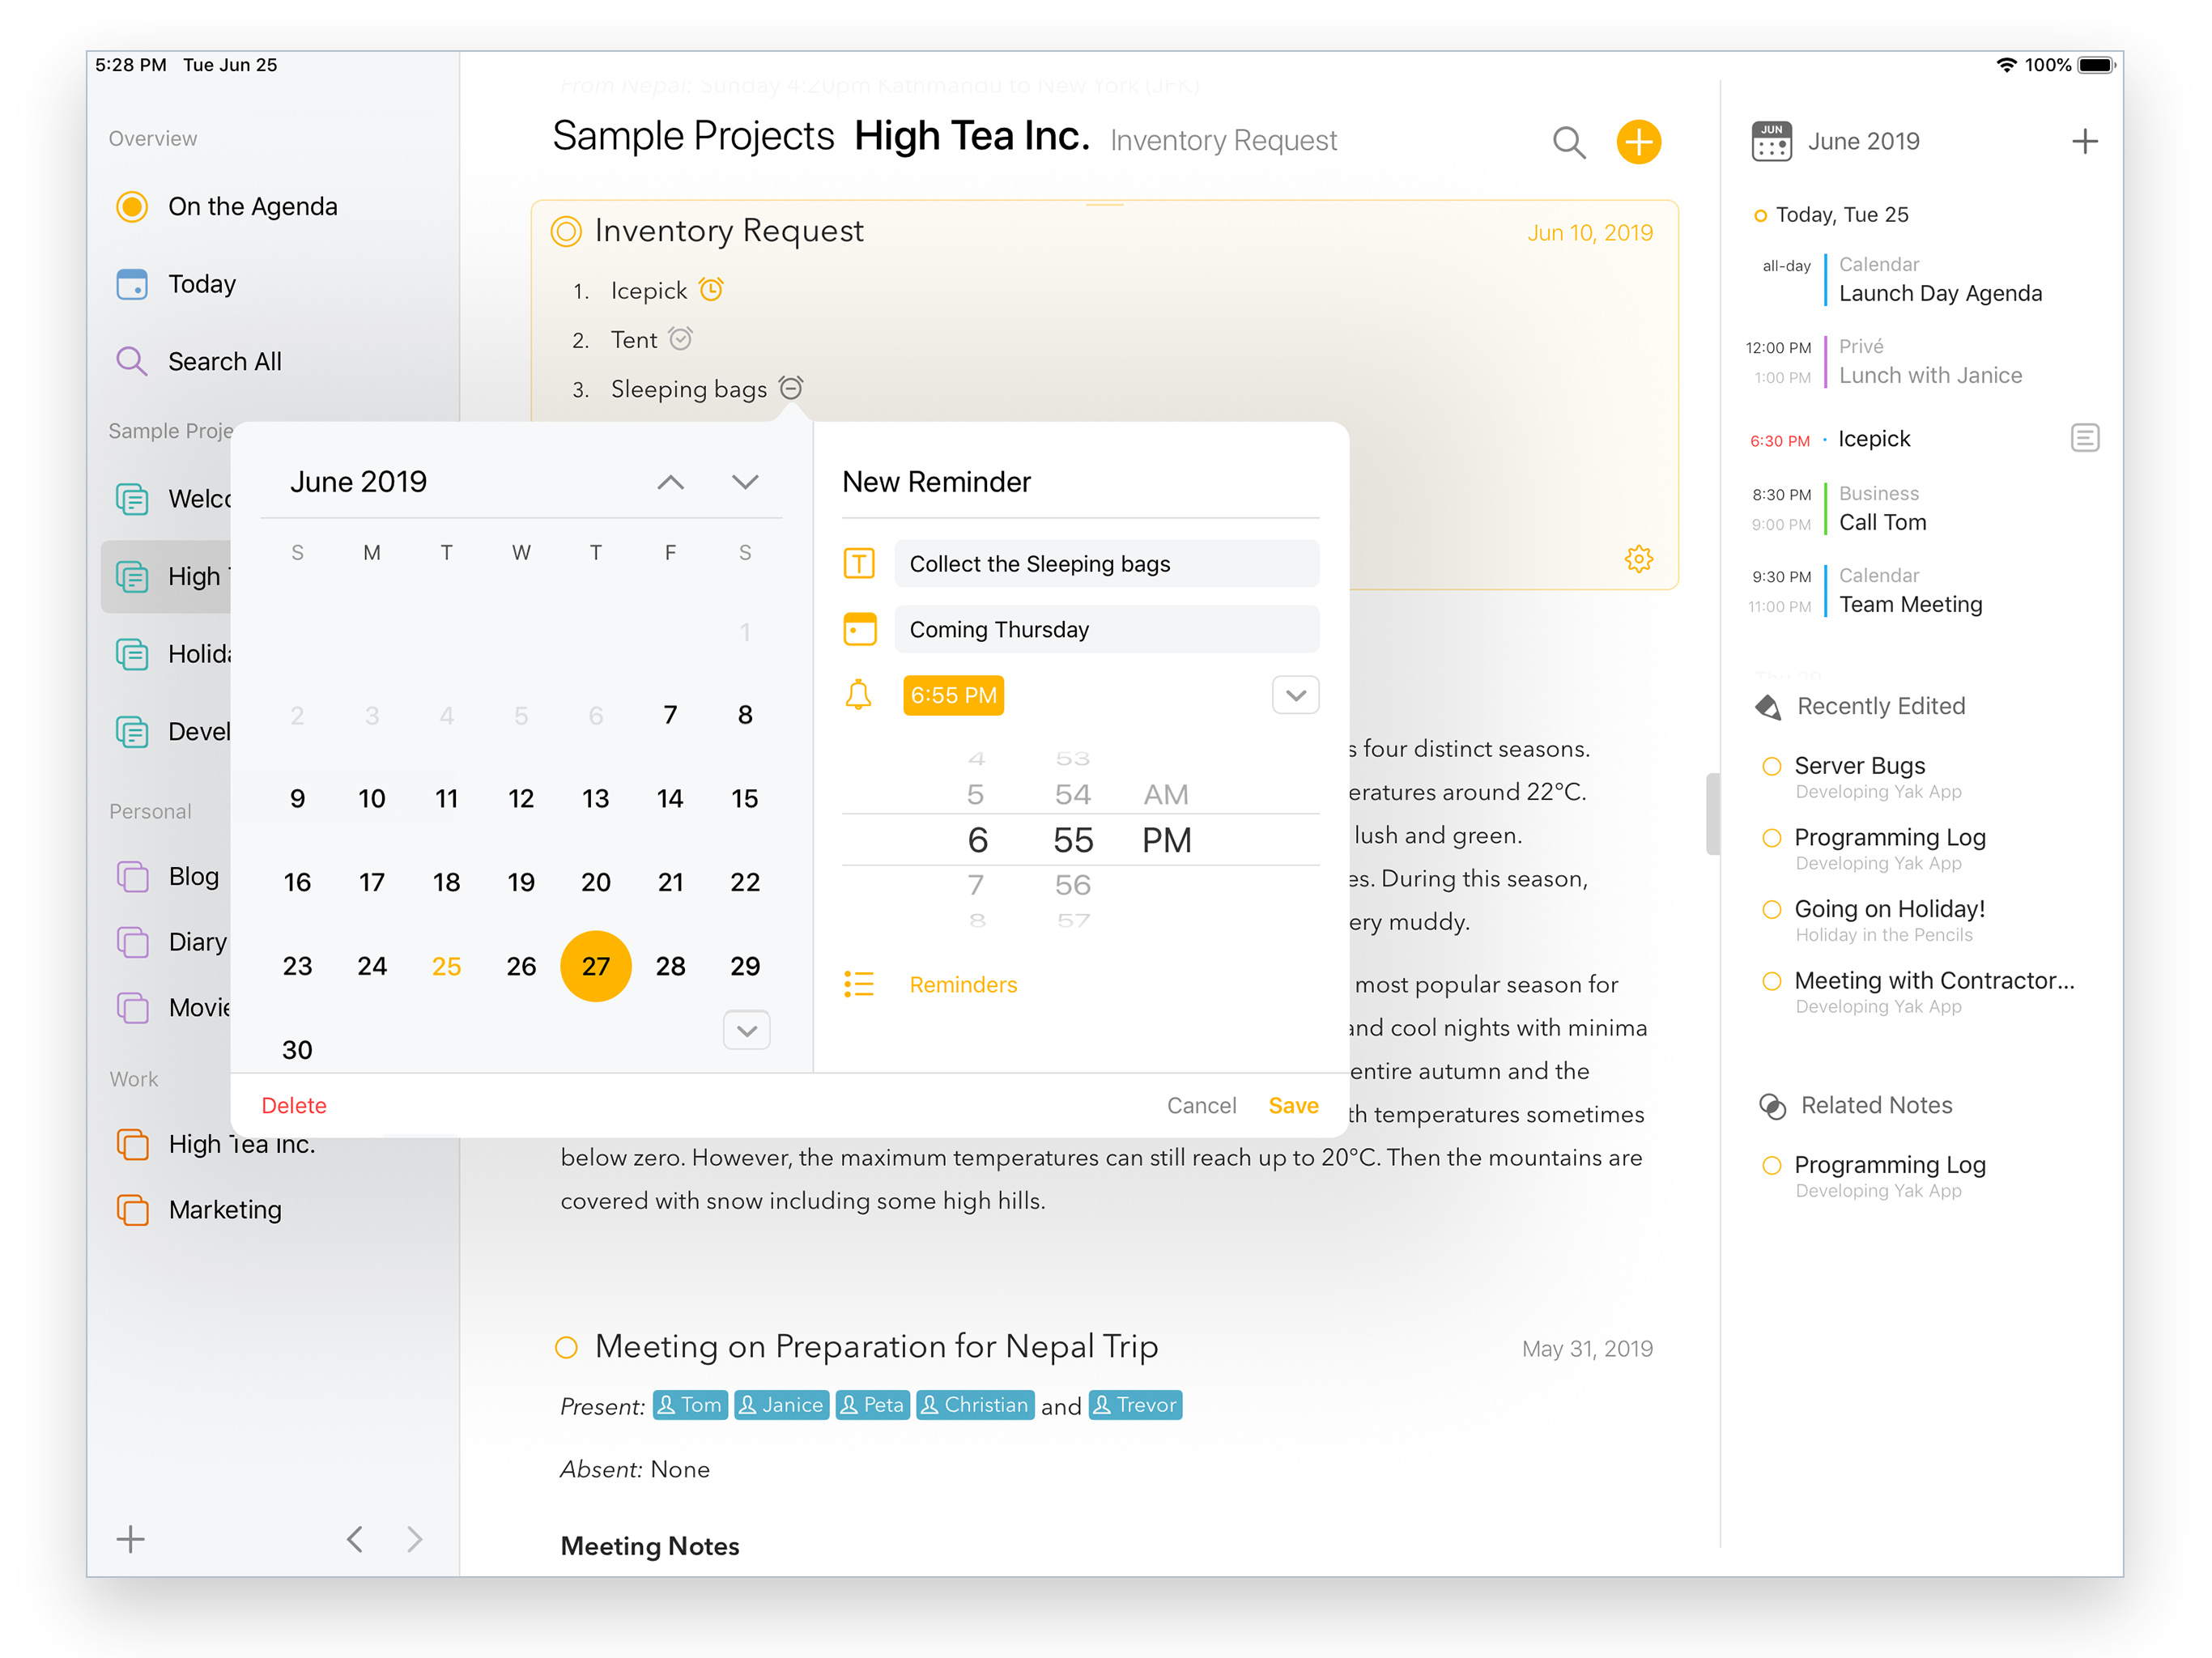
Agenda fully integrates with the Reminders app. You can add reminders to list items in Agenda, so that you get a notification when they become due. Agenda will autofill as much information as possible from the context of your note when you create a reminder. On Mac this can be done through Note > Add Reminder, and on iOS and iPadOS through the plus button in the keyboard bar.
There is also support for a markdown-like syntax, so you don’t even have to stop typing. Agenda presents your calendar events and due reminders in a new scrolling timeline. Reminders can be edited, rescheduled, or checked off without ever leaving Agenda. If you do need to see a reminder in the Reminders app, Agenda will send you straight to it.
Learn more on how to use Reminders in Dates, Events, and Reminders
Adding a Horizontal Rule
If you like to visually delineate different sections in a note you can insert a so-called horizontal rule, which draws a single pixel line over the full-width of the note. To add one on Mac you can use the menu Insert > Horizontal Rule. On iOS and iPadOS you can make use of the bar above the on screen keyboard.
Adding a Table
Tables are an elegant way to organise and display multi-column data in your notes. To add a table, on Mac you can use the menu Insert > Table. On iOS and iPadOS you can choose a table from the plus button in the bar above the on screen keyboard.
Text inserted into cells can be styled (eg. bold, italic), the number of rows and columns can be adjusted, and there is even support for multiple paragraphs in a single cell. As you would expect, notes with tables can be printed, exported, and shared with others.
Learn more on how to use Tables in Lists, Tables, and Summaries
Attaching Files, Photos and Scans
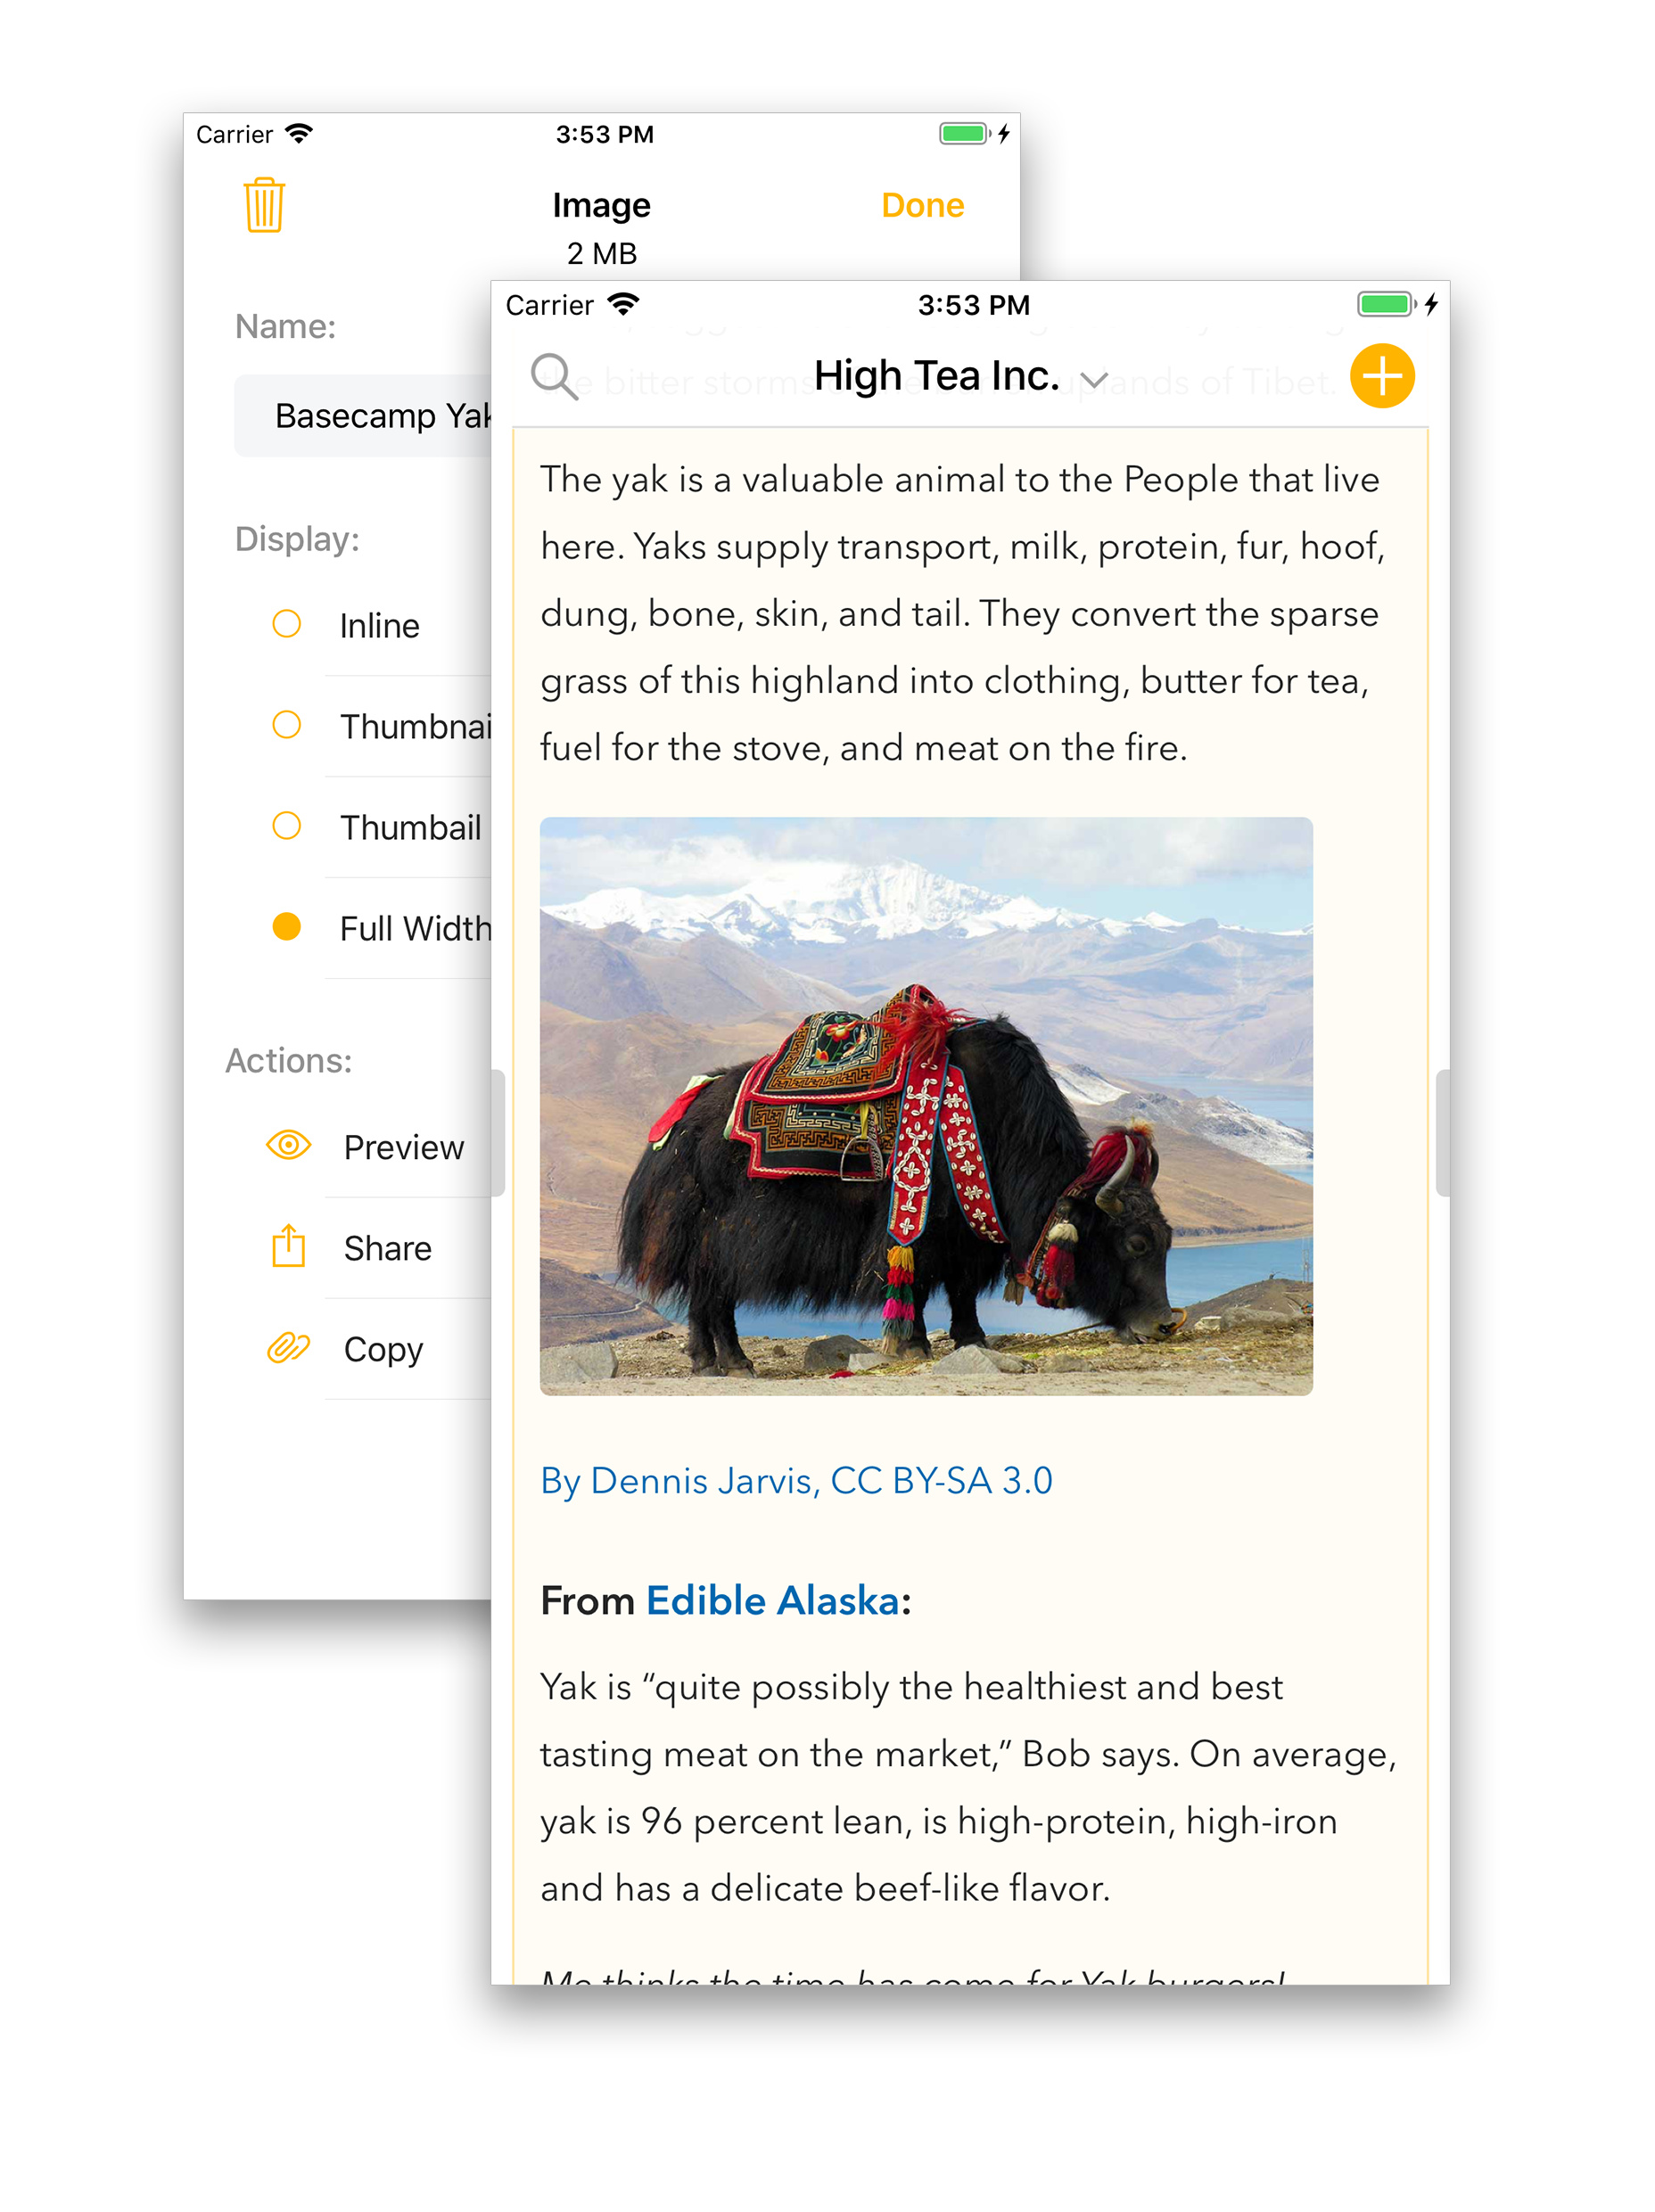
Agenda is not only for text. You can also include file attachments, images, and other media in your notes. On macOS, the easiest way to do this is to select a note, and choose Insert > Attach File…. On iOS, tap the plus button in the bar above the keyboard, and choose an option from that. It not only includes standard files, but you can also pick a photo from your photo roll, take a photo with the camera or scan a document and insert that. Once inserted you can click or tap the attachment in the text to reveal various options, including whether to display the attachment as a full-width preview, thumbnail, or inline token.
There is much more you can do with attached files, and we have a section dedicated solely to images and attachments.
Learn more on how to attach files and images to your notes in Attachments, Images and Drawings
Adding Sketches and Drawings
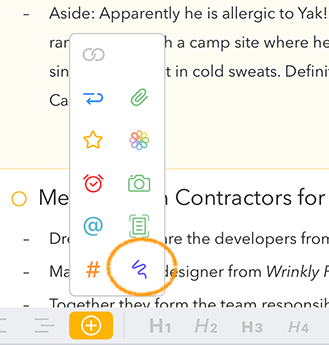
With Agenda you can literally draw your conclusions. Add an drawing on iOS and iPadOS by tapping the plus button in the bar of the on screen keyboard, followed by the purple scribble icon:
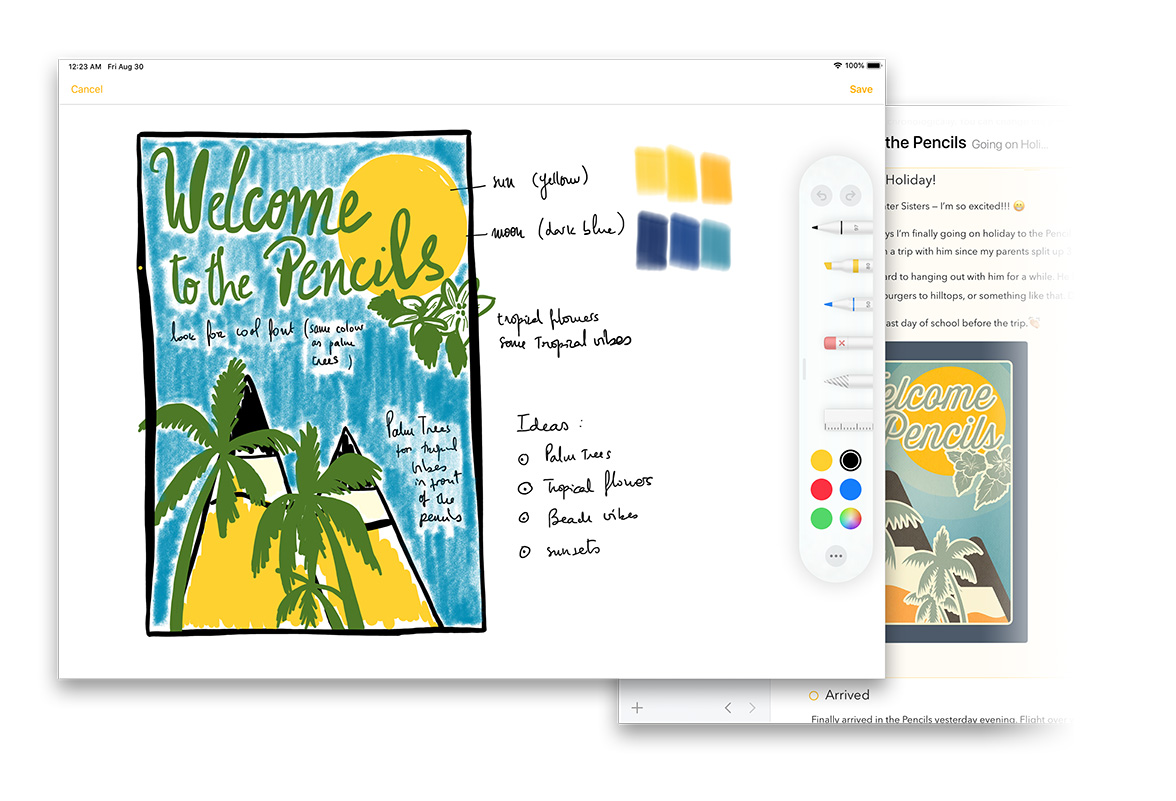
You can draw whatever you wish using an Apple Pencil on your iPad, or if you like, draw a quick sketch with your fingers on your iPhone:
Sketch out your ideas, write down your thoughts, and literally draw your conclusions using Apple Pencil, directly in Agenda.
After finishing your sketches or writing, the drawing is inserted as an attachment in your note. You can subsequently edit or add to your drawing by a long-tap and choosing Edit from the popover menu.
As a premium feature you can even annotate any image attached to your note, for example to add remarks, or highlight important aspects. Just tap-and-hold the image, and choose Annotate in the popover menu.
Learn more on how to attach drawings to your notes in Attachments, Images and Drawings

