Lists
With Agenda, you can mix hierarchical lists in with your other notes. The app supports number lists, bullet lists, and check lists.
Creating a Dashed or Bullet List
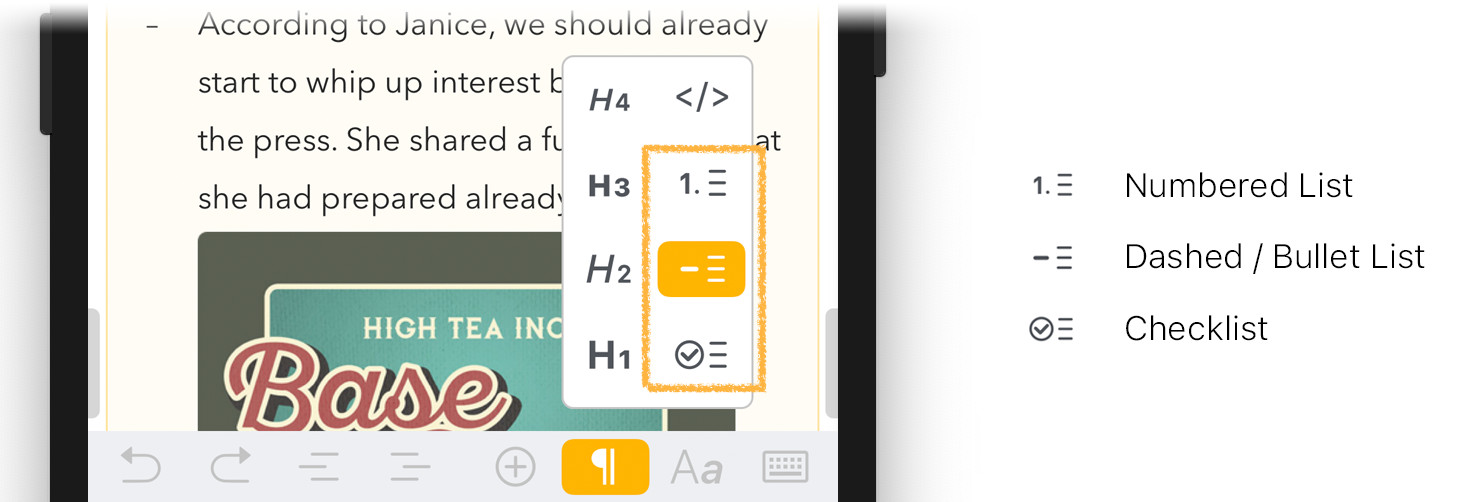
You can create a bullet list on Mac using the menu item Format > Lists > Bullet List. The list options can also be triggered by clicking the dot in the gutter to show the formatting popover and picking the first list option:
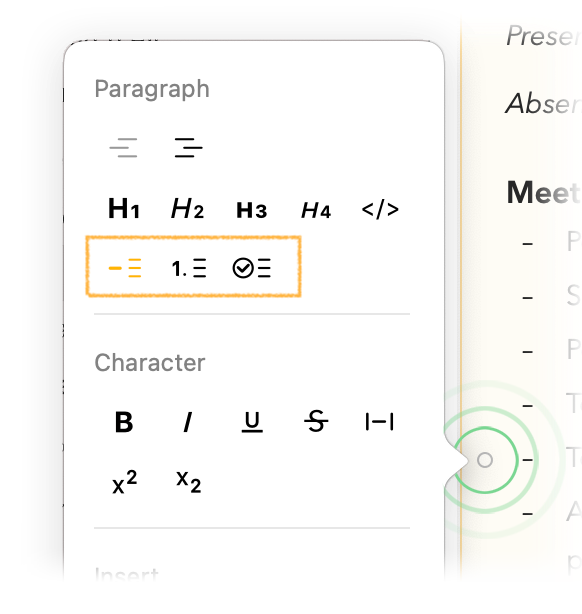
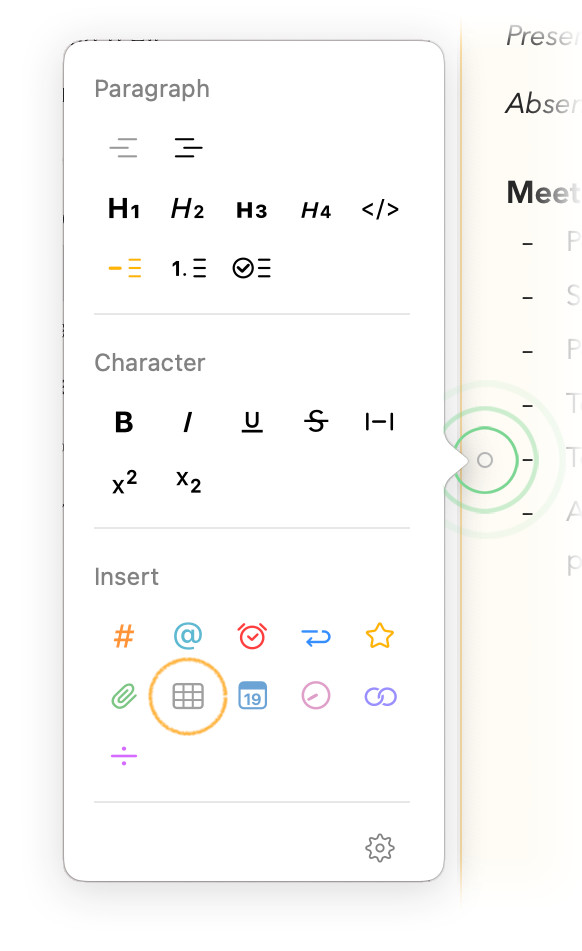
On iOS you find the list options by tapping the ¶ button in the bar above the on screen keyboard:
Once active you should see a dash (or bullet) appear at the beginning of the item. Pressing enter creates a new item. Here’s an example:

Alternatively, you can use markdown syntax to start a list. Just begin the line with a hyphen (-) followed by a space, and start typing your first list item. The paragraph will automatically turn into a bullet list item.
To exit the list, you can choose a different paragraph style from the Format menu (eg Body) or keyboard bar, or you can go to a new line, and press backspace to delete the dash or bullet.
Choosing between a dashed or bullet list
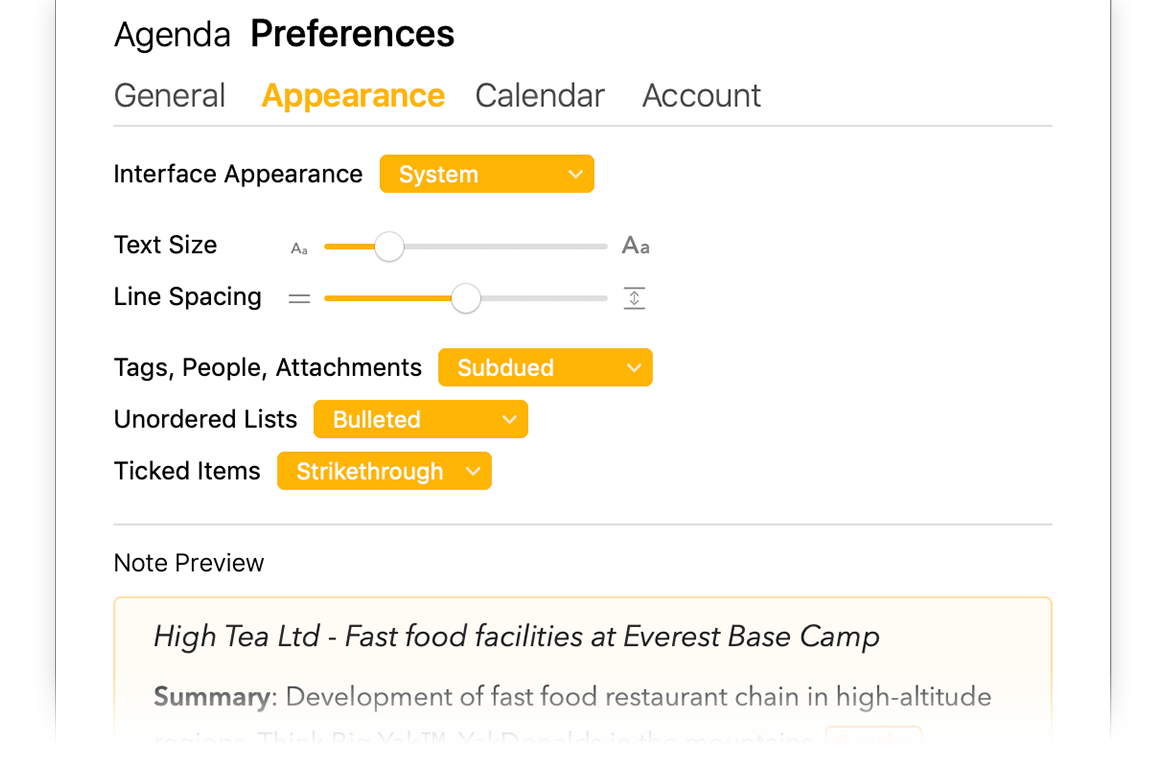
You can choose whether you would like to have unordered lists to begin with a dash (-) or bullet (•) by in the Agenda Preferences. This changes is reflected everywhere in the app, e.g. when printing, sharing, etc.
Premium: This feature is only available after you purchase the premium feature pack.
Creating a Numbered List
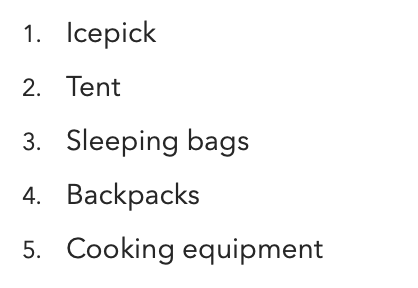
In a number list, items are numbered in order. Here’s an example:
Numbering applies to a single level of indentation; if you indent to create a nested list, it will have a separate set of numbers to the original list.
To create a number list on macOS, use the menu item Format > Lists > Numbered List, or use the markdown syntax by beginning your first item with “1.”, followed by a space and the item text. On iOS you find the list options under the ¶ button in the bar above the on screen keyboard.
If you want to have the list start with a different number than 1. or continue with a different number than the one succeeding the previous paragraph, you can do so by beginning your line with that number, followed by a period and a space, e.g. 5. Fifth Item
To exit the list, choose a different paragraph style, or press enter to create a new empty item, and then backspace to delete the number marker.
Tip: When you enter a return in between two items you will notice that the list starts again at 1. One way to prevent this is by using a so-called non-breaking (soft) return, which will bring you to the next line without starting a new paragraph. You can read more about soft returns here: Taking Notes
Tip: If you don’t want text like
1. Somethingbe recognised as a numbered list, prefix the text with a backslash\and Agenda will keep your text as-is (removing the backslash of course).
Creating a Checklist
Checklists are useful for tracking tasks or items you need to handle. Creating a checklist is as simple as selecting the menu item Format > Lists > Checklist on macOS, or using the ¶ button bar above the on screen keyboard on iOS and iPadOS. Here’s an example:
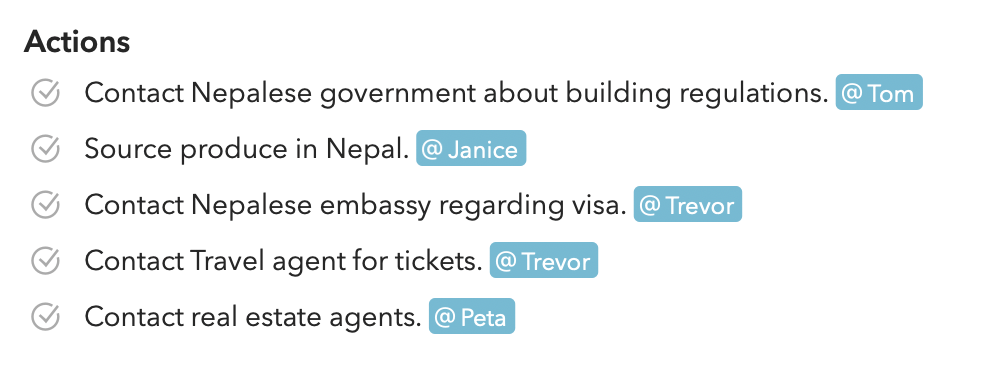
You can use markdown in various ways to create a new checklist. You can enter [] or -[] at the start of a line. To create an item that is already checked, use [x].
Checking Off in a Checklist
The advantage of a checklist is that you can check off items as they are completed. As you would expect, this is as simple as clicking on the circle to the left of the item. You can toggle a checked off item to be unchecked again by clicking the circle once more. On Mac there is also the option under the Format > Lists menu.
Choosing the look of checked off items
You can choose the way checked off items should appear in your note in the Agenda Preferences. By default the checked off item shows a greyed out checkmark icon with standard black text. If you like checked off items to stand out more you can opt for the options to have the text be stricken through, while if you like them to be more subdued you can choose to have the text be greyed out.
Premium: This feature is only available after you purchase the premium feature pack.
Indentation
All lists and other paragraph styles can be indented. Hitting tab is the easiest way to indent (and Shift-Tab to deindent), but you can also use the Format > Indentation menu on macOS, and the bar above the on screen keyboard on iOS and iPadOS:
You can mix indented lists. For example, you could have a check list, where one item has a nested numbered list. Perhaps that item has a number of steps that you need to remember, so you enter those as a sublist to ensure you don’t forget.
Tables
Tables in Agenda are a great way to display multi-column or tabular data in your notes. You can choose the number of rows and columns as you see fit and can also style the text inside using inline styles as bold and italic.
Creating a Table
To add a table to your notes, on macOS you can use the menu Insert > Table, this will insert a new 2x2 table. You can also use the popover that shows when you click the small circle in the gutter of the note text area:
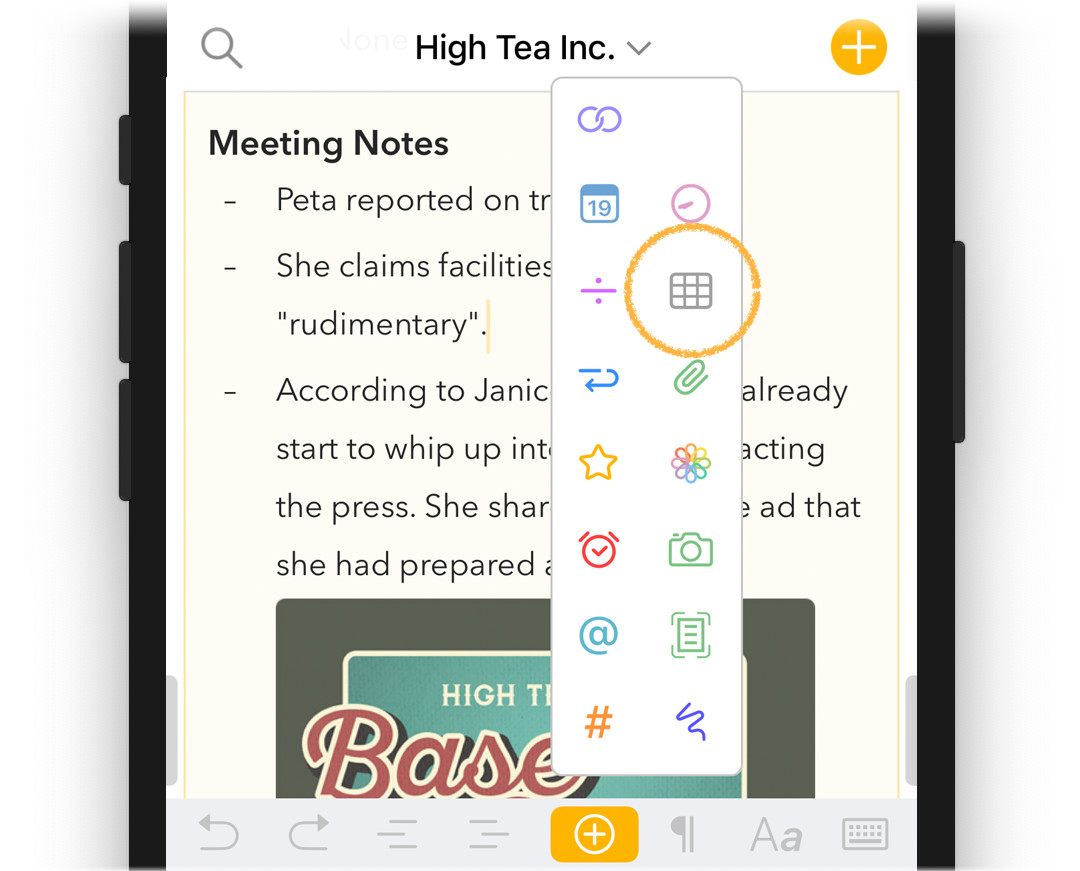
On iOS and iPadOS you can create one by tapping the hash table icon in the popup menu that shows after tapping the plus button in the bar above the keyboard:
There is also support for creating tags with a textual shortcut: you can type three pipe symbols (|) in a row to insert a table, i.e. |||.
Selecting table cells
You can select one or more table cells by starting to drag-select text in the cell and moving the cursor while dragging to the end of the table cell, or into a neighbouring cell. This can be useful to for example copy the contents of one or more cells for use in other apps, to cut and paste cells, rows, or columns to a different location within the same table, or move them into a separate new table.
Editing a table
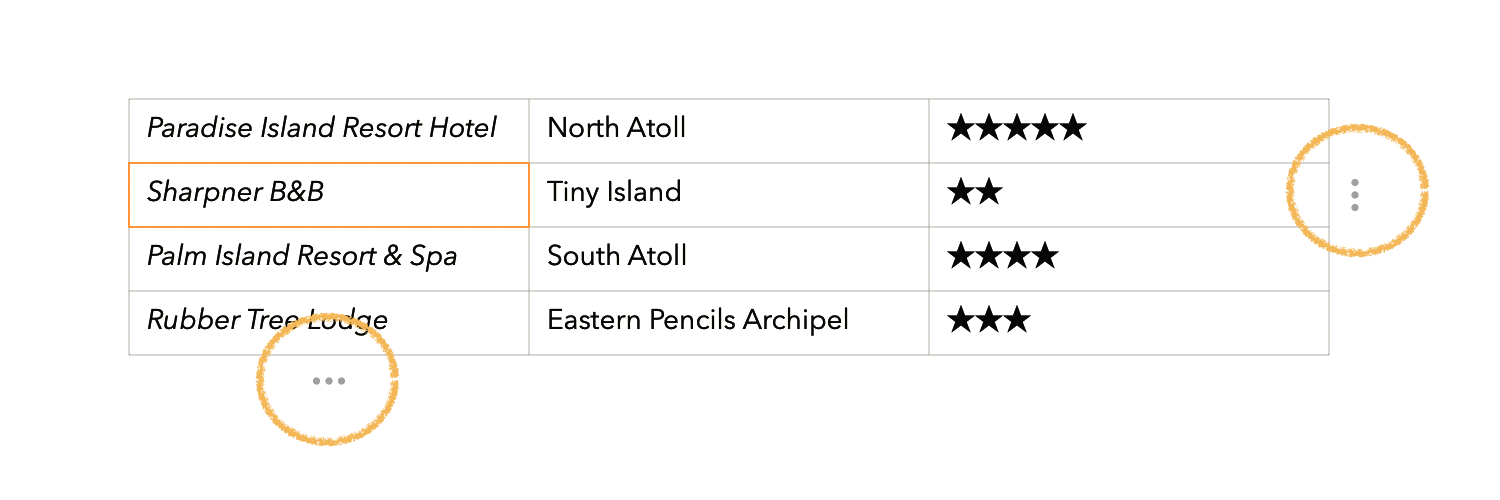
Text in individual table cells can be entered and edited in the same way as text outside a table, Agenda even supports adding inline styles like bold, italic, etc. You will notice that three dots will show next to row and column the selection is currently in. These can be clicked to reveal a number of options to edit the table.
Adding a table row
To add a table row:
- Place the cursor in a cell in the table where you want the new row to be inserted.
- Click or tap the three dots at the right of the table row.
- From the menu choose either Add Row Above or Add Row Below, which will insert a new row either above or below the row of the selected table cell, respectively.
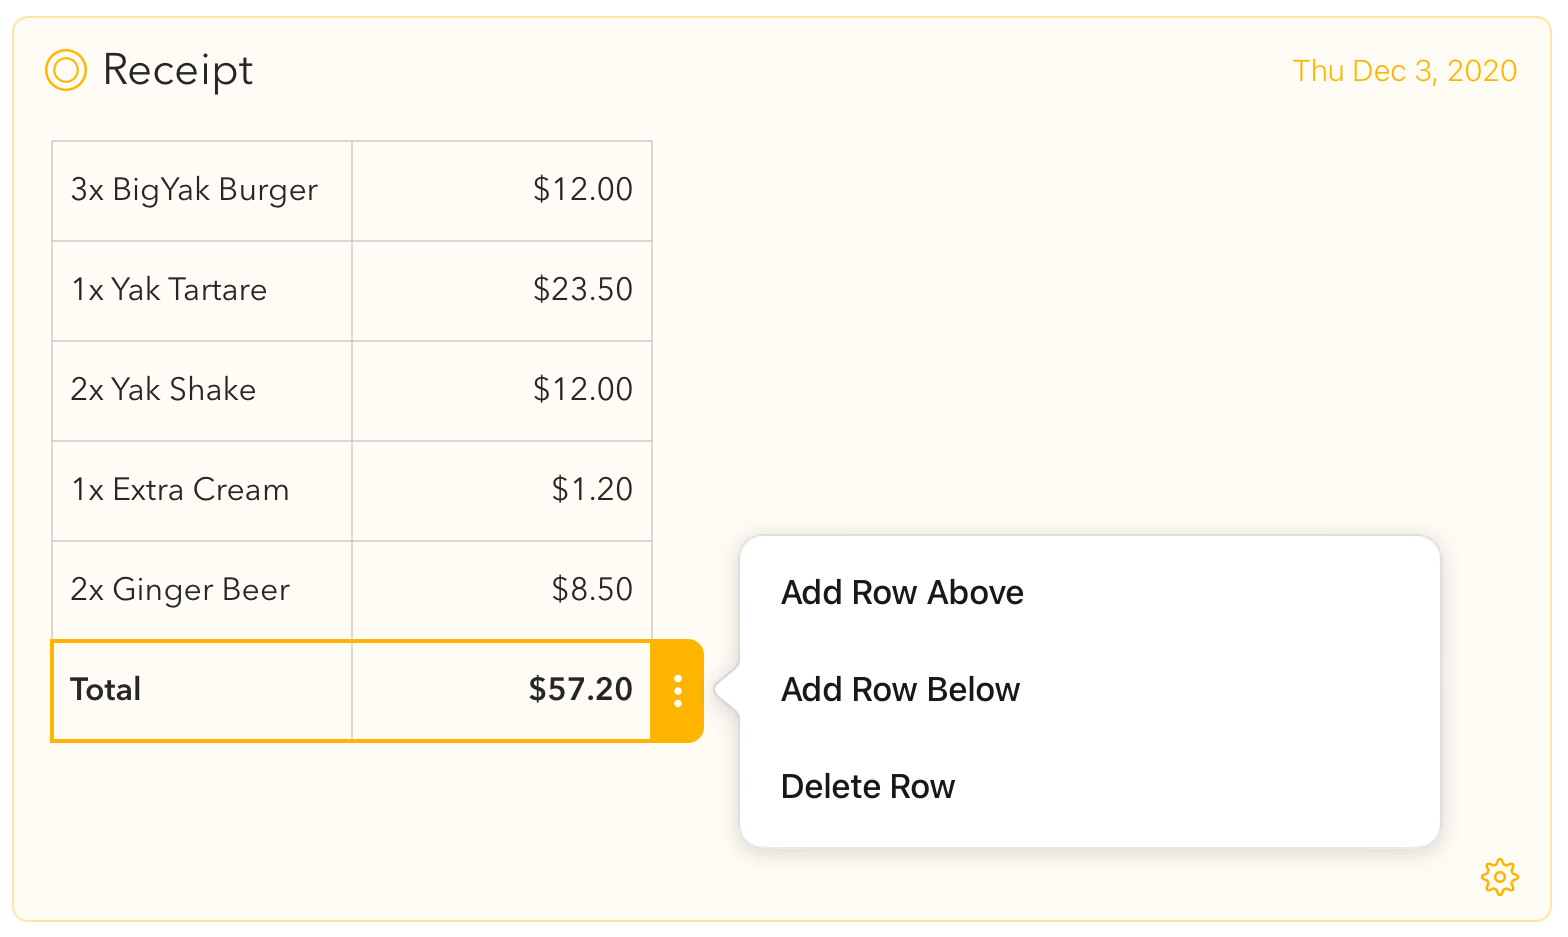
On macOS you can also use the menu option Edit > Table > Add Row Above or Add Row Below.
Tip: If you hit the ⇥ (tab) key with the cursor in the last cell of a row, Agenda automatically adds a new row to the table for you. In general you can use the tab key to jump to the next cell of the table, but as a convenience doing so in the last cell will add a row for you.
Deleting a table row
To delete a table row:
- Place the cursor in a cell of the row to be deleted.
- Click or tap the three dots at the right of the table row.
- From the menu choose Delete Row.
On macOS you can also use the menu option Edit > Table > Delete Row.
Adding a table column
To add a table column:
- Place the cursor in a cell in the table next to where you want the new column to be inserted.
- Click or tap the three dots at the bottom of the table column.
- From the menu choose either Add Column Before or Add Column After, which will insert a new column either left or right of the selected table cell, respectively.
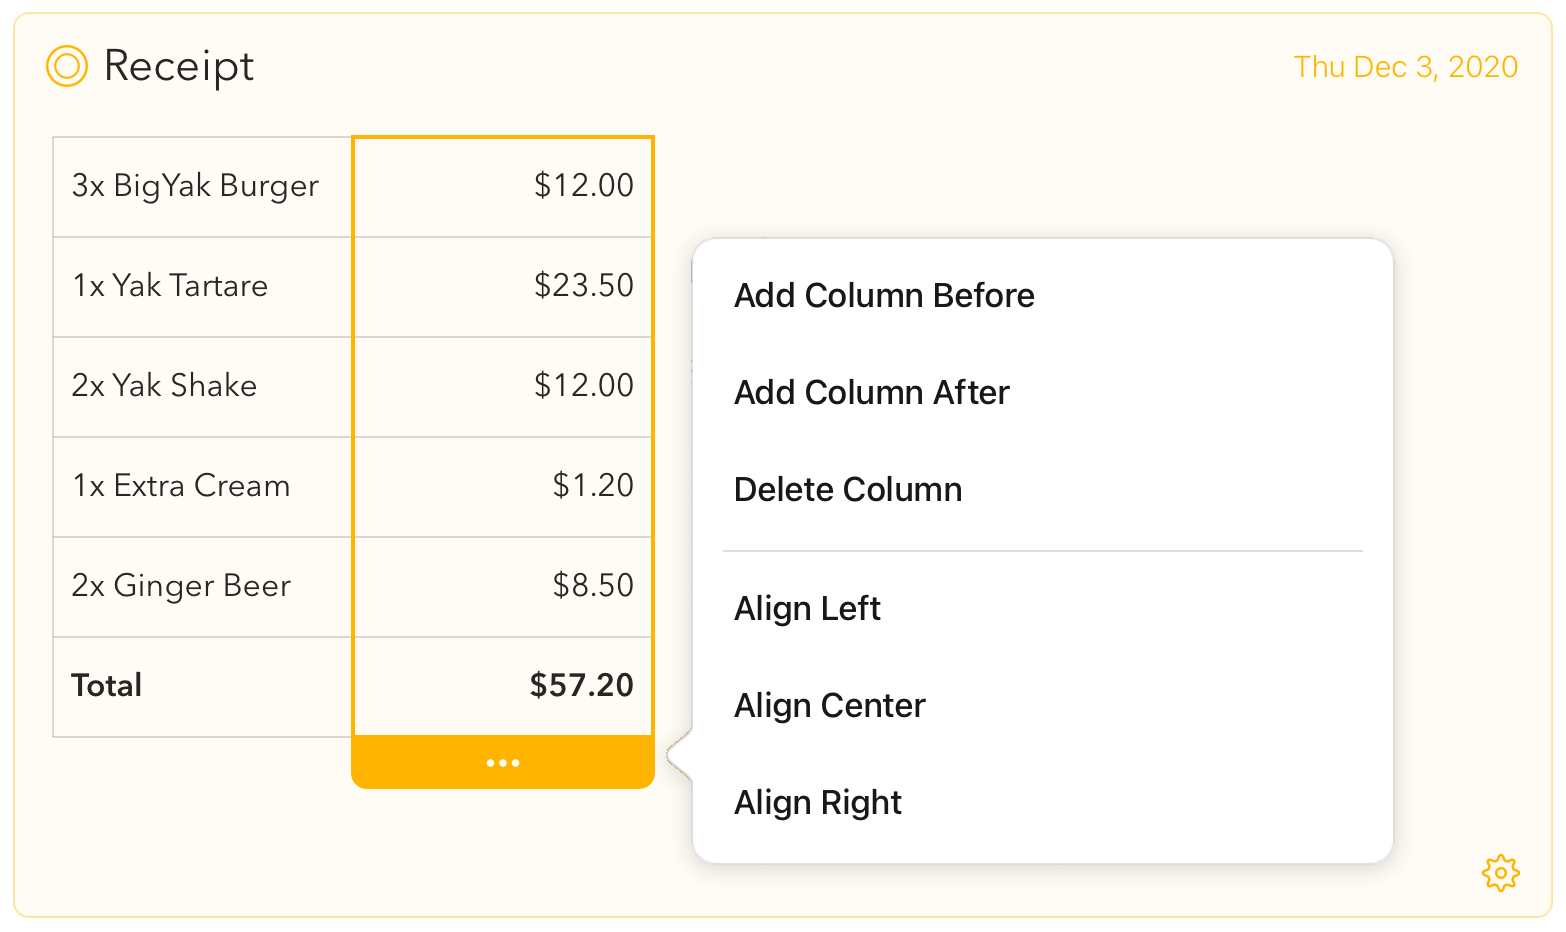
On macOS you can also use the menu option Edit > Table > Add Column Before or Add Column After.
Deleting a table column
To delete a table column:
- Place the cursor in a cell of the column to be deleted.
- Click or tap the three dots at the bottom of the table column.
- From the menu choose Delete Column.
On macOS you can also use the menu option Edit > Table > Delete Column.
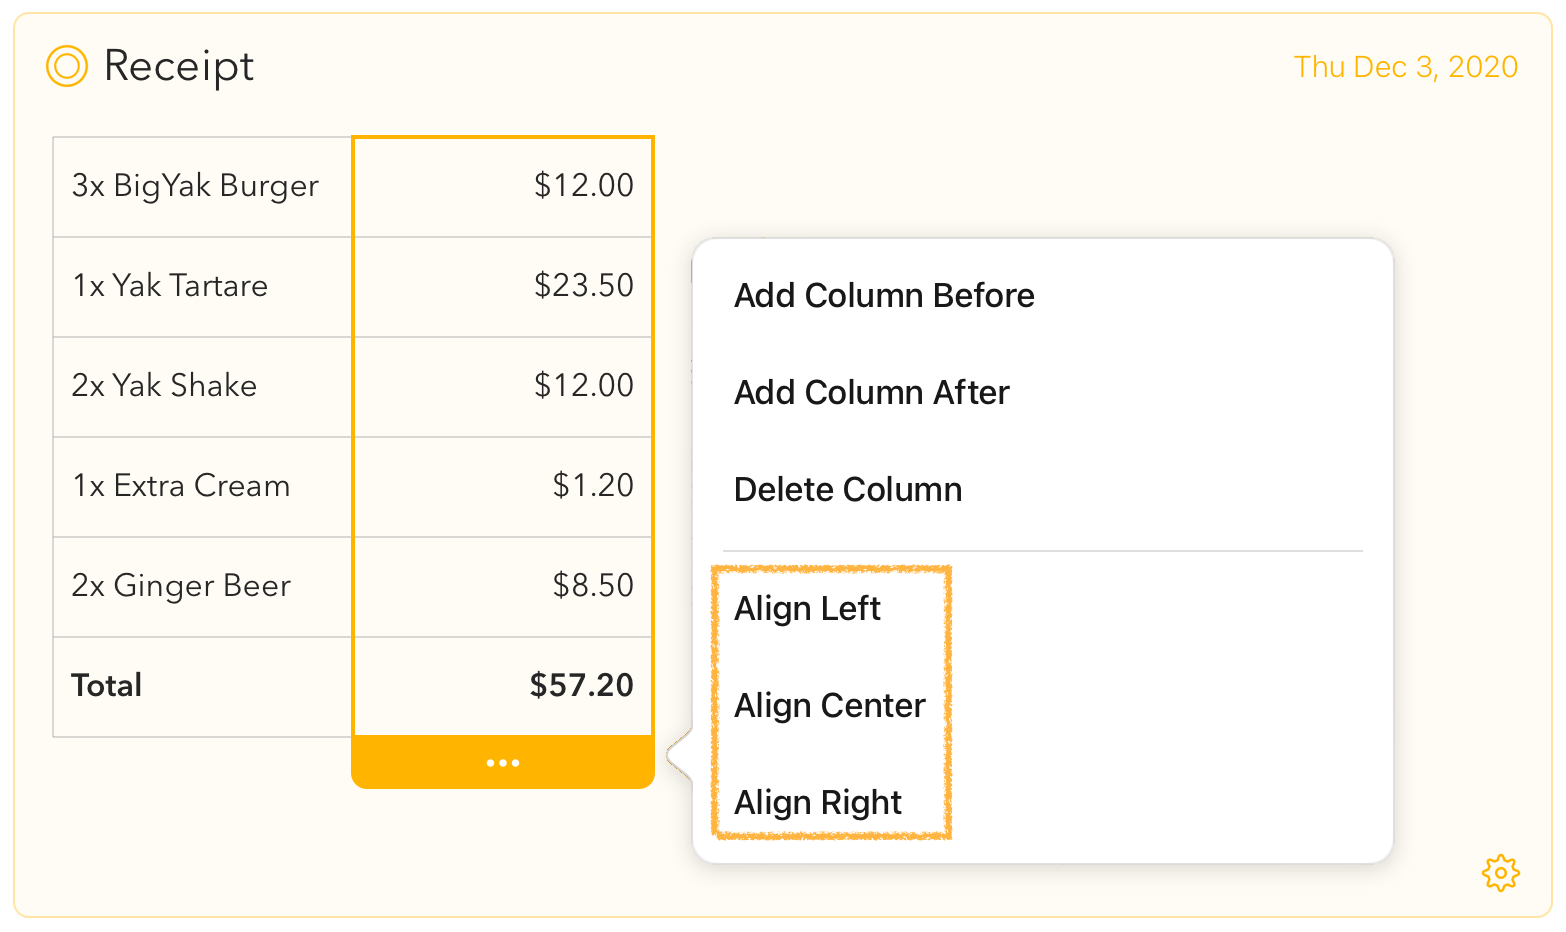
Changing the text-alignment of a column
For certain kinds of data you might prefer a different text alignment than the default left-alignment, for instance numbers or currency looks better right-aligned. To change the text alignment of a column:
- Place the cursor in a cell in the table of the column you’d like to change the alignment for.
- Click or tap the three dots at the bottom of the table column.
- From the menu choose one of the alignment options.
Premium: This feature is only available after you purchase the premium feature pack.
Summaries
Summaries in Agenda can be a convenient way to quickly extract the most important parts of note that you can either add to your note or copy so you can paste it to a different note or to say an email.
Adding a summary to your note
To add a summary to your notes, on macOS you can use the menu Insert > Summary, and selecting the type of summary you would like:
Alternatively, you can use the \summary text action to directly insert the summary at the current position. This also works on iOS and iPadOS.
Copying a summary of your note
The same summary options can be found on macOS under the Edit > Copy As > Summary menu item. The resulting summary will be copied to the clipboard so you can easily paste it in a different note or in another app.