A unique feature of Agenda is how it allows you to attach dates to your notes, and even couple notes to events in your calendar. The notes you take integrate into your projects and daily activities, and you have a complete picture of past, present, and future. In addition, to stay fully on top of things, you can assign reminders to the tasks in your notes. You’ll never forget a thing anymore.
Dates and Notes
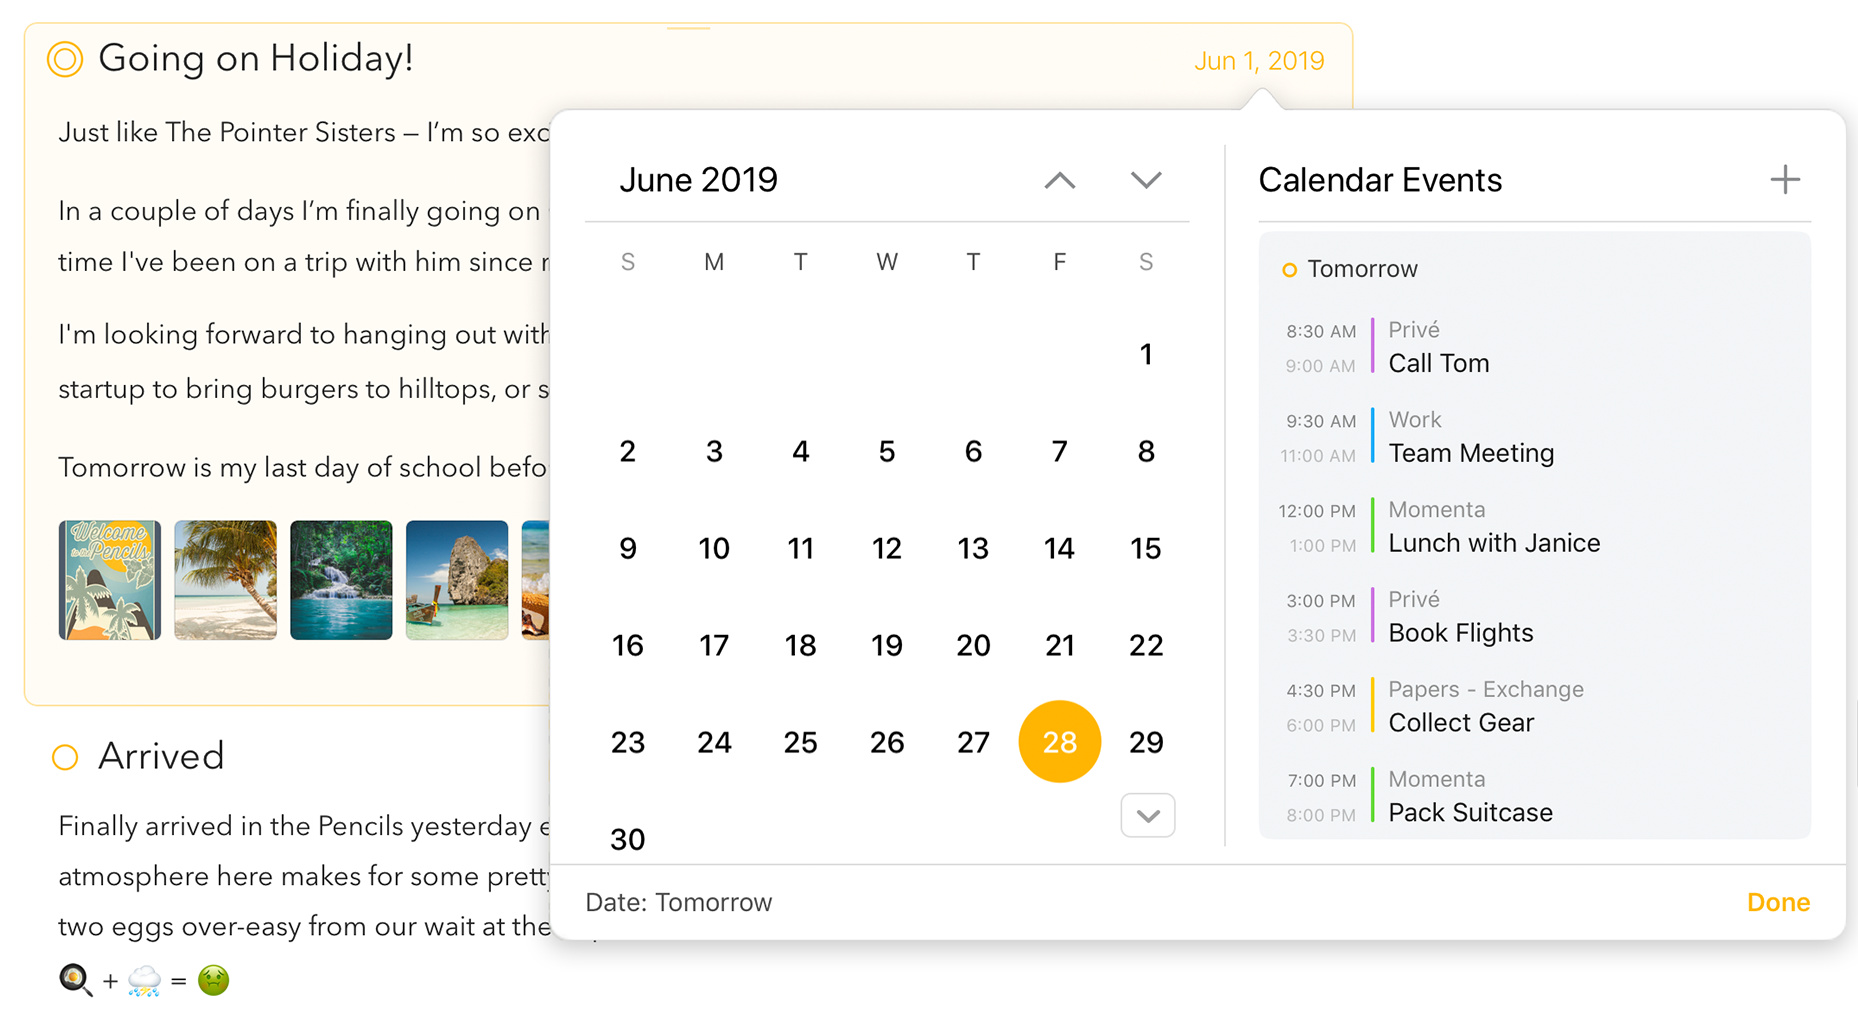
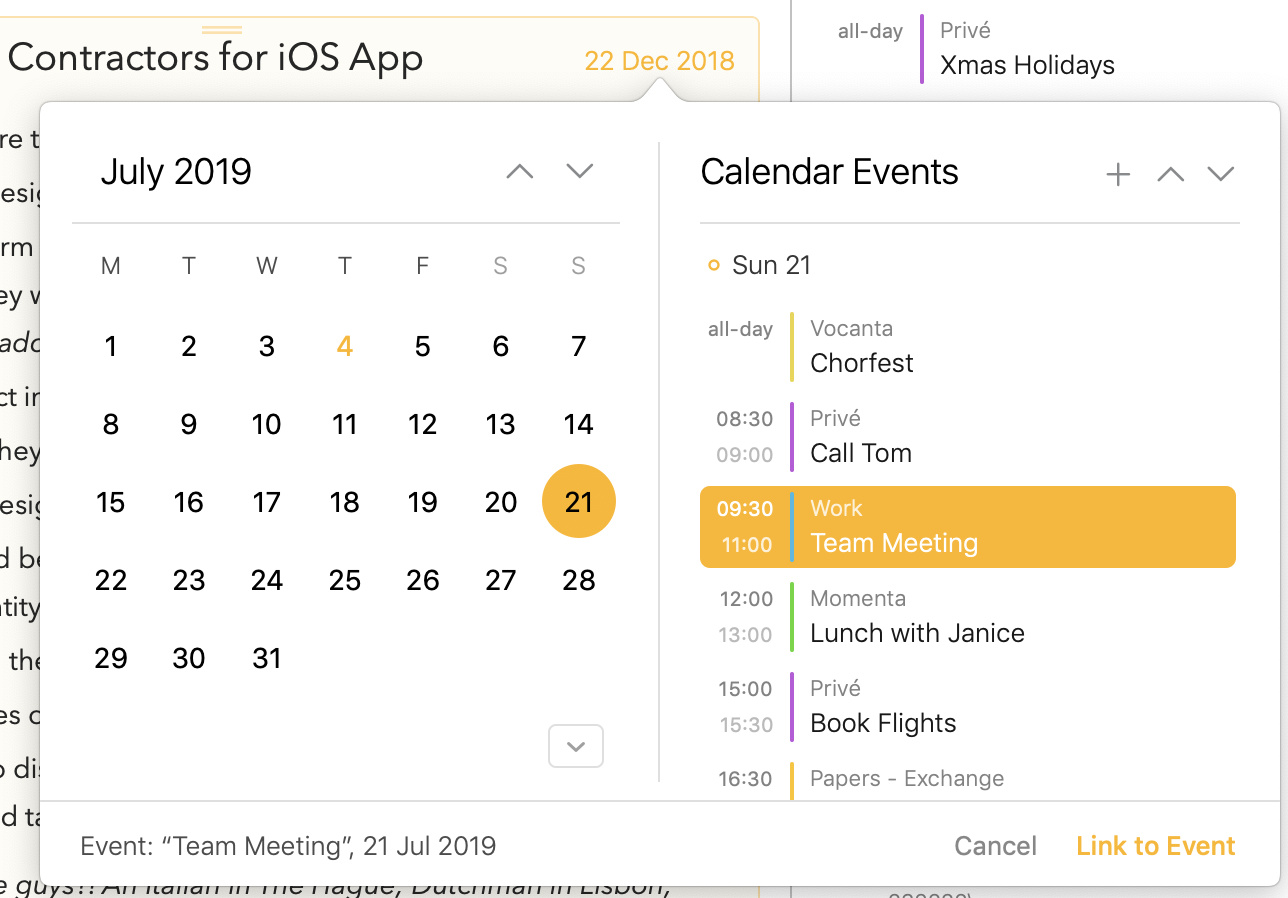
Dates and ranges of dates can be added to notes, and edited, using the date button that appears top-right when a note is selected. Clicking the button brings up a calendar control.
Setting the Date
To set the date for a note…
- Select the note.
- Click/tap the date button top-right on the note.
- Use the arrow buttons to move to the desired month.
- Click/tap on the date.
- Click/tap the Assign Date button.
Note: Changing the date of a note can cause the note to move to a different position in the list, to maintain the correct sorting order.
Tip: On macOS you can move through the calendar quicker by holding the alt/option key while clicking the arrows, it will jump the calendar by year instead of by month. On both macOS and iPadOS you can also use the keyboard arrow keys to navigate the calendar. For an overview of all keyboard navigation options, see Keyboard Shortcuts Overview. You can also simply start typing a date, like “next Saturday”, the moment you do so you’ll see the search field will expand and you can quickly jump to the date you’re looking for.
Tip: An even quicker way to assign a date using the
\assign-datetext action, as well as the related actions\today,\tomorrow,\mondayetc. You can even type\assign(15 Dec)or\assign(in 3 weeks). You can see it in action in this video: https://www.youtube.com/watch?v=mb1F9k0HUb4&t=659s
Assigning Today’s Date
While you can assign Today’s date to a note in the way described above, a much faster way is to use Assign to Today from the Note menu on macOS or the ⇧⌘ ⏎ keyboard shortcut. You can also type \today anywhere in the note itself.
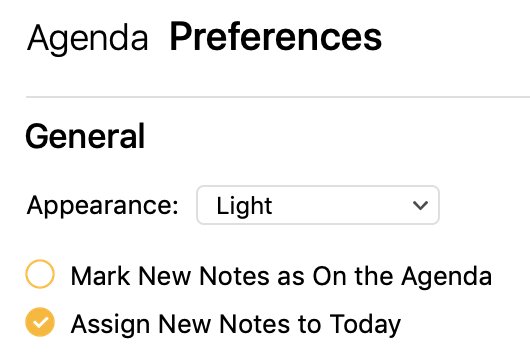
If you like new notes to be always assigned to Today, you can enable this setting in the Agenda Preferences.
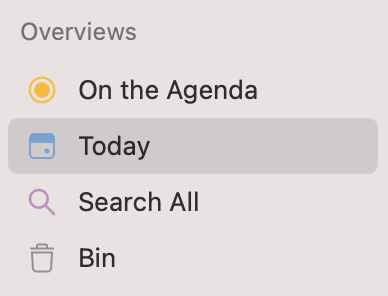
Tip: Notes assigned to today will show automatically in the Today overview in the source list on the left, giving you a quick access to all notes that have an assigned date that includes today.
Setting a Range of Dates
Setting a range of dates for a note is similar to a single date.
- Select the note.
- Click/tap the date button top-right on the note.
- Use the arrow buttons to move to the desired month.
- On macOS either…
- Click and drag across the desired range, or…
- Click the start date, and hold ⇧ while clicking the end date.
- On iOS tap and hold, then drag to across the desired range
- Click/tap the Assign Dates button.
Removing a Date
To remove an existing date or range of dates from a note…
- Select the note.
- Click/tap the date button top-right on the note.
- Either…
- Click/tap on the selected date to deselect it, or…
- Click/tap on empty space at the bottom of the calendar to deselect.
- Click/tap the Remove Date button.
On macOS you can also choose the option Remove Assigned Date from the Note menu.
Sorting Order
Notes that include dates are kept in chronological order. Notes without a date can be dragged to any position within the project. By default, notes with a date are ordered from newest to oldest, but that can be changed on a per project basis.
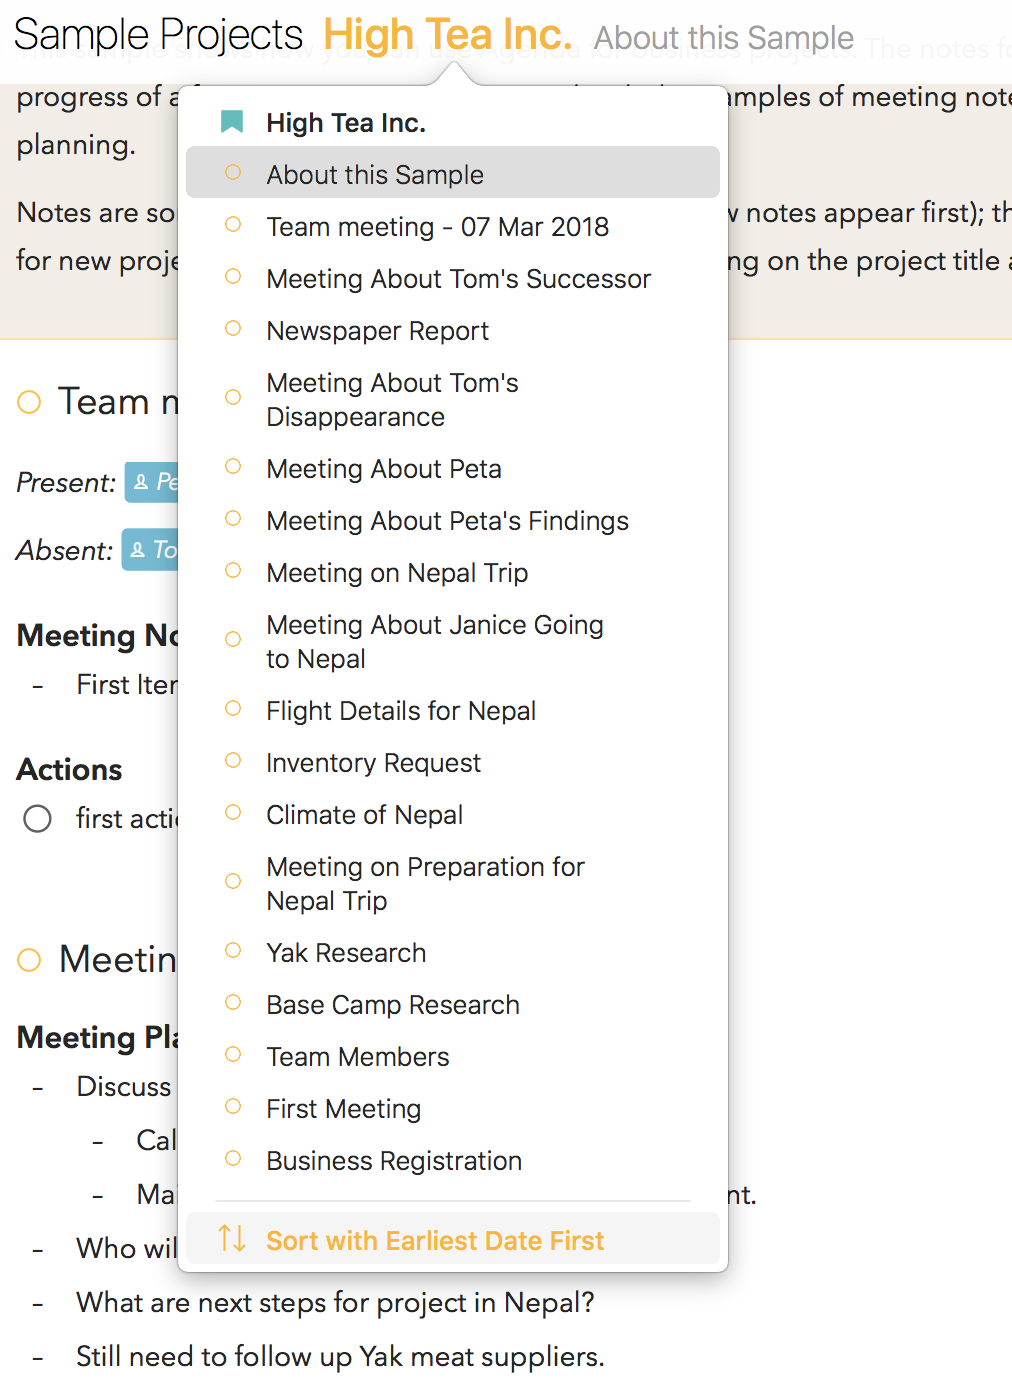
To change the sort order of a project on macOS you can choose the options under Sort Notes by from the View menu. On all platforms you can also:
- Click/tap on the project to select it in the sidebar.
- Click/tap the project title at the top of the list of notes.
- Scroll to the bottom of the popover, if needed.
- Click/tap the menu item Sort with Earliest Date First
Notes without a date will maintain their position relative to notes with a date.
Filtering Notes by Date
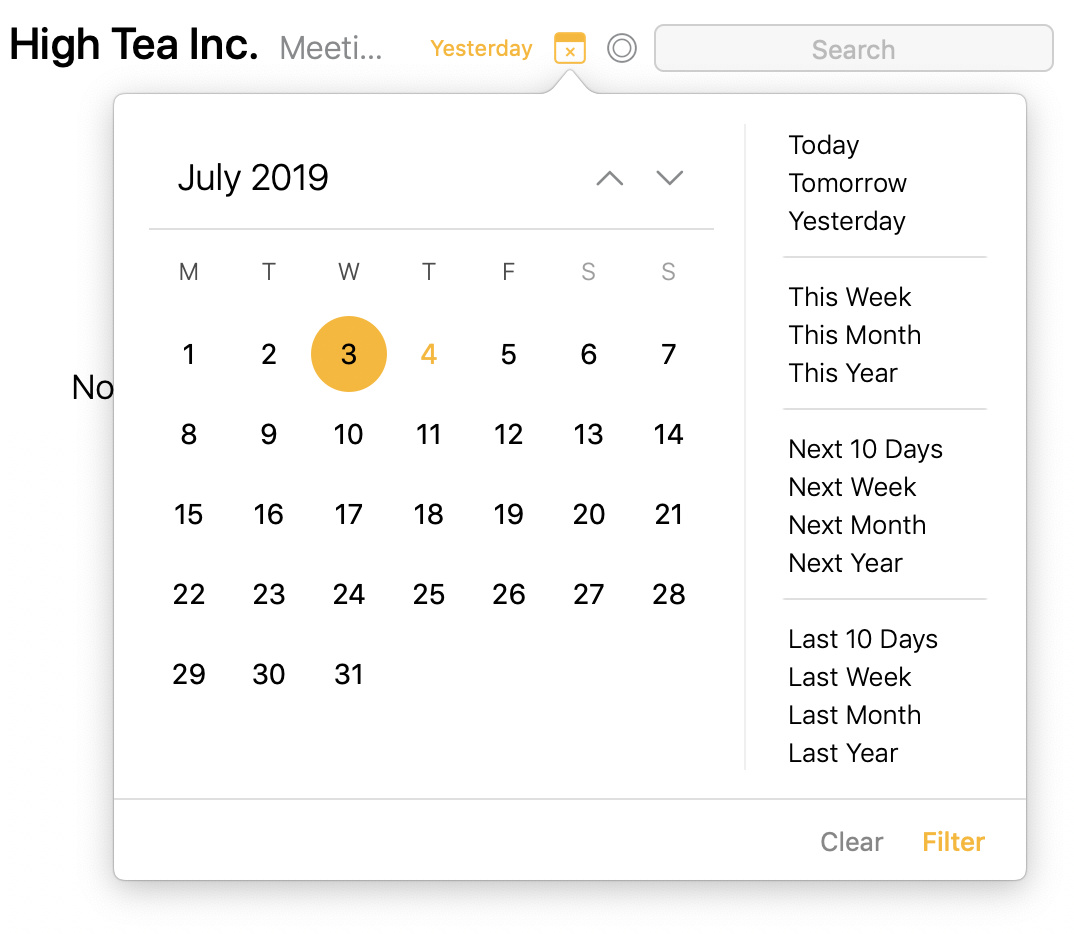
You can filter the notes list based on text using the search field that appears when you click the magnifying glass icon, but you can also filter by date.
To filter notes based on date or range of dates…
- Select the project or overview you want to filter in the sidebar.
- Click/tap on the magnifying glass button to show the search controls.
- Press the calendar button that appears to the left of the search field.
- To select a single date, click/tap it in the calendar.
- To select a range of dates, click/long-tap and drag the range, or on macOS select the start date, and then click the end date holding down ⇧.
- Apply any other filters desired, e.g. entering a search term.
Tip: You can save the date filter as a smart overview in the sidebar, for instance to always be able to quickly see tomorrow’s notes. Learn more about how to create smart overviews in Searching and Filtering
Calendar Events
Applying dates to your notes is already very useful, but sometimes notes apply to a particular event, such as a conference you are attending, or a weekly meeting. Agenda allows you to couple a note to an existing event in your calendar, or even create a Calendar event without ever leaving Agenda app.
Connecting with Calendar App
Before Agenda can access events in your calendars, it needs your permission. You need to link your Calendar app to Agenda.
To link Calendar app to Agenda…
-
Open the Related Panel on the right by clicking the grip half way up the right side of the window, or open the date popover shown above.
-
At the top, click/tap the button to Connect to your Calendar.
-
When prompted, allow Agenda access to your calendars.
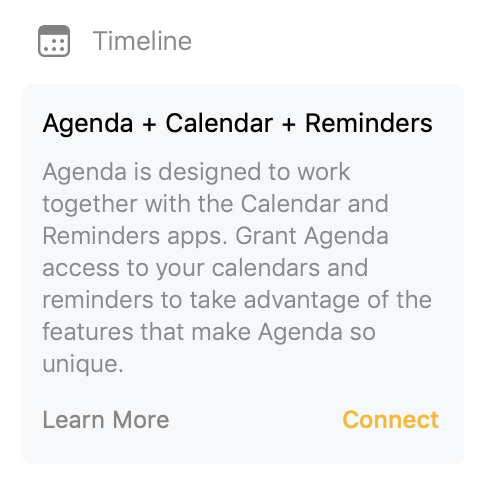
After connecting with the calendar, your calendar events will show in the timeline in the related info pane (see below).
Note: If you initially deny access to your Calendar and want to connect Agenda later, clicking/tapping Connect will open the System Preferences / Settings app and you’ll need to give it access from there in the Privacy section.
Important: For Agenda to see your calendars you will have to have your calendar accounts configured in the System Preferences (under Internet Accounts) on macOS or in the Settings app on iOS and iPadOS (under Calendar). The easiest way to verify whether Agenda should see your calendars is to check the system Calendar app, if the calendars show there, also Agenda should see them. See also Dates, Events, and Reminders)
Selecting Visible Calendars
You might not want to have all your calendars be shown in Agenda, and for example exclude calendars for meeting rooms etc. You can do so by going to the Agenda Preferences
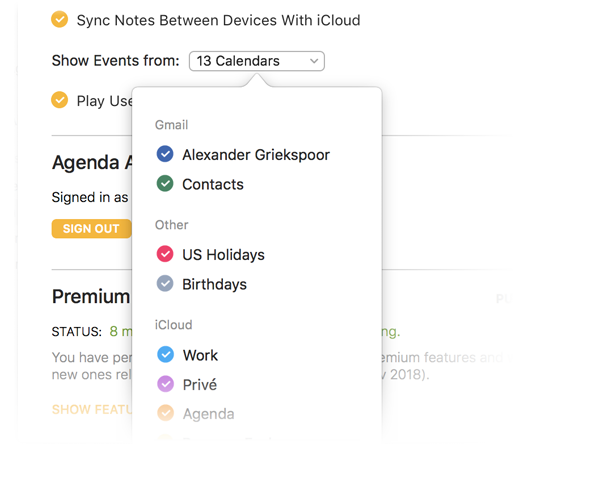
Premium: Selecting which Calendars and Reminders Lists to show is a premium feature only available upon purchase.
Linking a Note to a Calendar Event
To link a note to an existing event in the calendar…
- Select the note.
- Click/tap the calendar button at the top-right of the note.
- Select the date that the event falls on in the calendar on the left if necessary.
- Select the event in the timeline on the right side of the popover.
- Press the Link to Event button.
After linking, the note will update to have the date of the event and also update the title of the note if you didn’t give it one yourself yet. When you change an event in the Calendar app, Agenda will bring those changes over. If you change the date, for example, the date of the note will change in Agenda too.
A second way to create a note linked to a Calendar Event is to:
- Open the Related Panel on the right by clicking the grip half way up the right side of the window, or open the date popover shown above.
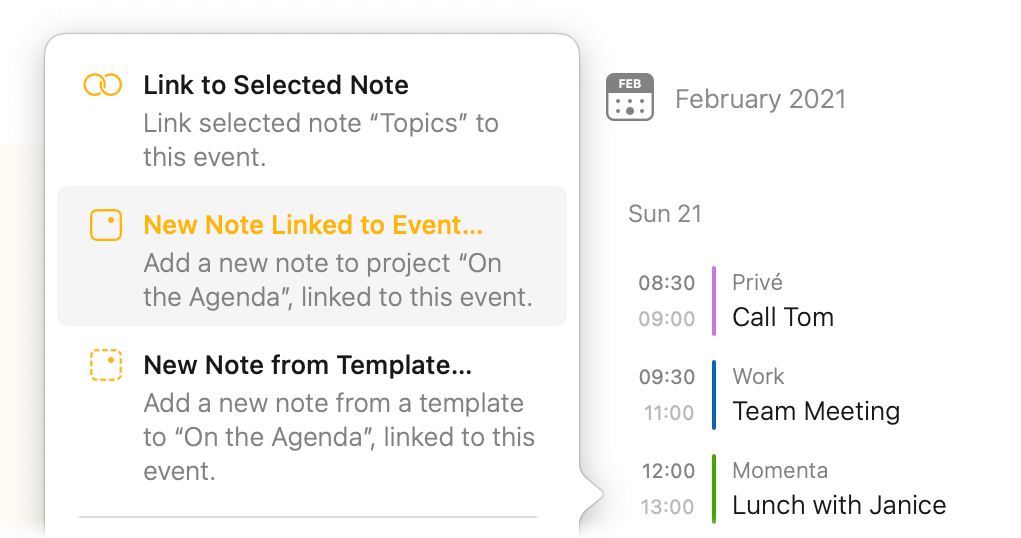
- Scroll to and click/tap on the Calendar Event you want to link a note and select from the menu that is shown the option to either create a new note for the event, or link the event to the selected note.
Tip 1: Once linked a small note icon will appear next to the event in the Timeline in the Related Panel. Clicking/tapping this icon will make the notes list jump straight to the note again.
Tip 2: When you link a Calendar Event to a note in Agenda, it automatically copies any text in the notes field of the event to the Agenda note. Mind though that for this to work the note in Agenda cannot yet have any other text at the time of linking.
Unlinking a Note from a Calendar Event
To unlink a note from a linked event in the calendar…
- Select the note.
- Click/tap the calendar button at the top-right of the note.
- Click/tap the even in the timeline on the right to unselect it
- Press the Unlink Event button.
Other ways to unlink an event is by clicking/tapping the event in the timeline in the related panel and unlink from the menu that will appear. Or though the options in the cog wheel or Note > Unlink Calendar Event menu.
Linking Multiple Notes to a Calendar Event
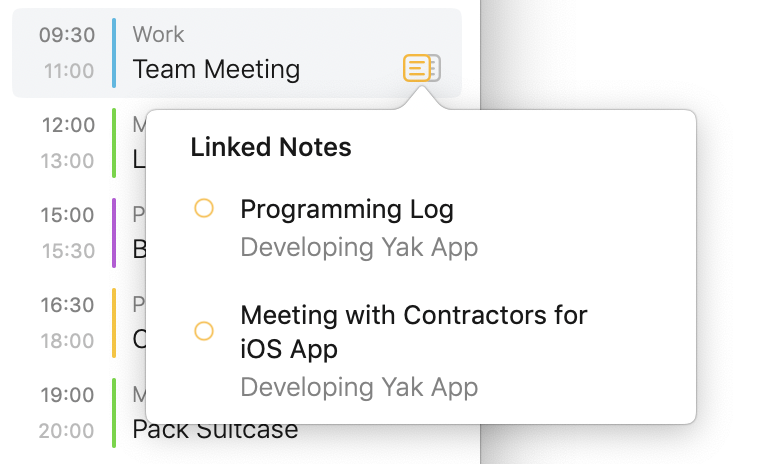
Sometimes you can have multiple notes related to same calendar event. If you link multiple notes to the same event, this is indicated in the Timeline in the Related Panel by a “multiple notes” icon. If you click/tap this icon you will see a menu with all the notes linked to that event. Choosing any of these notes will jump the notes list straight to the linked note.
Linking through Drag and Drop
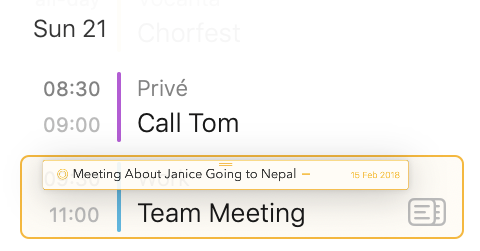
One easy way to link a note to a calendar event is to drag a calendar event onto a note:
or the other way around, to drag a note onto a calendar event:
Creating a Calendar Event
To create and link a new Calendar event for a note…
- Select the note that you want to create the event for.
- Click/tap the calendar button at the top-right of the note.
- Set a date or date-range for the event (see above).
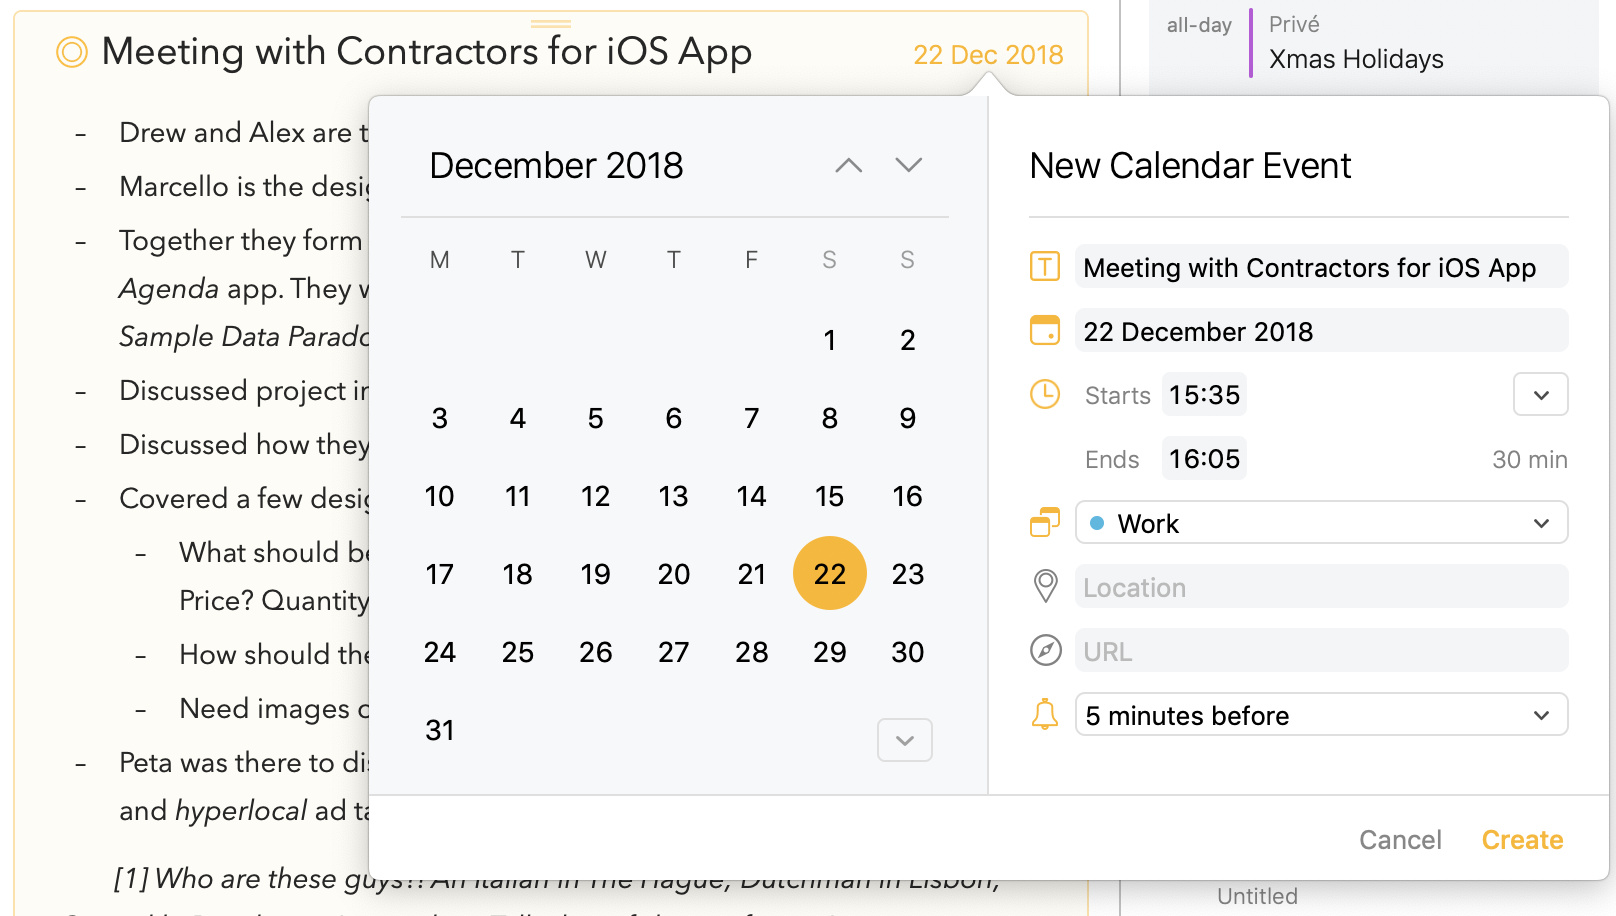
- Click/tap the + button at the top right corner of the date popover.
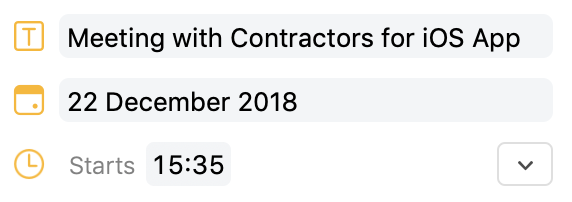
- Complete the details for the event, including:
- The title of the event
- The start and end date (on iOS tapping the start and end date will reveal a date picker)
- The calendar to which to save the event
- An optional location and/or URL
- An alert to show when the event becomes due
- Click/tap the Create button.
- Click/tap the Link to Event button.
If you don’t want to per se link an event to a note but just want to create a new event without having to switch to the calendar app, you can do this by clicking/tapping a day in the calendar in the Related Panel and selecting the New Event option in the menu:
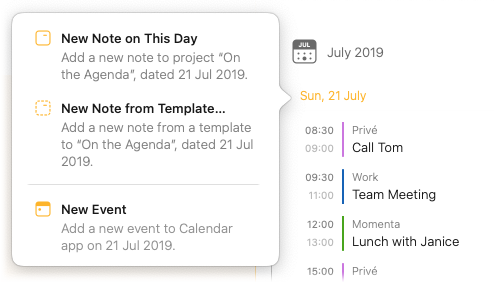
On iOS and iPadOS you’ll also find this option under the plus at the top right corner of the related panel:

Premium: Creating a new event from Agenda is a premium feature, and requires the premium feature upgrade be purchased.
Tip: Agenda automatically parses the date in the title of the note (by default the title of the note also becomes the title of the calendar event) and selects any date found as the start date. The currently selected date is shown both in the calendar (which can be used to change the date), but also in a text field below the event title.
You can use this text field to quickly jump to a different date. For example, you can type "next week, or “25 dec 2020” to quickly change the calendar to the right date.
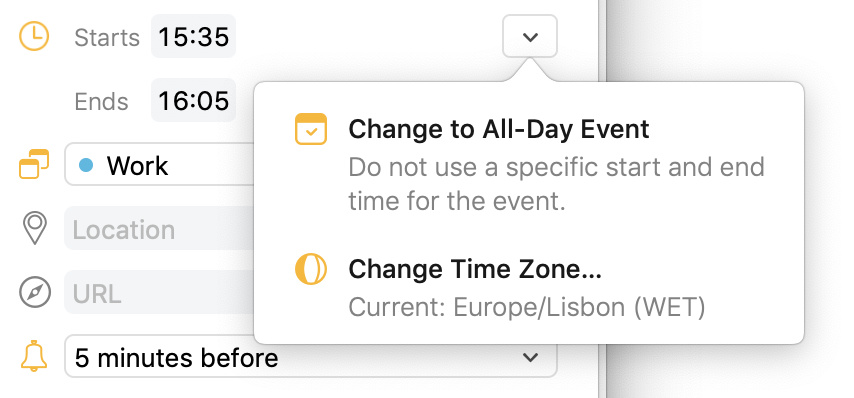
Switching Between an All-Day and Timed Event
To toggle between a timed and all-day event…
- Click/tap the button at the right next to the start time of the event.
- Select the menu option to switch a timed event to an all-day event, and vice versa.
Changing the Time Zone of an Event
To change the time zone for an event…
- Click/tap the button shown in the above screenshot.
- Navigate the menu and select the desired time zone for the event.
Reminders
Reminders can be useful to stay on top of all the items you have to do. In Agenda you can easily add reminders to your notes, either using a button or menu action or by typing the \remind shortcut. Reminders created and edited in Agenda are automatically synced with the Reminders app.
Connecting with Reminders app
Before Agenda can access events in your reminders, it needs your permission. You need to link your Reminders app to Agenda.
To link Reminders app to Agenda…
- Open the Related Panel on the right by clicking the grip half way up the right side of the window.
- At the top, click/tap the button to Connect to your Reminders.
- When prompted, allow Agenda access to your reminders.

Note: If you initially deny access to your reminders and want to connect Agenda later, clicking/tapping Connect will open the System Preferences / Settings app and you’ll need to give it access from there under the Privacy section.
Important: For Agenda to see your reminders you will have to have your calendar accounts configured in the System Preferences (under Internet Accounts) on macOS or in the Settings app on iOS and iPadOS (under Reminders). The easiest way to verify whether Agenda should see your reminders is to check the system Reminders app, if they show there, also Agenda should see them. See also Dates, Events, and Reminders)
Selecting Visible Reminder Lists
You might not want to have reminders from all your lists be shown in Agenda. You can determine from which lists reminders are shown by going to the Agenda Preferences.
Premium: This is a premium feature only available upon purchase. If you don’t have this premium feature, all lists are shown by default.
Adding a Reminder
To insert a reminder in your note…
On macOS:
- Select a note and place the cursor where you’d like to insert the reminder.
- Choose Add Reminder from the Note menu.
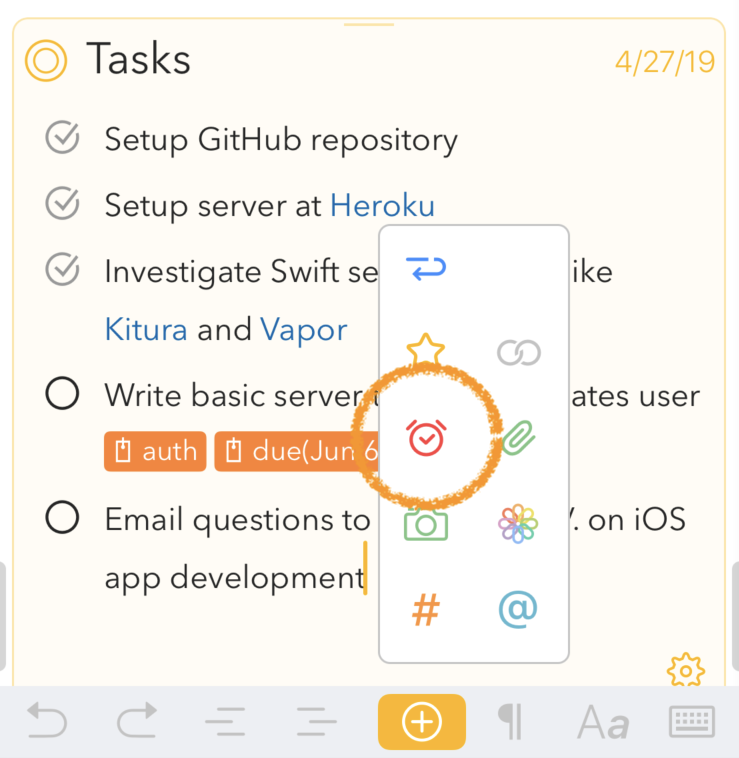
On iOS and iPadOS:
- Select a note and place the cursor where you’d like to insert the reminder.
- Tap the plus button in the keyboard bar, followed by tapping the reminder icon.
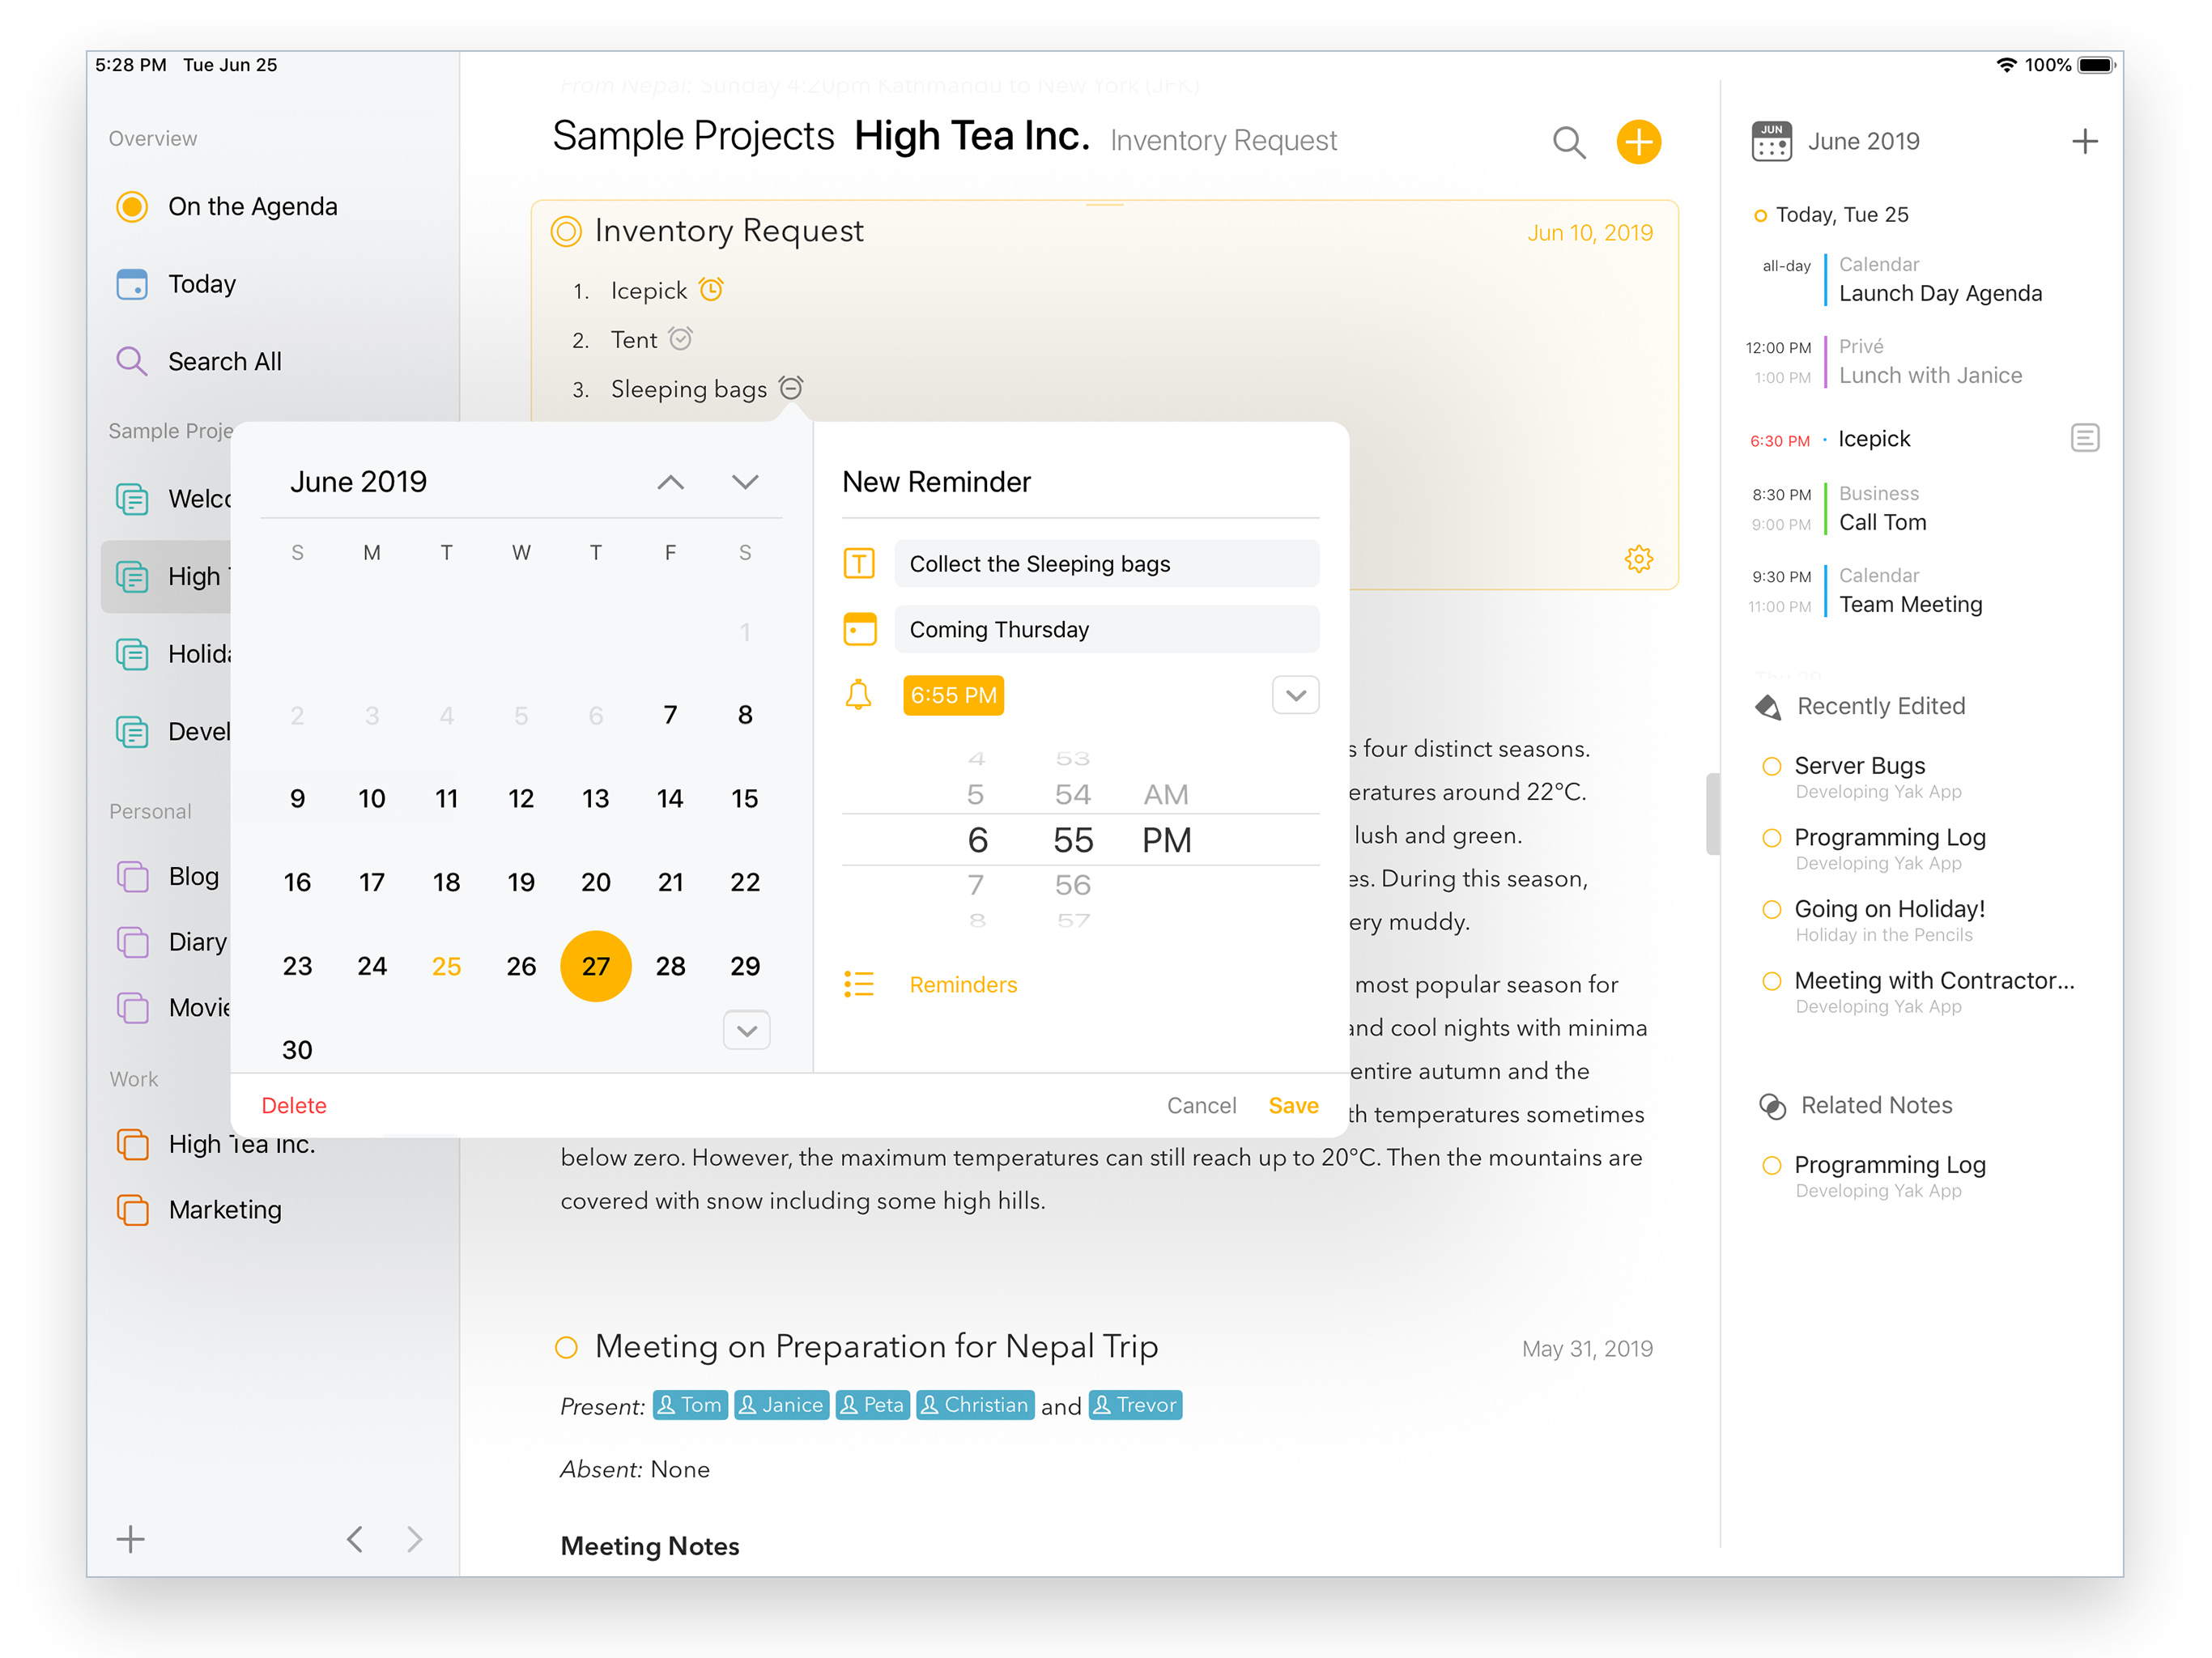
Then…
- Set a due date for the reminder by selecting a date in the calendar or typing a date in the textfield.
- Complete the details for the reminder, including:
- The title of the reminder
- The due time (on iOS tapping the time will reveal a time picker)
- The reminder lists to which to save the reminder
- Click/tap the Create button.
Note: Only due dates in the future can be selected, it’s not possible to create a reminder with a due date in the past.
Reminder Appearance
Once created, a reminder can appear in four states in the note. When it has been inserted but not yet scheduled it will appear gray as in the above screenshot. This means it has not yet been inserted into the Reminders app. A scheduled reminder will become orange, and turn red once it has become due. Finally, if a reminder is deleted in the Reminders app while it was not yet due, it will be greyed out with a small cross in the note.
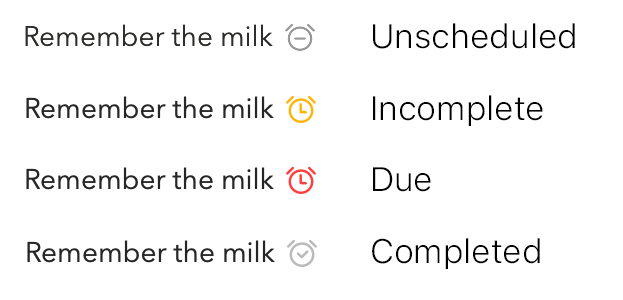
Adding a Reminder using the \remind action
An even faster way to add a reminder is by typing the \remind action shortcut. Typing \remind or \reminder is the equivalent of the first two steps in the above Add Reminder sequence. However, by providing additional parameters in parentheses you can directly schedule a reminder without the need to a popover.
For example:
-
\remind(today)will schedule a reminder for today in 30 minutes -
\remind(today at 6pm)will schedule a reminder for today at 6 o’clock -
\remind(tomorrow evening)will schedule a reminder for tomorrow at 6 o’clock -
\remind(in 3 weeks)will schedule a reminder 21 days from now -
\remind(25 dec 2020, at 8pm)will schedule a reminder on the 25 dec 2020 at 8 o’clock
Optionally you can also provide an alternative title as a first parameter, separated by a semi-colon.
For example:
\remind(Remember the milk; tomorrow morning)will result in a reminder with the title Remember the milk scheduled at 9am tomorrow morning.
You can also indicate the list and whether you prefer an all-day type reminder using parameters as described in more detail here:
-
\remind(today at 6pm, list: important)will schedule a reminder for today at 6 o’clock on the reminder list “important” -
\remind(all-day: tomorrow)will schedule an all-day reminder for tomorrow
and these can also be combined:
\remind(all-day: tomorrow, title: Remember the milk, list: "important")will schedule an all-day reminder for tomorrow, with the title Remember the milk, on the reminders list important.
Tip: The
\remindaction is just one of a number of useful actions you can trigger by typing, learn more about them here: Creating and Using Templates - #4 by system
Editing Reminders
To edit a reminder…
- Select the note containing the reminder
- Click/tap the reminder icon inside the note. The same popover as when creating a reminder will show.
- Edit the properties of the reminder, including marking the reminder as completed if desired.
- Click/tap the Save button.
The edited reminder will also be updated in the Reminders app.
Alternatively you can click/tap the reminder in the calendar that is part of the Related Panel and select Edit from the menu that appears.
Deleting a Reminder
To delete a reminder:
- Select the note containing the reminder
- Click/tap the reminder icon inside the note.
- Click/tap the Delete button in the lower left corner of the popover.
The deleted reminder will also be removed from the Reminders app.
Alternatively, deleting the reminder by simply backspacing the icon in the text also deletes the reminder. The difference with the above way is that this won’t delete the reminder from the Reminders app, only from the text.
Adding a Quick Reminder
If you just want to create a quick reminder outside the context of any particular note, you can do this by clicking/tapping a day in the calendar in the Related Panel and selecting the Quick Reminder option in the menu:
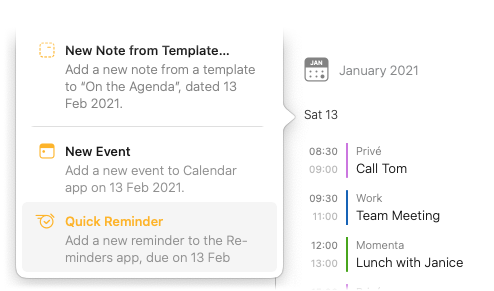
On iOS and iPadOS you’ll also find this option under the plus at the top right corner of the related panel:

Premium: Creating a quick reminder from Agenda is a premium feature, and requires the premium feature upgrade be purchased.
The Timeline
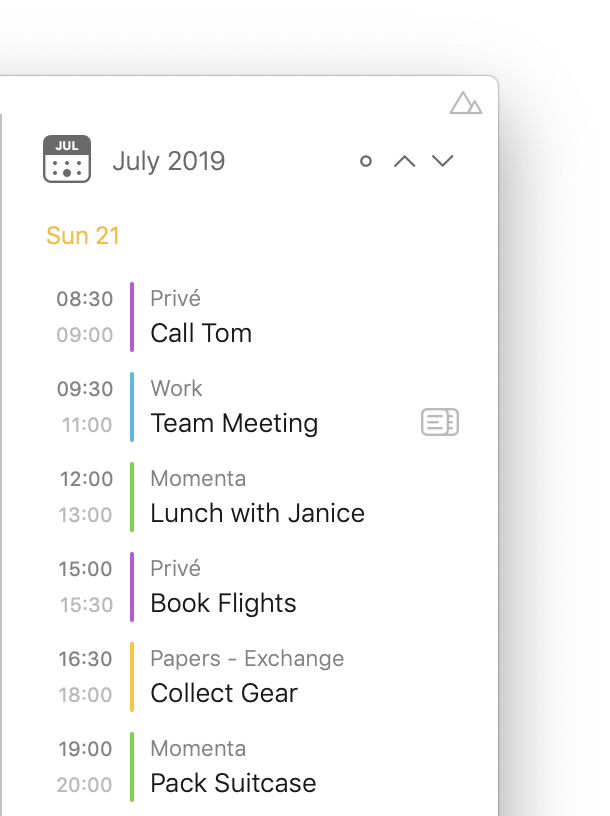
Agenda provides a single comprehensive view of all your calendar events and reminders, grouped by day, in an infinitely scrolling list called the timeline. The timeline also allows for a wide range of actions you can perform on the items it displays, from jumping to linked notes, to creating new and editing existing events and reminders.
Navigating the Timeline
The timeline is infinite scrolling list, it will automatically fetch the next or previous batch of calendar items when you scroll down and up, respectively. On macOS you can also scroll per page using the up and down arrow at the top right.
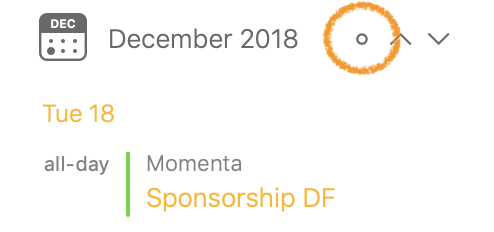
The list also automatically adapts to the selection of notes in the notes list in the centre pane of the Agenda window. The timeline automatically scrolls to the day or event assigned to the selected note, or to today if the note has no date or event assigned. If there is a note with a date or event selected, the relevant day(s) or event will also be highlighted in the timeline with a gray background, and the first day in the selection is marked with an orange circle.
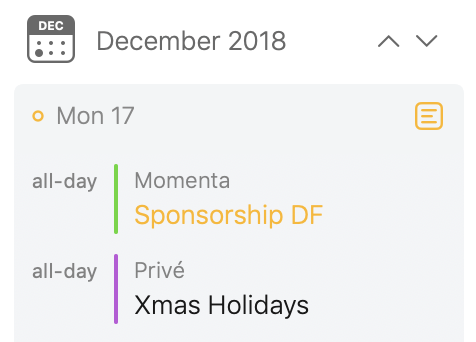
When you scroll the timeline up or down in a way that the selected day(s) or event are no longer visible, a circle button will appear next to the arrow button (or next to the plus button on iOS) in the top right corner. Clicking/tapping the circle button will scroll the selected day(s) or event back into view.
Tip: A good keyboard shortcut to remember is ⌘T or View > Show Today’s Calendar, it will recenter the timeline on Today.
Filtering the timeline
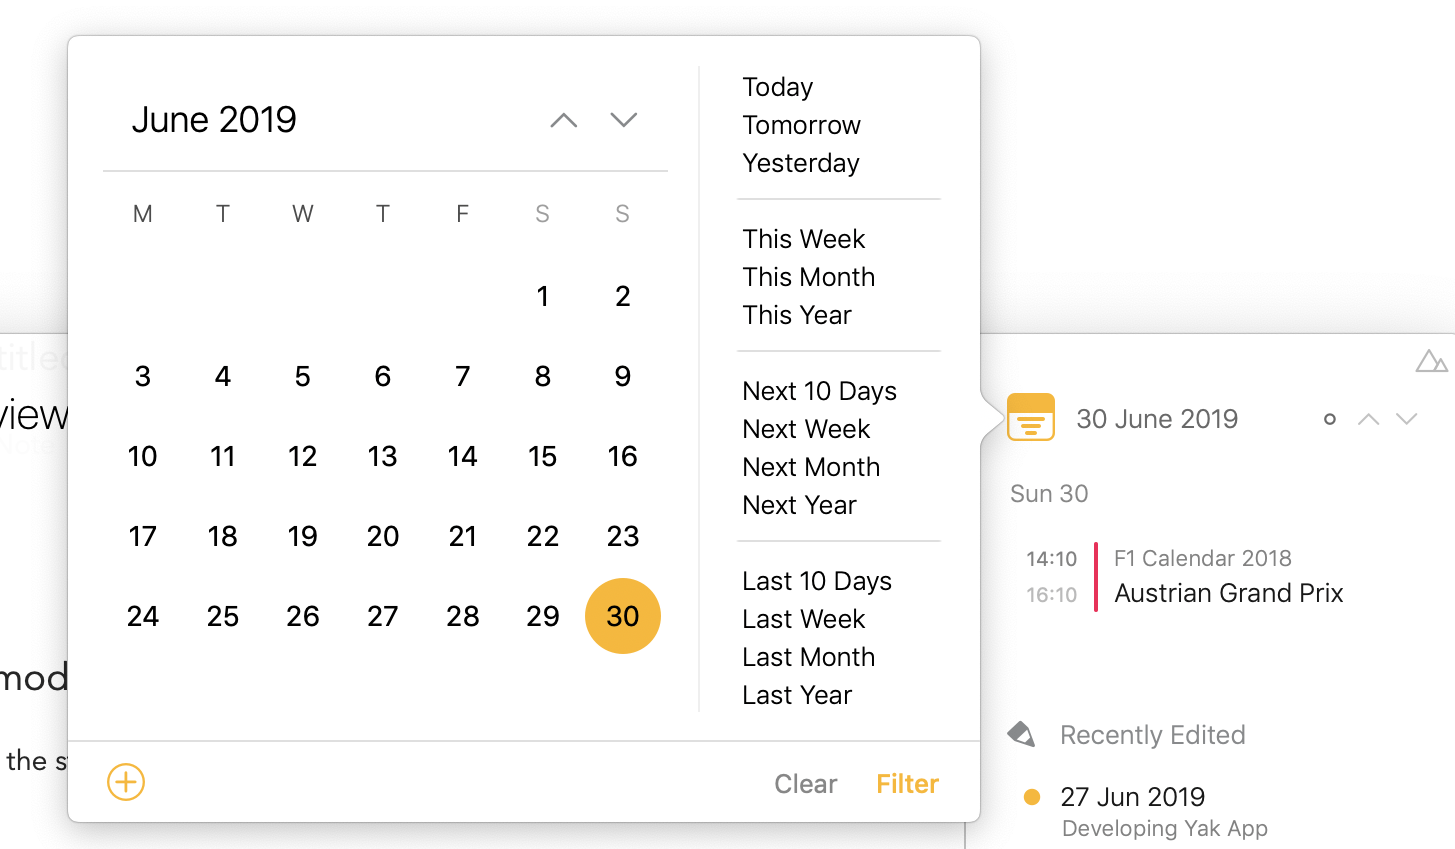
While the timeline normally automatically follows the selected notes, you can filter and thereby fix the timeline on a certain day or day range by clicking/tapping the calendar icon above the timeline.
To filter the timeline…
- Click/tap the calendar icon above the timeline.
- Select a day or day range in the calendar popover.
- Click/tap the Filter button.
While the filter is active the calendar icon will change to a orange filter icon.
To return the timeline to its normal state…
- Click/tap the filter icon above the timeline.
- In the popover that shows click/tap the Clear button.
The filter is also automatically cleared if a note is selected that has an assigned date or linked event that falls outside the filtered day range.
Creating New Events and Reminders
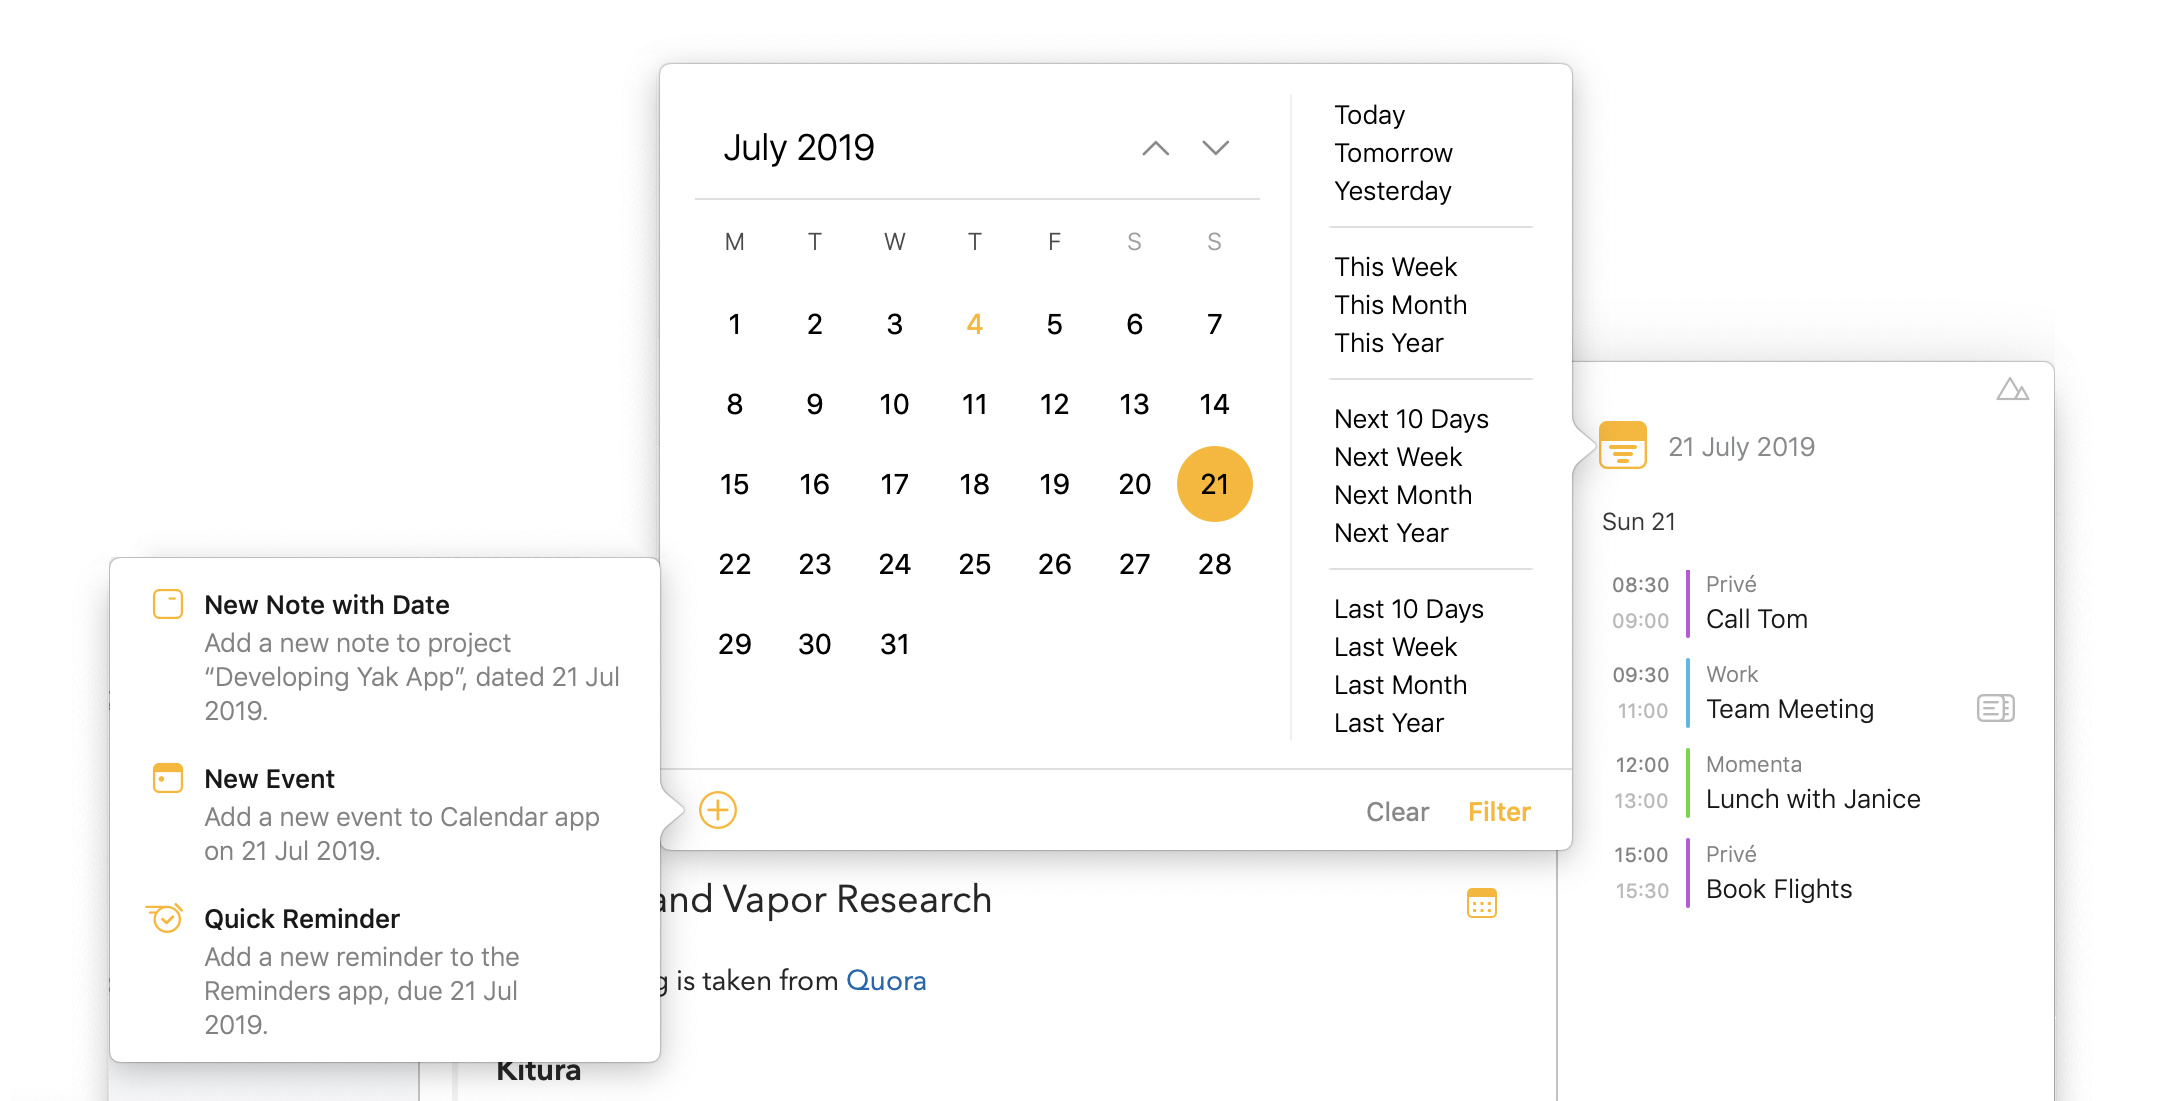
When a day is selected in the above calendar popover, a plus button will appear in the lower left corner that allows creating:
- a new note with the selected date(s) assigned
- a new calendar event
- a new quick reminder
A second way to create a new note, calendar event or quick reminder, is to click/tap any day header in the timeline.
Tip: You do not need to click/tap the final day for a new event or reminder in the list. As you can still change the dates in the popover that will show to edit the details, you can start the process by tapping any day in the timeline if you want.
Premium: The timeline allows creating a new reminder outside the context of a note, a so-called Quick Reminder. This is a premium feature only available on purchase. Also the creation of a new calendar event is only available as a premium feature.
Timeline Actions
When you click/tap the items in the timeline a menu is presented with possible actions.
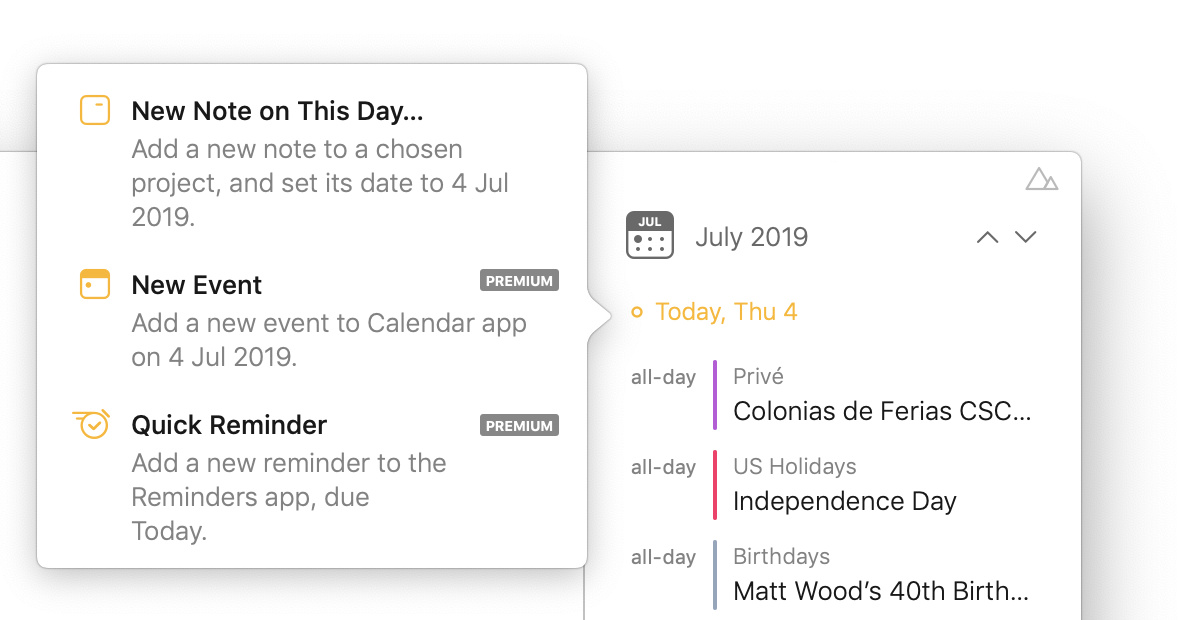
Day Actions
When tapping a day header in the timeline the following actions are available if applicable:
Go to Assigned Note – Jump to the note assigned to this day in the notes list
New Note on This Day – Create a new note with the selected day assigned
New Event – Create a new calendar event starting on the selected day (premium feature)
Quick Reminder – Create a new reminder, unrelated to any note, with the selected day as due date (premium feature)
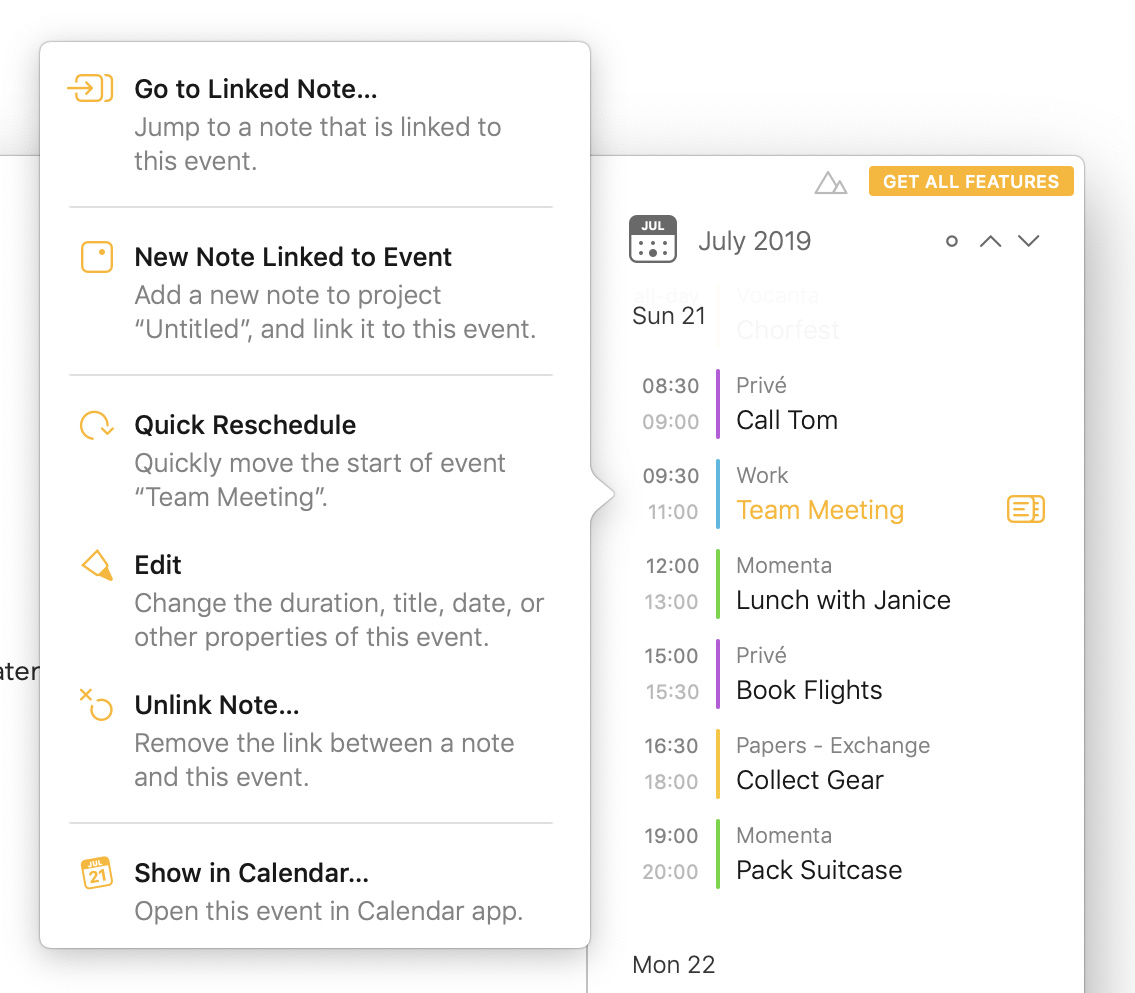
Calendar Event Actions
When tapping a calendar event in the timeline the following actions are available if applicable:
Go to Linked Note – Jump to the note linked to this event in the notes list
Link to Selected Note – Link the selected event to the note currently selected in the notes list
New Note Linked to Event – Create a new note linked to the selected event
Quick Reschedule – Reschedule the selected event to start on a different date (premium feature)
Edit – Edit the properties of the selected event (premium feature)
Unlink Note – Remove the link between the linked note and the selected event
Show in Calendar – Open the default calendar app and show the selected event
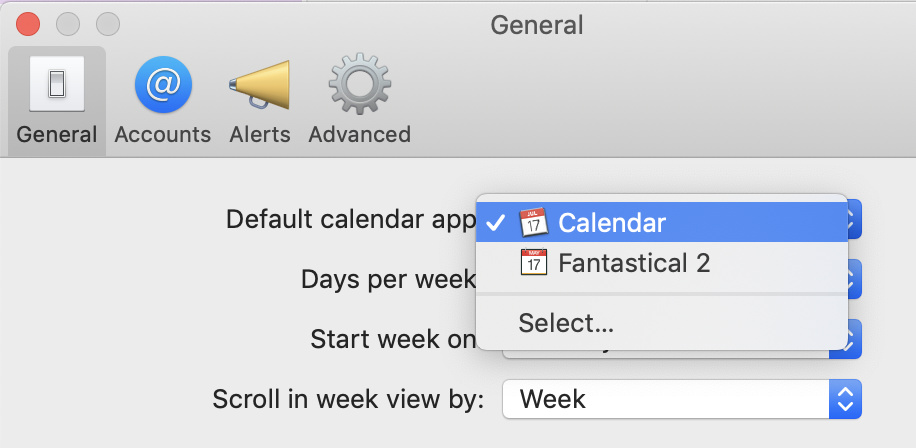
Tip: On macOS Agenda opens your default calendar application when using the Show in Calendar action. You can change your default to your favourite calendar application by going to the preferences in the system Calendar app:
If after the above change, Agenda still ignores the default calendar app, this solution might help.
Reminder Actions
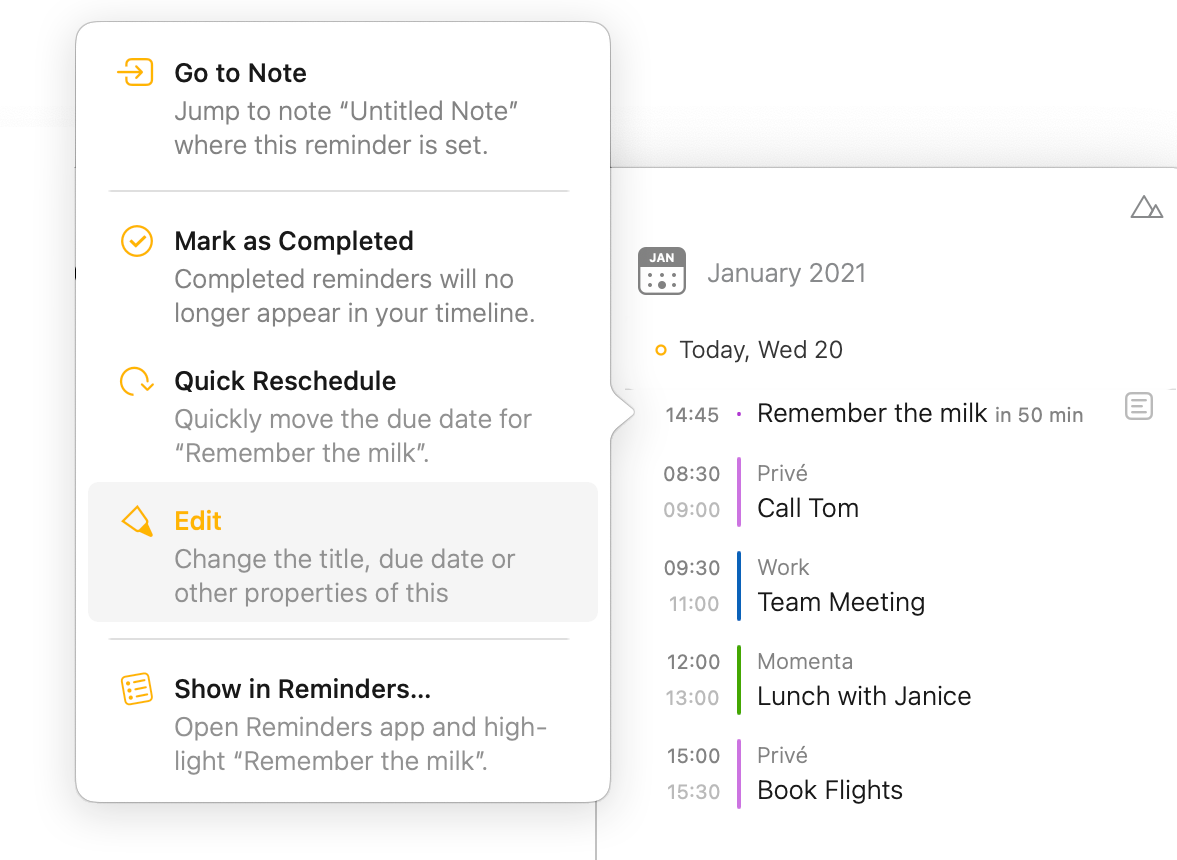
When tapping a reminder in the timeline the following actions are available if applicable:
Go to Note – Jump to the note where the selected reminder was added to.
Add to Selected Note – Add the selected reminder to the note currently selected in the notes list
New Note with Reminder – Create a new note with the selected reminder
Mark as Completed – Mark the selected reminder as completed
Quick Reschedule – Reschedule the selected reminder to a new due date (premium feature)
Edit – Edit the properties of the selected reminder (premium feature)
Show in Reminders – Open the Reminders app and show the selected reminder
Troubleshooting
My Google or Outlook calendars don’t show up in Agenda
Be sure to check whether the calendars do show up in the system Calendar app. If not you will have to configure your Google or Outlook calendar account in the System Preferences (under Internet Accounts) on macOS or in the Settings app on iOS and iPadOS (under Calendar). Once the calendars show up in the system Calendar app, also Agenda should see them. If they do show in the system Calendar app but not in Agenda, then see below.
My work calendars and reminder lists don’t appear in Agenda
If your Mac, iPhone or iPad is managed by your work through so-called mobile device management (MDM) profiles, it might prevent Agenda from accessing your work calendars (e.g. from Office365 or Exchange). To verify whether this is the case, go to Settings > General > Profiles to check if you have indeed an MDM profile installed and other it has the following specific restriction listed: “Opening documents from managed to unmanaged apps not allowed”. If you have an MDM profile with this restriction installed by default it will not allow sharing of your calendars with Agenda.
To resolve this, you will need to speak with your workplace’s administrator, who will be able to grant Agenda the necessary clearance it needs to access your managed calendars. Specifically, Agenda either needs to be added as a managed app in the MDM profile, which allows it to access iOS’s calendar data, or the “Opening documents from managed to unmanaged apps not allowed” restriction needs to be removed from the MDM profile.
Tip: Fellow Agenda user @darkgrunge has posted this tip that will give read-only access if you’re affected by an MDM profile and can’t get your workplace’s administrator to allow Agenda to access your calendar: Adding an Outlook calender and email - #9 by darkgrunge
