Templates allow you to create new notes with pre-filled content in Agenda. This is great for standard forms, meeting notes, shopping lists, standard inventories, and anything else where you typically want to begin from a common set of content.
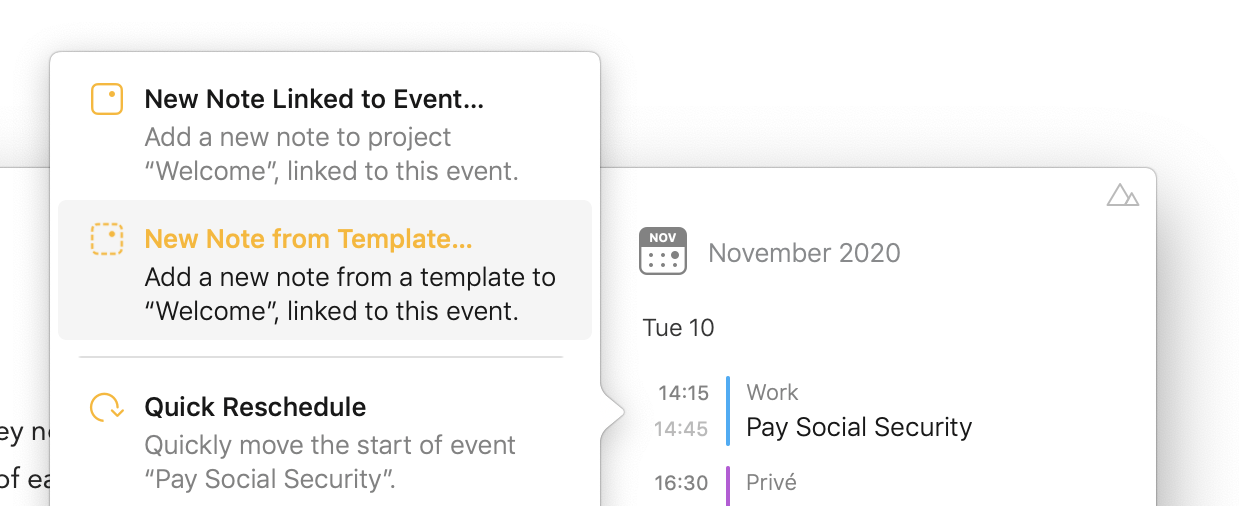
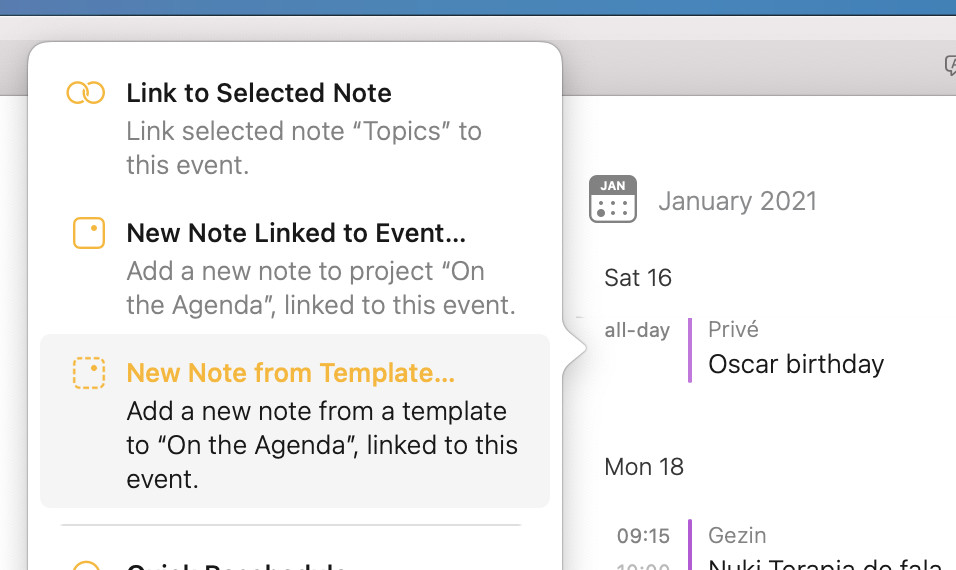
Imagine, for example, that you have a regular meeting each week, and you have setup a recurring calendar event for the meeting. With Agenda templates, you can create a new note for each meeting, with some pre-filled content, and link it to that week’s meeting event.
Templates are a premium feature. You need to purchase the premium feature pack to unlock them.
Creating Templates
You can create a template in two main ways: first, you can take an existing note, and make a template from it; and second, you can use the Template Manager.
Creating a Template from an Existing Note
To do this on macOS, select the note and choose Save as Template… from the Note menu, or the cog button menu at the bottom of the note.
On iOS, tap the cog button at the bottom to save the note as a new template.
Creating a Template from Scratch
Creating a template from an existing note is a common approach, but you can also build a template up by hand, entering the text and styles directly. For this, you use the Template Manager.
To bring up the Template Manager on macOS, choose the Window > Template Manager menu item. You can also click and hold the main + button at the top of the notes list, and open the manager from in there.
On iOS and iPadOS, you tap and hold down on the + button in order to show the option to bring up the Template Manager.
Once the Template Manager is showing, you can tap the + to add a new template, name it, and enter some content.
Making Notes from Templates
Once you have a template, you can make new notes from it. This will create a new note in the project of your choosing, and copy in the template content.
On macOS, you do this using the File > New Note from Template… menu, or by using a click and hold on the main + button at the top of the notes list.
On iOS and iPadOS, you can tap and hold on the + button to make a new note from a template.
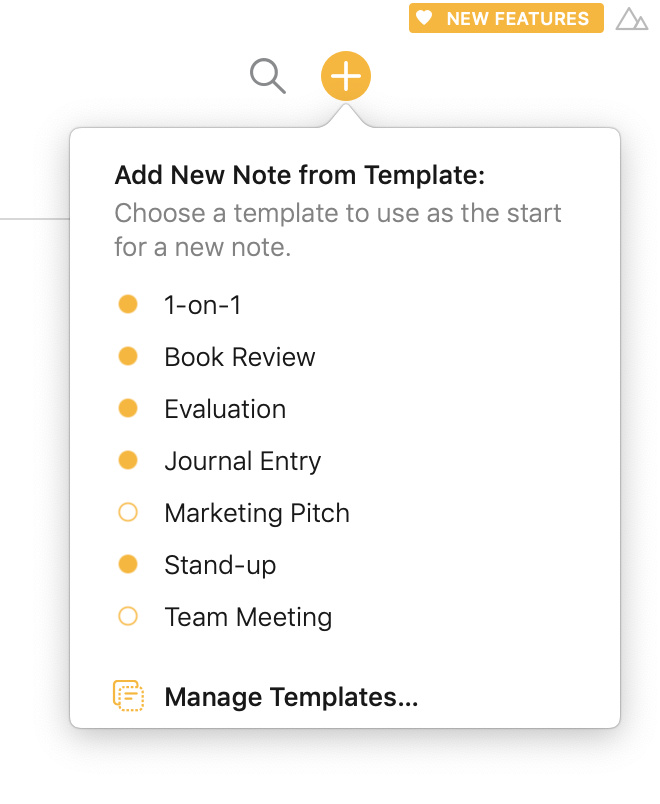
Click/Tap and hold the plus button to make a new note from a template.
Managing Templates
As discussed above, the Template Manager is a place to organize your templates. You can create new templates and edit them directly, but you can also remove, rename and edit existing templates.
To bring up the Template Manager on iOS and iPadOS, tap and hold down on the + button. On macOS, click and hold on the main + button.
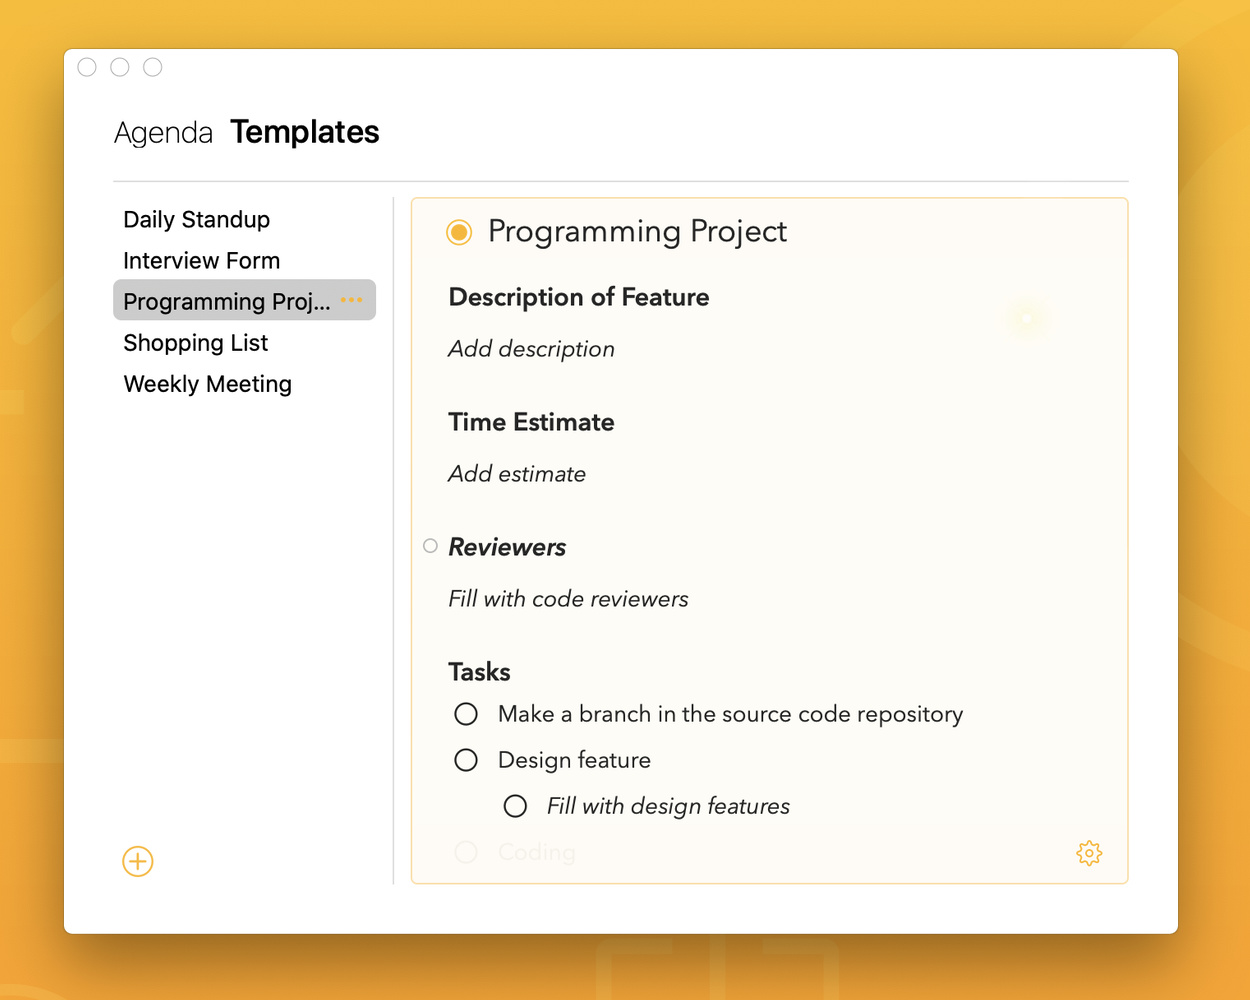
The Template Manager allows you to create, edit, rename, and delete templates. Click/Tap and hold the plus button to reach the Template Manager.
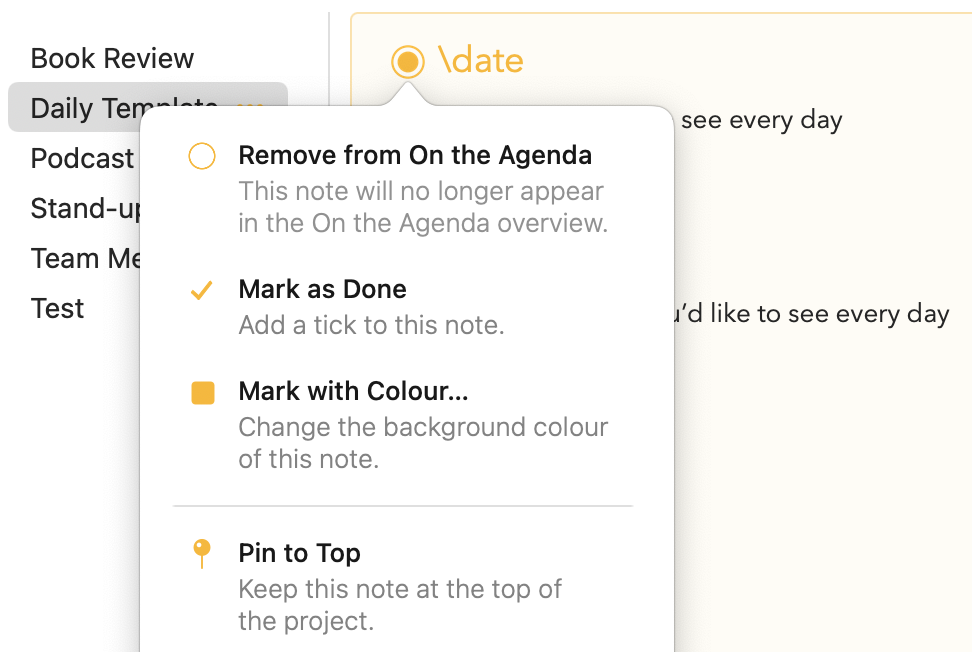
You can also set certain properties for a template, like the background color or whether notes created from it should be pinned on top by clicking/tapping the dot button next to the title:
Template Placeholders and Text Actions
Text Action placeholders allows you to insert short commands that upon converting the template to a new note get dynamically converted and expanded into plain text. Similar to typing \date in a regular note to insert the current date, you can type \date in a template to make it insert the date at the time of creating a new note from the template. You can insert the placeholders by clicking/tapping the button in the lower right corner of the note:
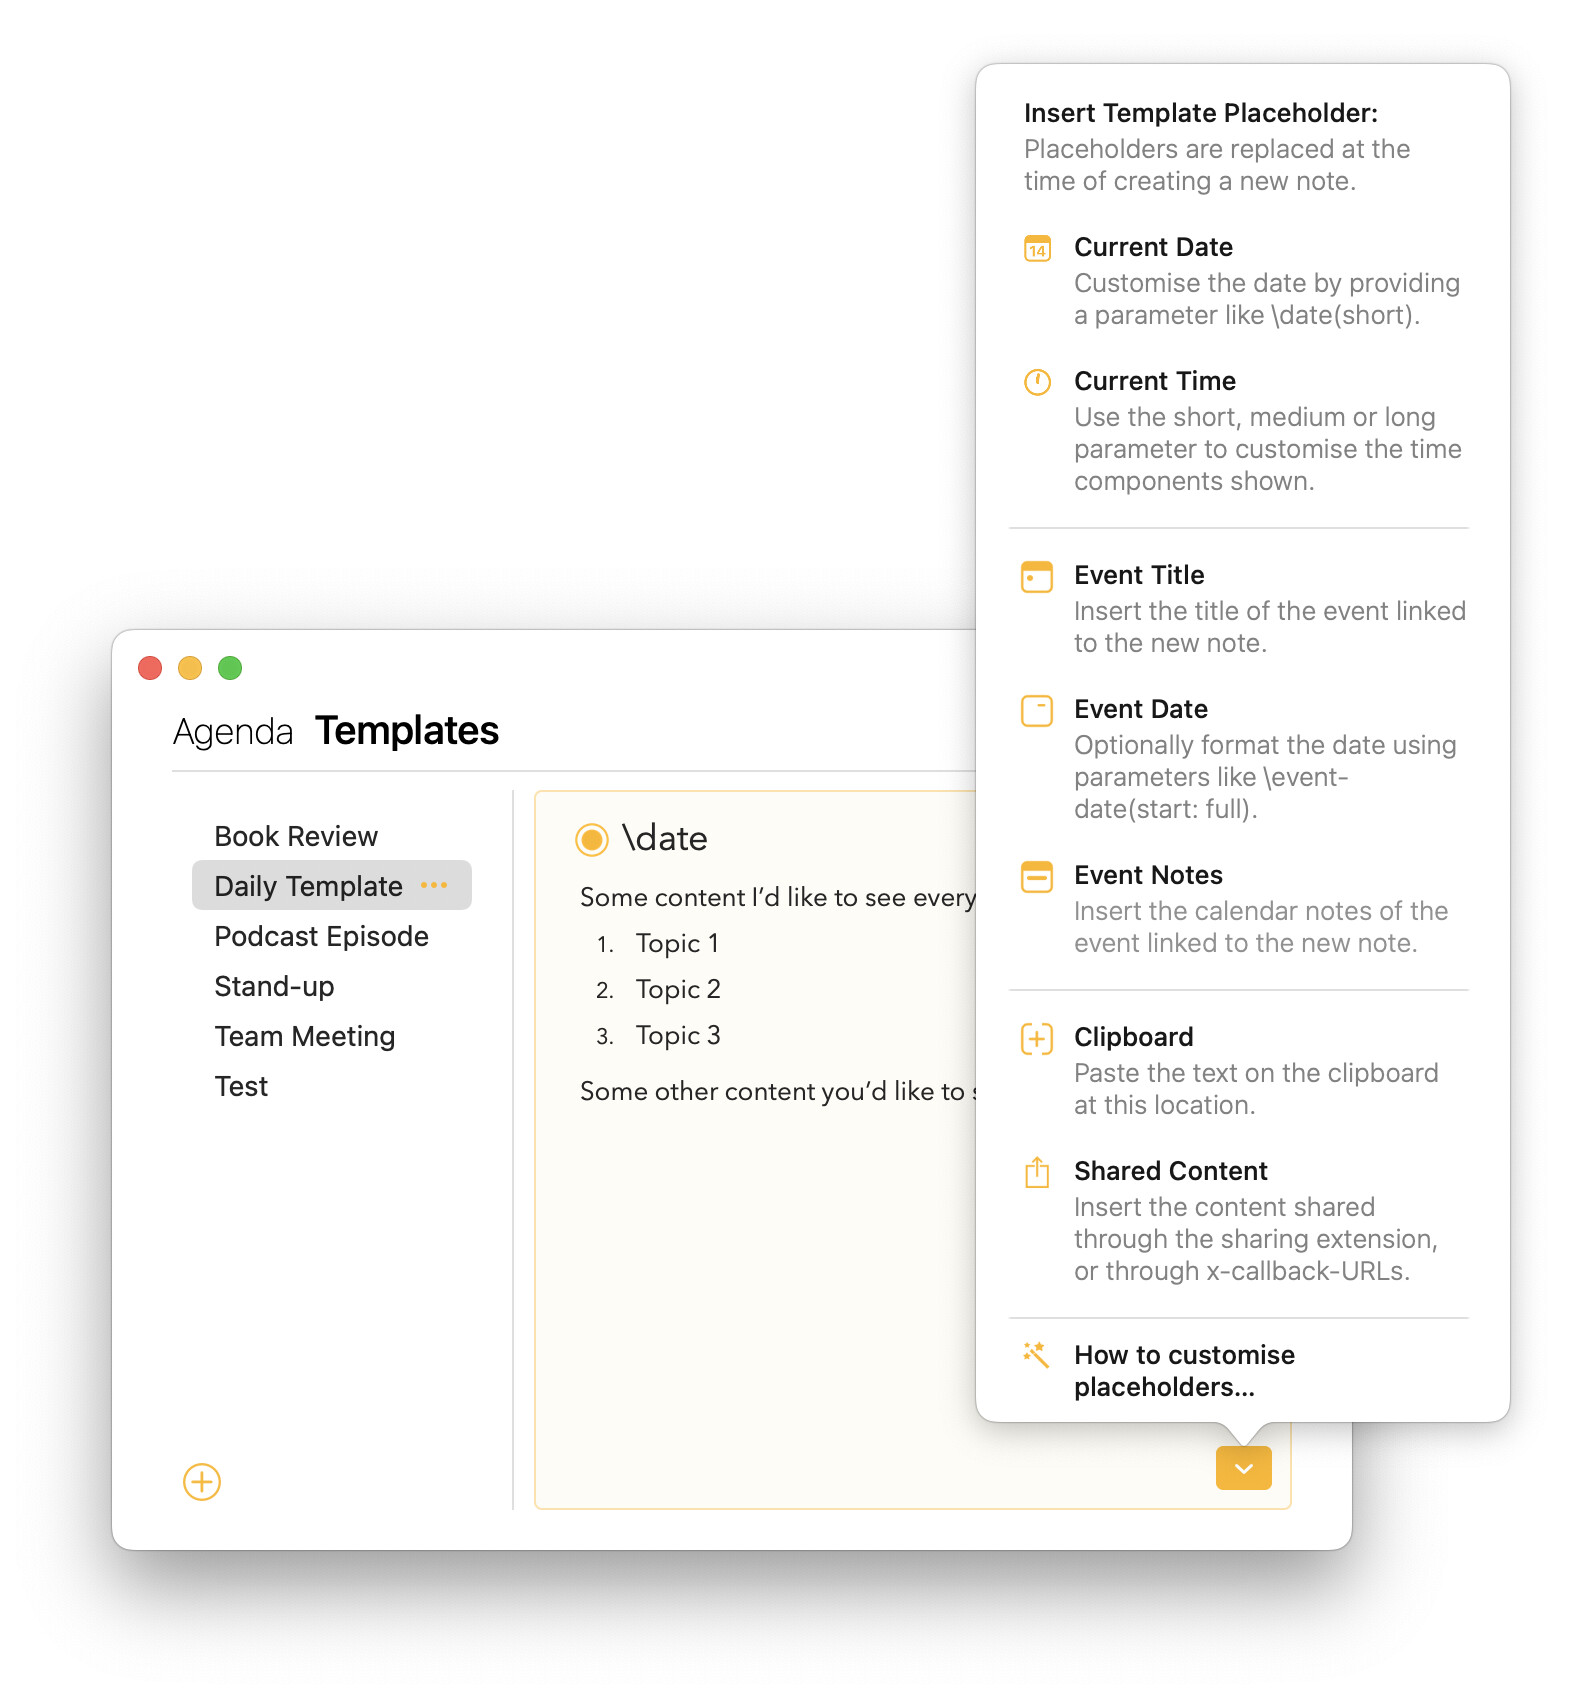
Alternatively, you’ll find a complete overview of all actions that you can type into your templates in the post below.
Examples
For some more create examples of how you could make use of templates in your daily workflows, check out this Talk article: