Getting started with collaboration
Agenda is the perfect personal note taking tool, but for certain notes, you want to be able to collaborate with other Agenda users. Perhaps you want to allow them to follow the evolution of the note as you edit it, or you want to edit the note collectively. Collaboration in Agenda provides for these scenarios in a straightforward and secure way.
To take part in a collaboration, you need to have an Agenda Account. You can sign up for an Agenda Account in the Agenda > Settings… area of Agenda for macOS, or by opening the right panel and tapping the button bottom-left on iOS and iPadOS.
Once you have an Agenda Account, you are able to accept invitations from other Agenda users to collaborate on a shared note.
In order to share your own notes, sending invitations to others, you will need to have purchased the premium features. Once the features are unlocked, you can click or tap the collaboration button top-right on any selected note, in order to share it and invite others to join. (Note that the people you invite do not need to have the premium features to accept your invitation.)
Premium: Inviting others to join your note requires a premium feature, which requires a purchase, but those accepting an invitation do not need the have the premium features, they can use a free download of Agenda.
Sharing a note and inviting others
There are a number of ways you can invite others to join a collaboration. You can send them an invitation link, use the Shared with You feature of the Messages app, or have Agenda send them an invitation email if you have collaborated with them on other notes.
Inviting with a link
To invite other Agenda users to one of your notes by sending them an invitation link:
- Make sure the note is selected first, by clicking or tapping on it.
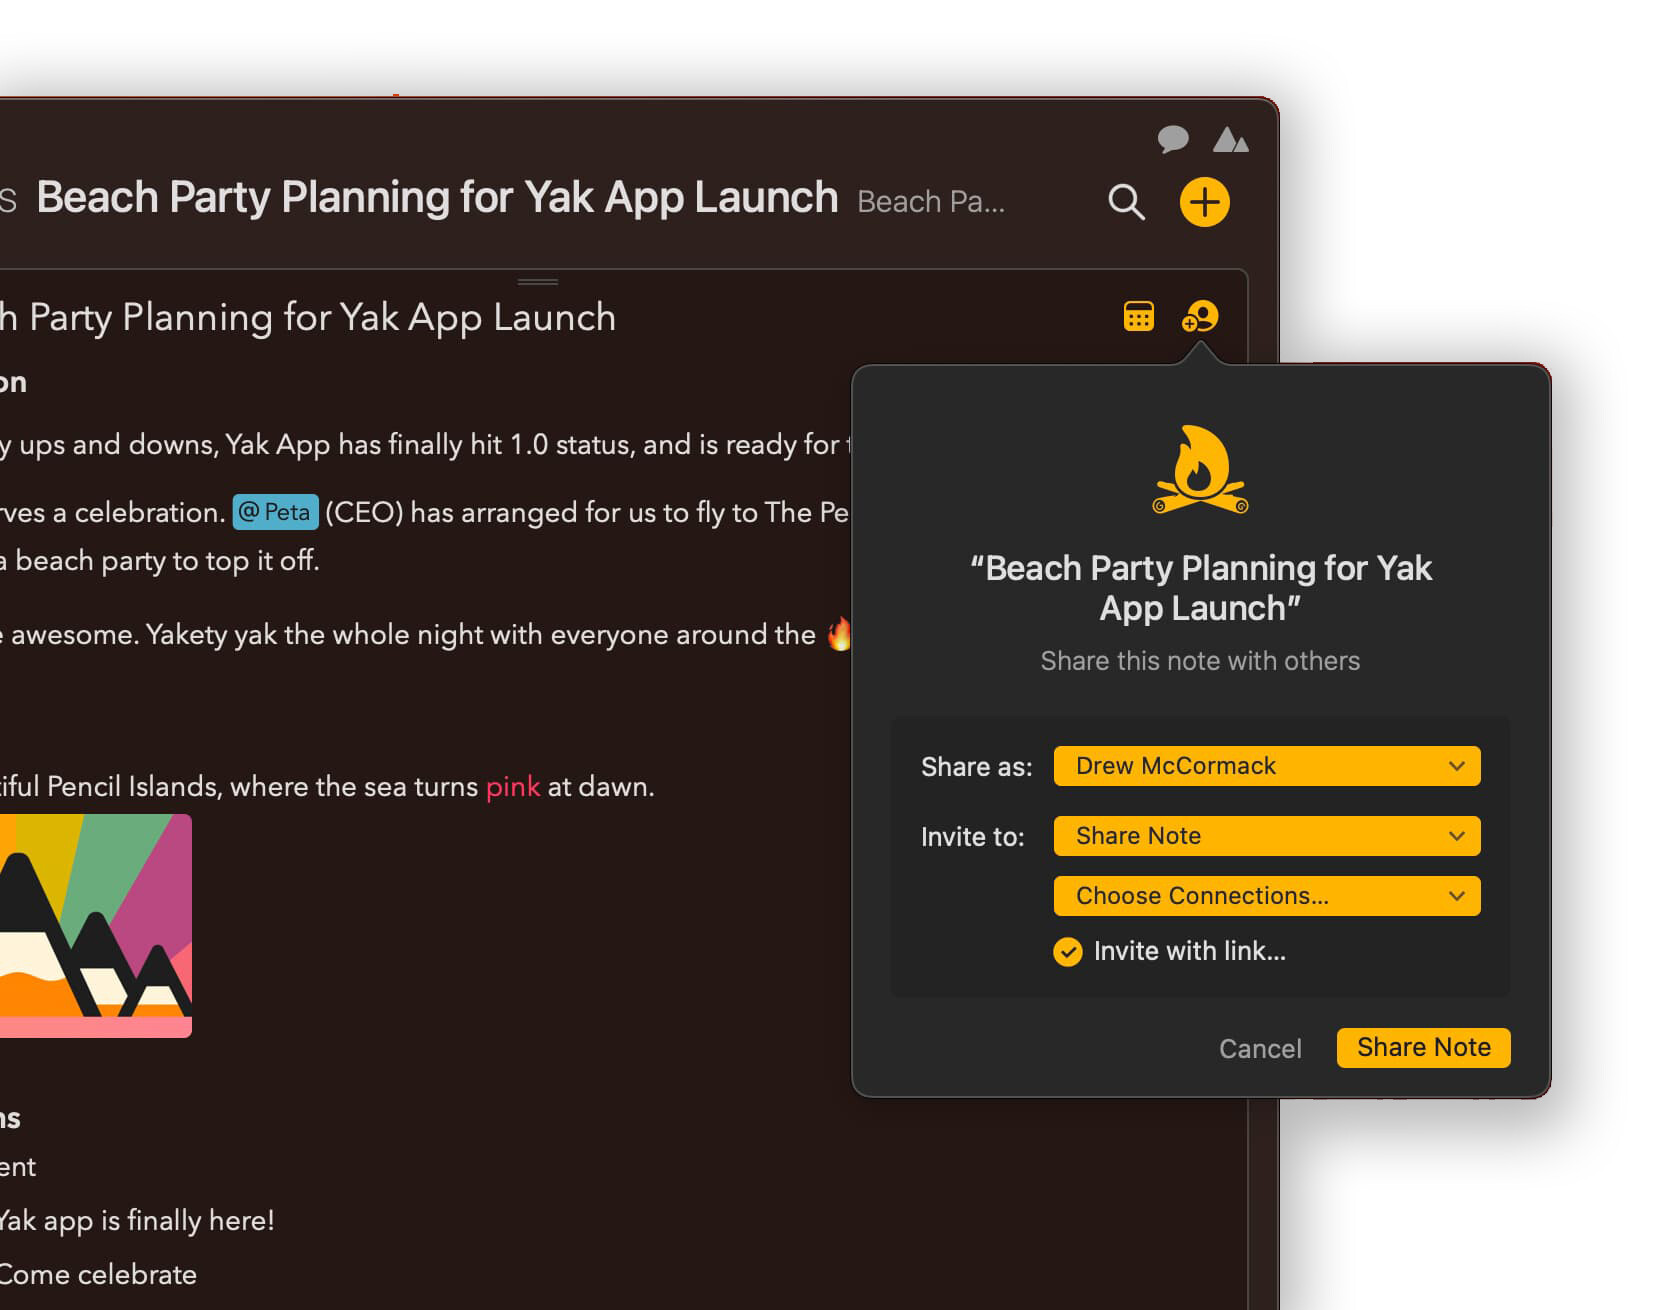
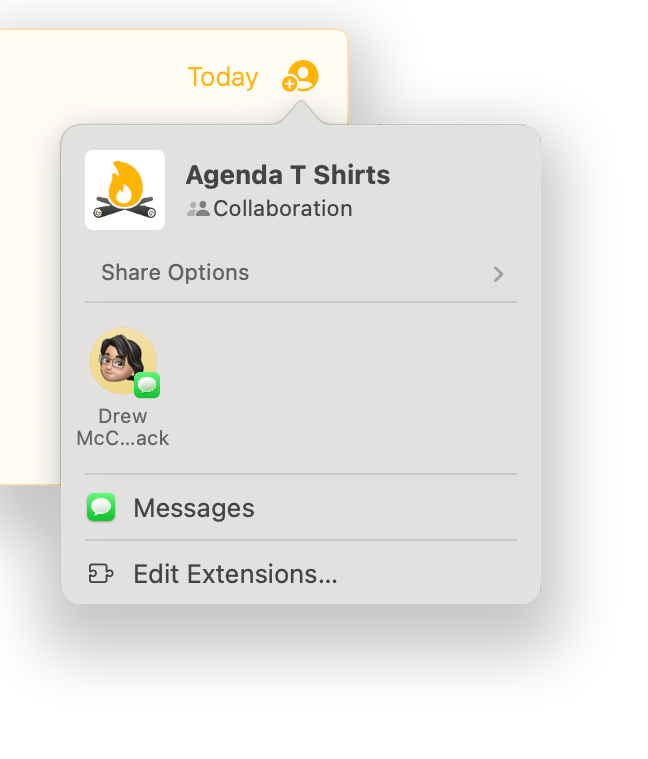
- Click/tap the collaboration button top-right on the note.
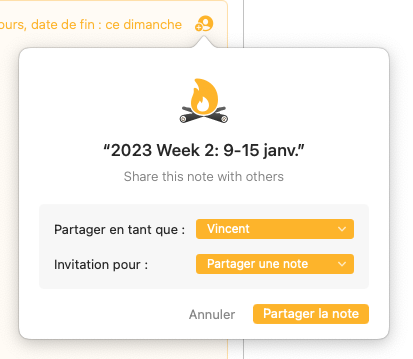
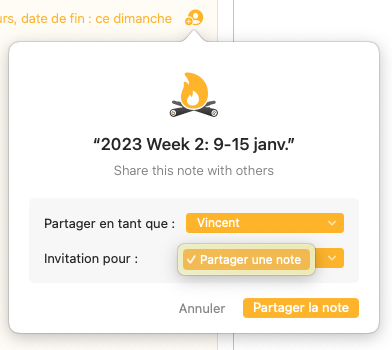
- Make sure the Invite to: popup button is showing Share Note.
- If you see the Invite with link… checkbox, make sure it is checked.
- Click on the Share Note button at the bottom.
- You should see a list of services that you can use to share the link.
- Click on the service you want to use, and send the link.
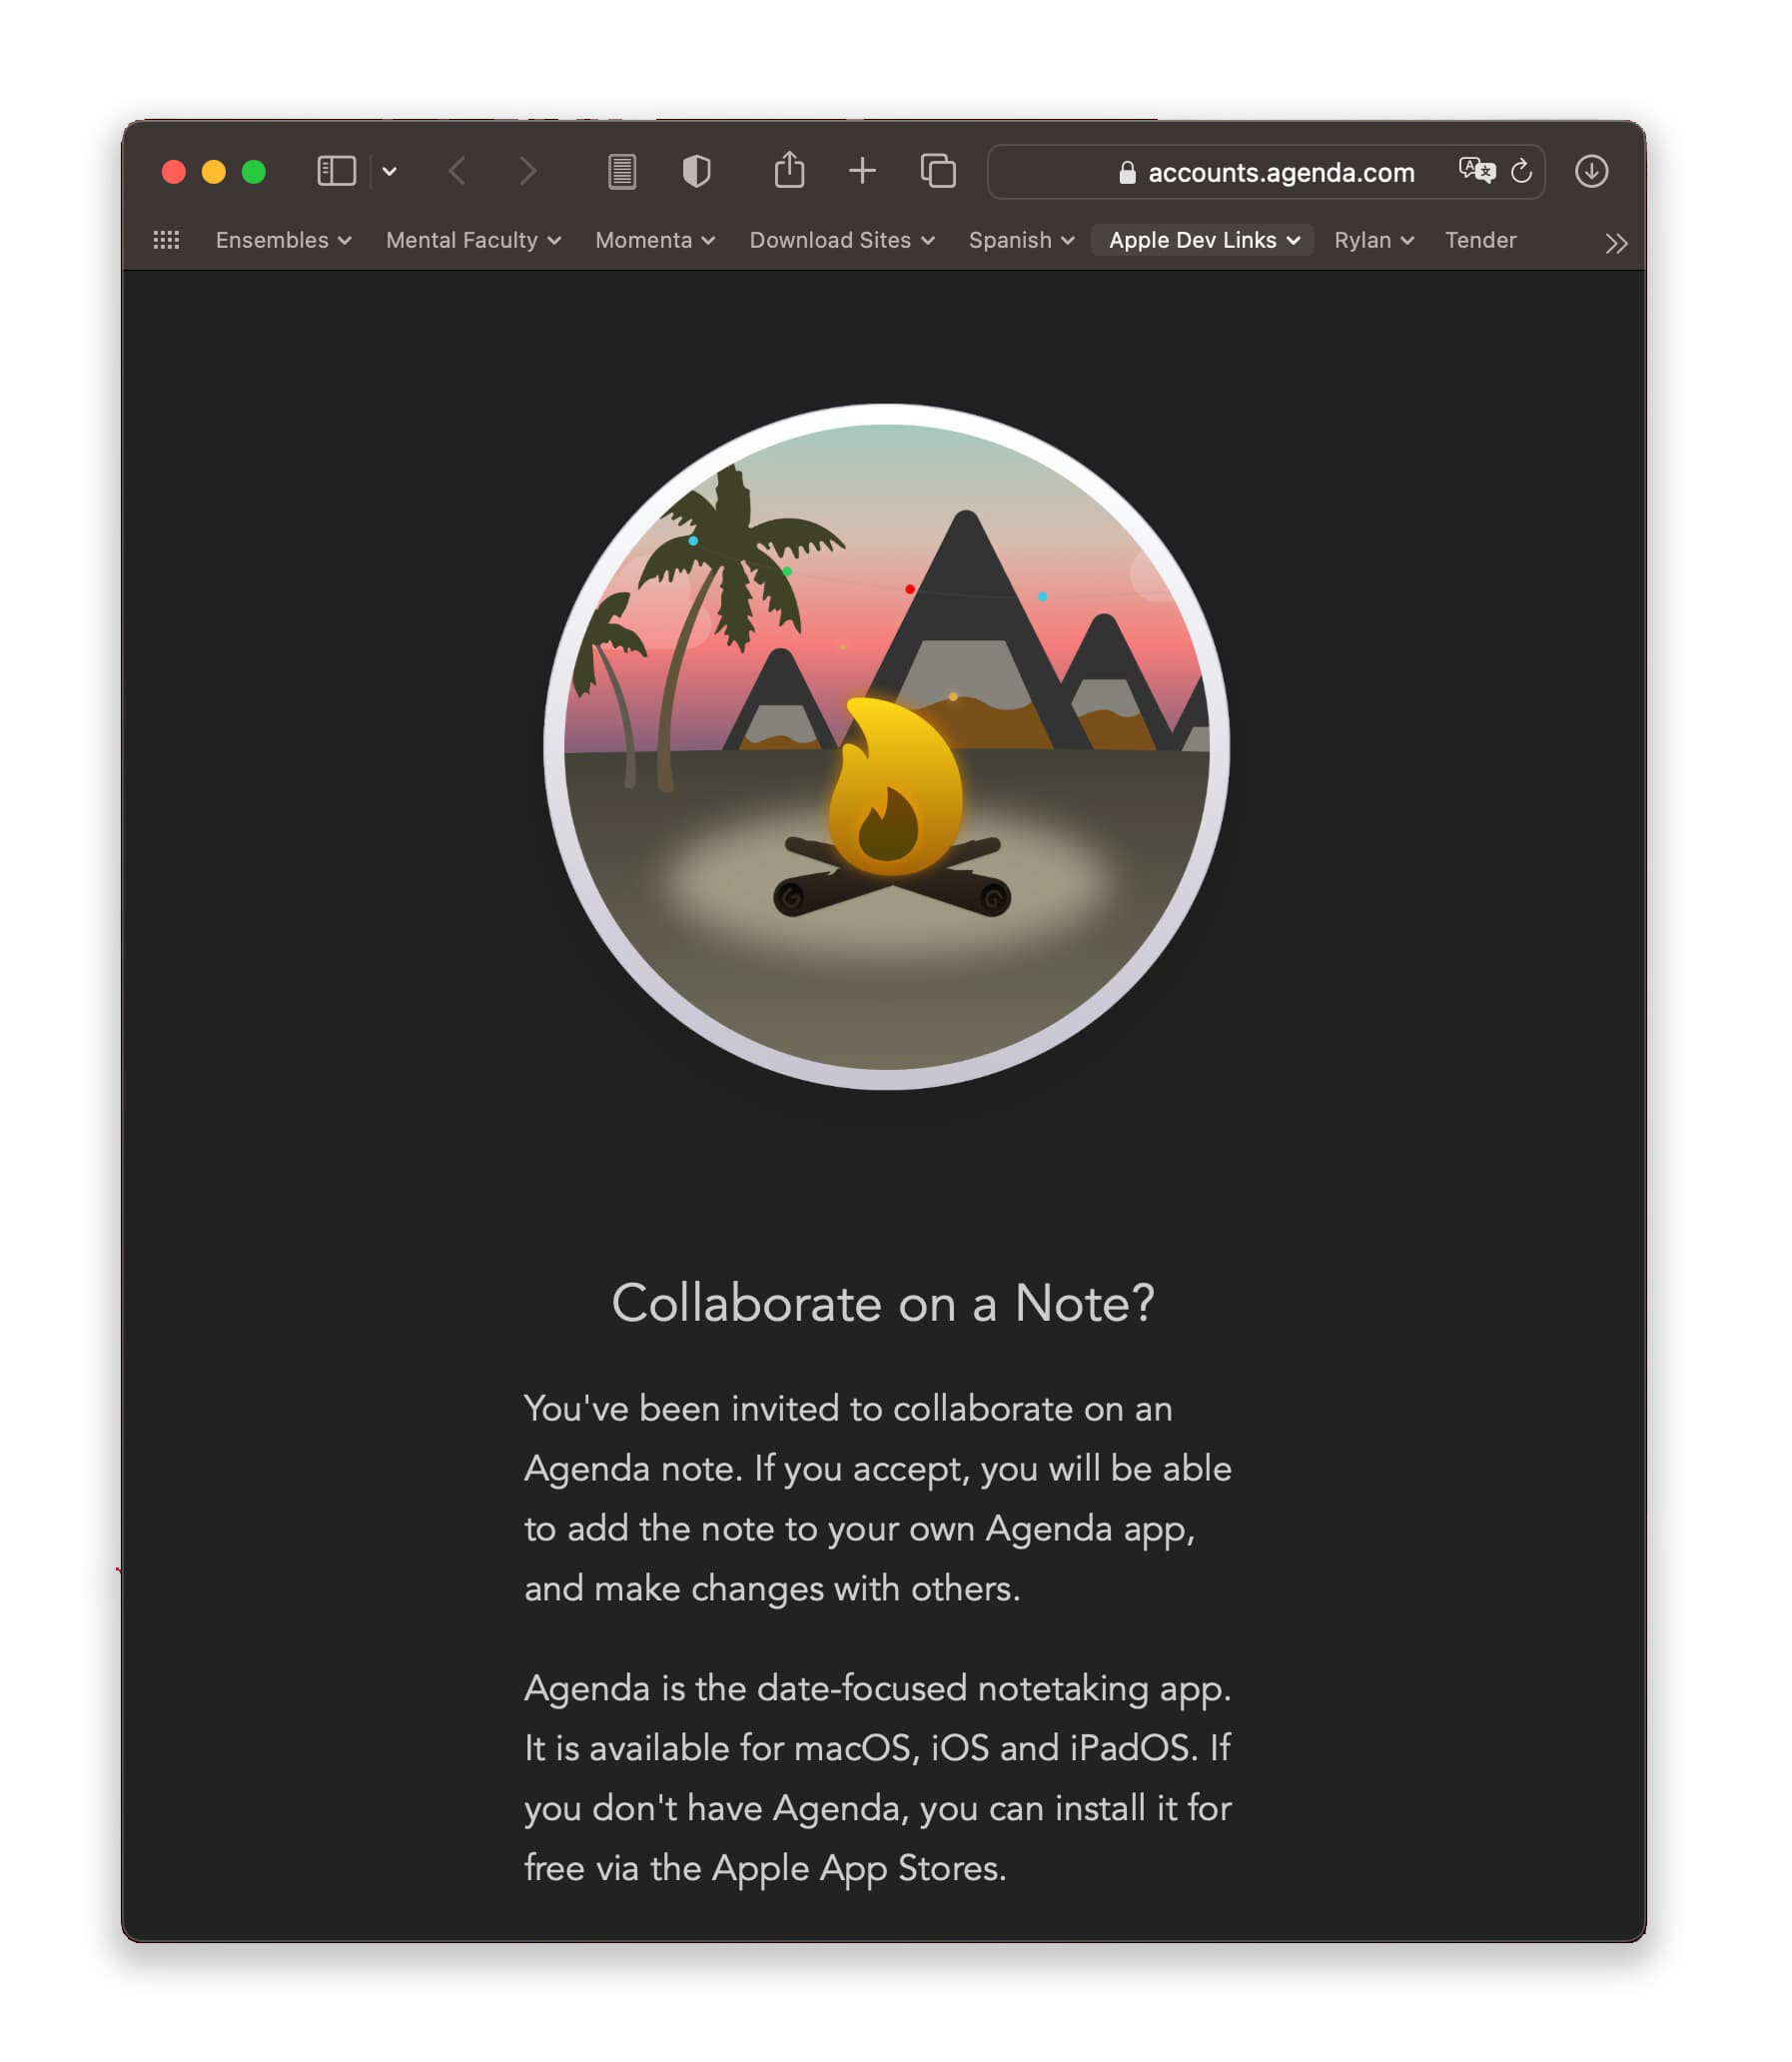
The recipient(s) can open the link in a web browser. They will receive information about how to install Agenda, and how to accept the invitation.
Important! Anyone who has the link can join the collaboration. If the content of the shared note is sensitive, be very careful how you provide the link to others.
Collaboration “Bubbles”
If a recipient(s) accepts an invitation you sent, a round “bubble” will appear top-right in your copy of the note, with their initials. The bubbles show you who is sharing the note, and the order they last made some change to the note.

Inviting known connections
Once you are partaking in a collaboration with another Agenda user, you can invite them more easily to future collaborations.
- Select a note to share, and bring up the sharing panel.
- In the section Invite to:, click/tap on Choose Connections… and click on the checkbox for those you want to invite.
- Click the Share Note button.
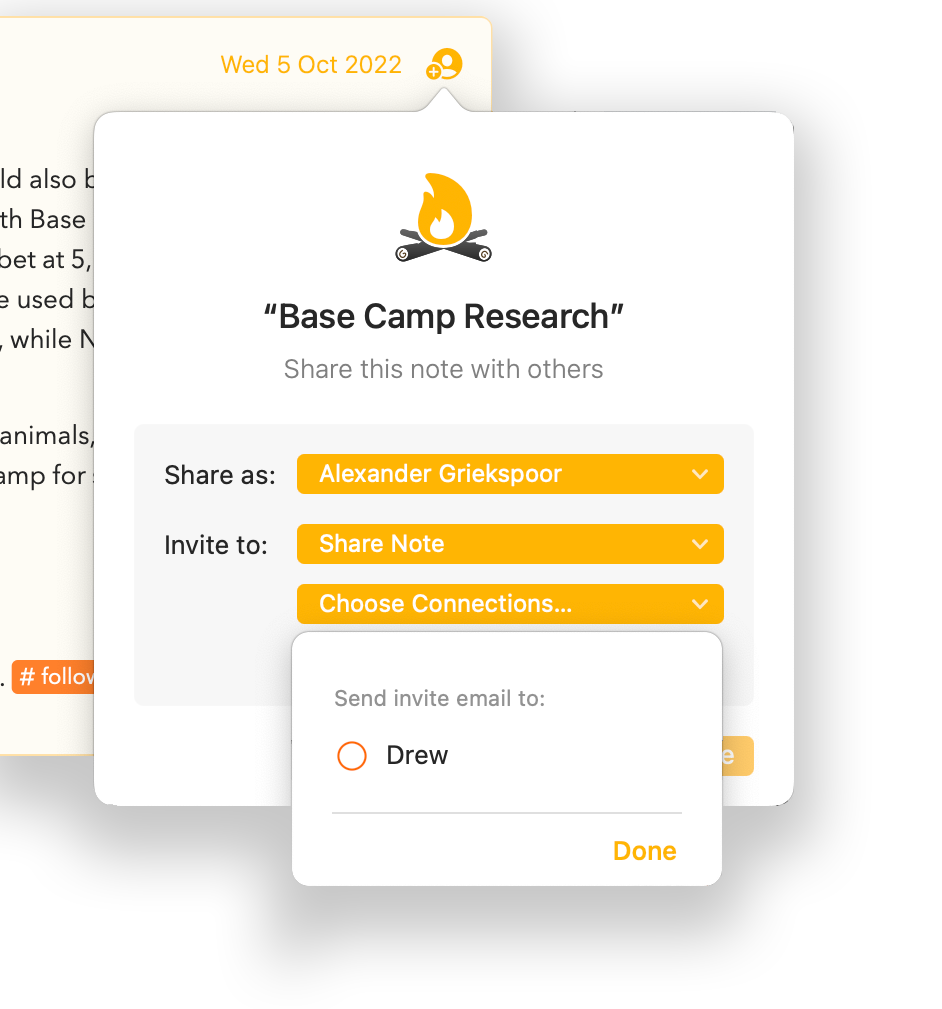
The connections you selected will be sent an email by Agenda, with details of the invitation, and a button they can press to accept the invitation and join the collaboration.
This option is ideal for people you regularly share notes with. Just click on the checkboxes, and share.
Note: Neither party involved gets to see the email address of the other party. This is handled transparently by Agenda, and the email is not sent from your own email account.
Inviting via Messages (Shared with You)
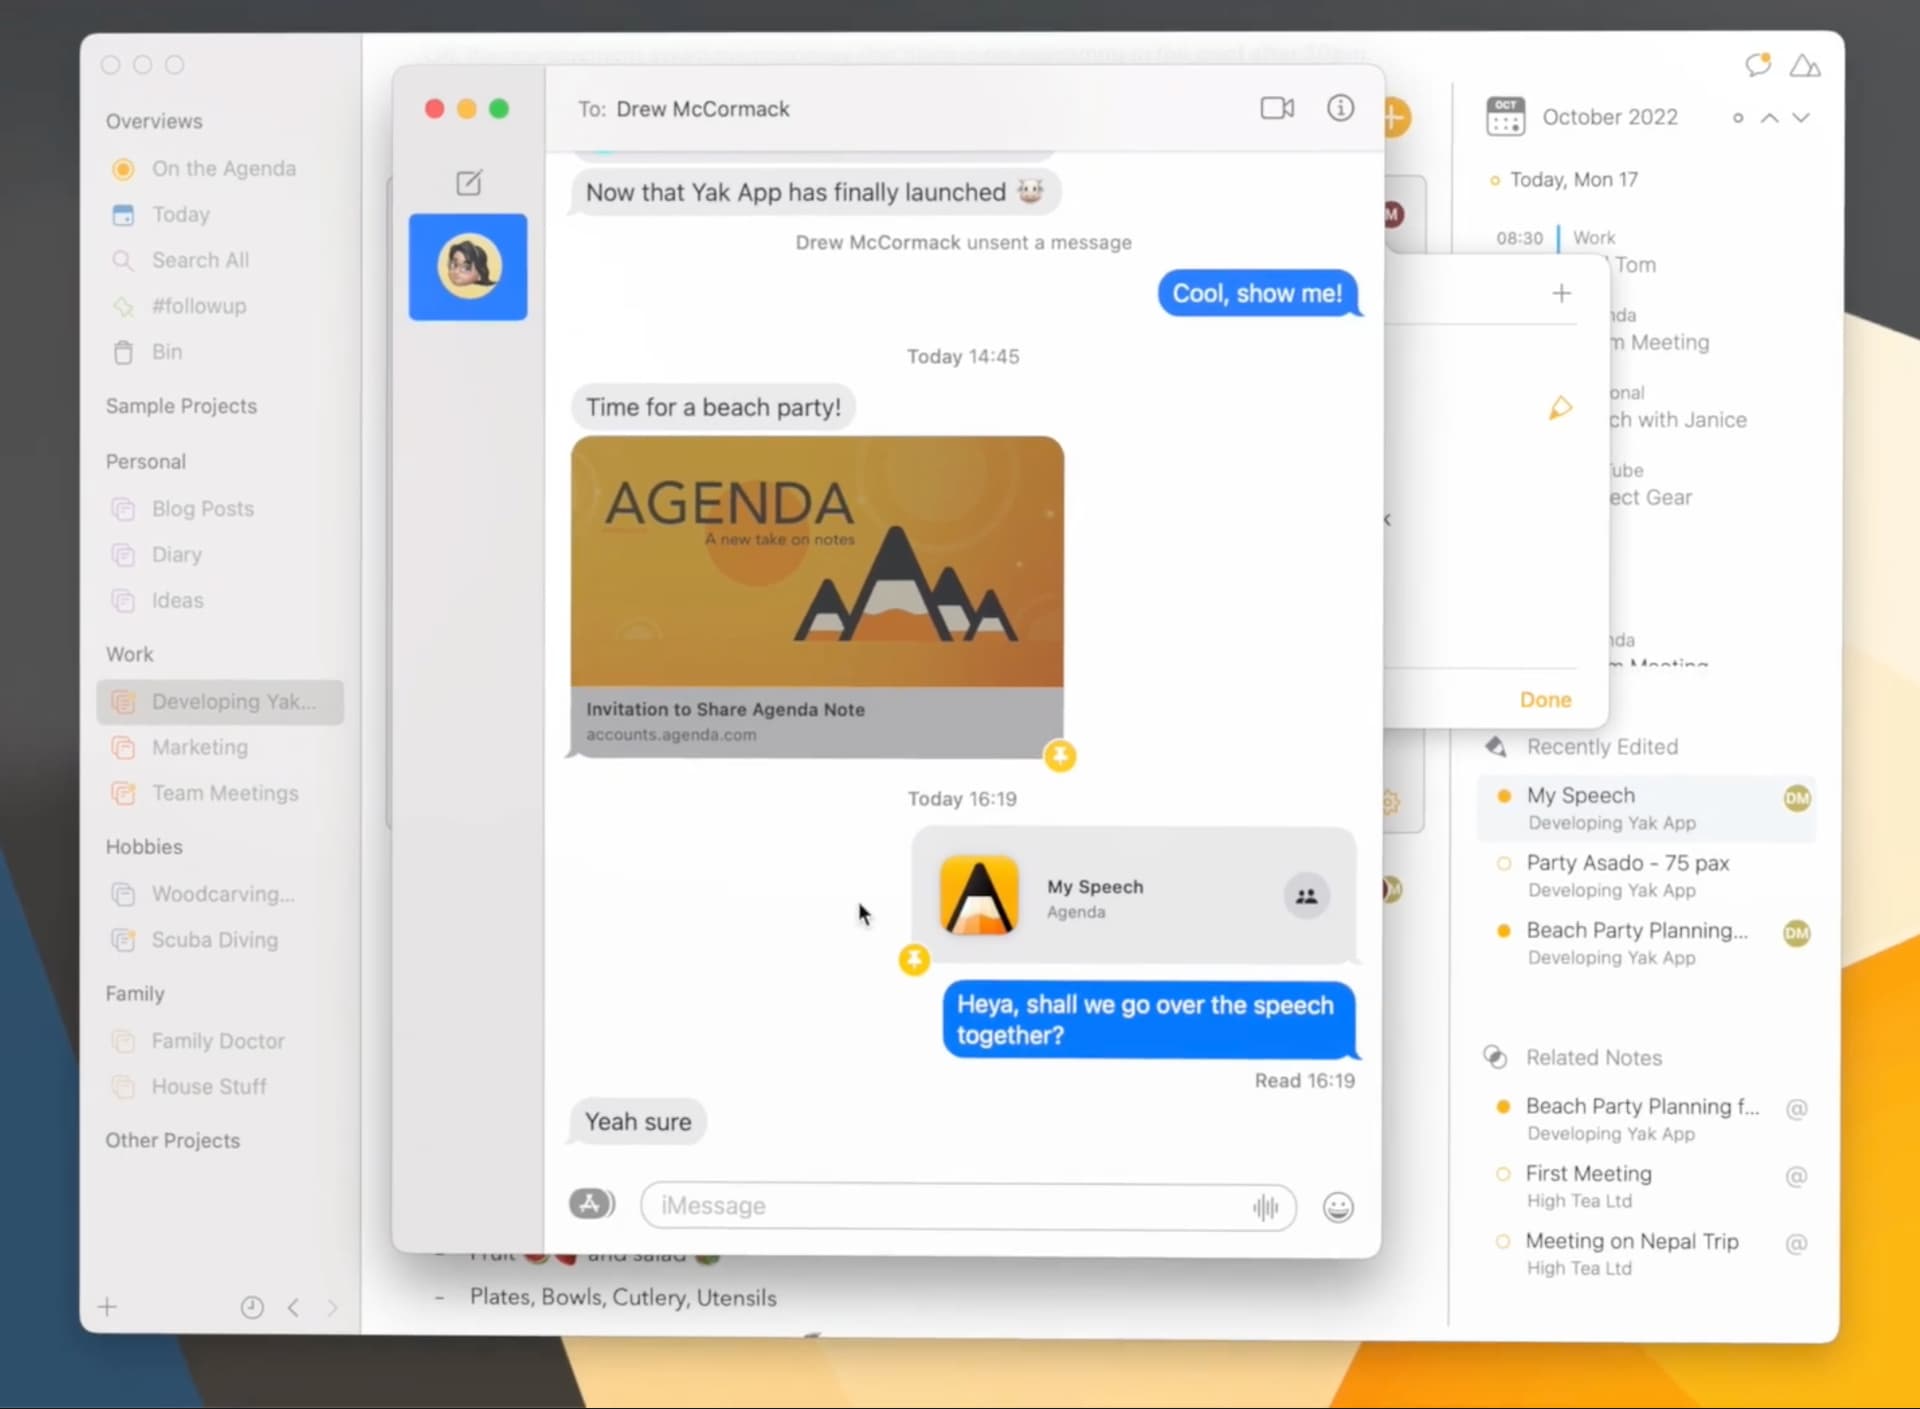
Shared with You is a feature added in iOS 16, iPadOS 16, and macOS 13. You can invite others to a collaboration via the Messages app, but also couple content to a Messages thread for discussions.
Agenda supports an option for using Shared with You in Messages.
- Select a note to share, and bring up the sharing panel.
- Locate the popup button for Invite to:, and select Share Note and Chat.
- Click the Share Note button.
- A popover will appear where you can choose the Messages app, or particular individuals to invite.
- Make a choice, and Messages app will open with the invitation.
- Add any recipients you wish to the message thread using the field at the top.
- Enter some text to the message explaining the invitation.
- Press return to send.
- Go back to Agenda. Your note should be shared, as seen by your user bubble top-right.
- As people accept the invitation, you should see their user bubble appear on the note.
Now that you are using Shared with You, you have ways of navigating between the note and the messages thread, and back again. These are discussed further below.
Choosing your own handle
Agenda supports a flexible system of user handles. You are not restricted to just using the name of your Agenda Account. You can choose any handle you like for each note.
As an example, for notes shared at work, you might want a handle more formal. Perhaps you are “Janice Jones” or “Dr. Tom Striven”.
If you have a note shared with a group of close friends, you could call yourself “Jan” or “Tom”, and for the family shopping list, you might just be “Mom” or “Dad”.
The choice is yours when it comes to the handle people will see in a shared note. You choose the handle when you share or join a note, but you can change it at any time for any note.
To choose or create a handle when sharing a note:
- Select a note to share, and bring up the sharing panel.
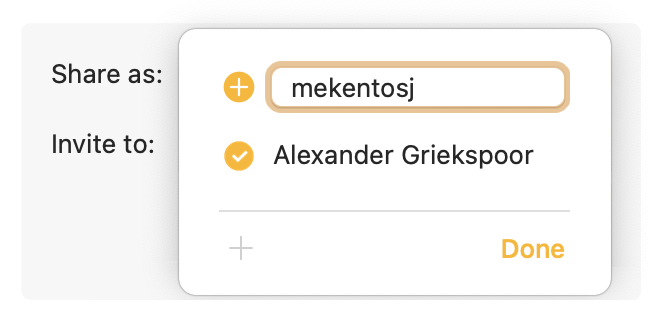
- Locate the popup button for Share as:, and open it.
- Click/tap on one of the checkboxes to select that handle.
- To create a new handle, click the + button and enter it.
- Click Done and then share the note.
This same button appears in other contexts, such as when accepting an invitation to join a note, and when updating the participants of a note that is already shared.
Inviting additional people to your note
Once you have shared a note, or joined a note shared by others, you can invite others to join (requires premium features).
- Select the shared note by clicking or tapping it.
- Click/tap on the user bubbles top-right.
- In the Participants panel which appears, click the + button.
- Select any known connections you wish to invite.
- Select the Invite with Link… checkbox if you would like to send an invitation link via a service.
- Click the Invite button.
- If you had Invite with Link… checked, select which service you want to use to send the link.
Joining a shared note
You accept an invitation to collaborate on a note in a variety of ways, depending on how you have been invited. Common to all approaches, you have to choose what user handle to use for the new note, and also which project you want to add the note to.
Opening an invitation link
If you received an invitation link, and wish to see the invitation:
- Open the link in a browser.
- If you have Agenda installed, the browser should ask if you want to open the invitation in the app.
- If you don’t have Agenda installed, follow the instructions to install it.
- Click the button to open the invitation in Agenda.
- Decide if you want to accept the invitation.
- If you want to join, choose a user handle to use with the Join as: button.
- Select a project to add the note to in Add to:, or choose the option to put the note in a new project.
- Click on Add Note to accept the invitation and add the note to your Agenda.
Note: Agenda will never add the shared note directly when you click the invitation link. It will always show you the invitation details in the app, and prompt you to add it yourself.
Opening an invitation sent by email
When you have collaborated with a someone on other notes, you have the option of sending them an invitation directly using an email from the Agenda app. This email is sent without revealing the email address of any of the recipients.
To accept an invitation received by email:
- Open the email and click on the View Invitation button
- This should open Agenda app, and present the same invitation panel as for an invitation link.
- Choose a handle, and a project for the note.
- Click/tap on Add Note.
Opening an invitation sent via Messages with Shared with You
You receive invitations using Shared with You in your Messages app. If you click the invitation, it should open in Agenda, and you can decide whether to join the collaboration or not.
- Click/tap on the collaboration in Messages app
- This should open Agenda app, and present the invitation panel.
- Choose a handle, and a project for the note.
- Click/tap on Add Note.
Note: Invitations arriving via Messages which have been sent with Shared with You may also appear in the Shared with You shelf. Using the shelf, you can quickly navigate to new invitations, or see notes and message threads for older ones. The shelf is described in detail below.
Making edits to shared notes
Shared notes can be edited by anyone who has joined the collaboration, in close to real time.
Anyone who has joined will appear at the top of the note as a user “bubble”. This is a colored ball with their handle initials in it. On the Mac, you could mouse over these bubbles to see who they are. On all platforms, tapping the bubbles brings up a list of participants.
The bubbles are shown in order of most recent change. The bubble most left is the person who has made a change most recently. The most recent change bubble is also shown in the Recently Edited list in the right panel. (If you yourself were the most recent editor, the bubble is not shown.)
The way in which you edit shared notes doesn’t differ any from other notes, but the information transferred to others is restricted. For example, the On-the-Agenda status, collapsed state, date, and linked calendar event are not shared with others, because they are very personal aspects of the note, and have no value in the Agenda of another.
The note content itself is shared with others in the collaboration. They will see the changes you make to the note, until you leave the collaboration. All the standard formatting and editing options are available to you. You can apply highlights, bold styling, add a table or attachment — anything you can do in a standard unshared note.
Leaving a collaboration
While you are sharing a note, you see the changes of others, and they see the changes you make. To end this exchange, you can leave the collaboration. Simply click/tap on the user bubbles top-right on the note, and click the Leave or Unshare button at the bottom.
When you leave, you keep a copy of the note at that point in time, but it is no longer involved in the collaboration, and there will be no transfer of edits with the other users.
If you would like to rejoin the collaboration, you can do that by accepting the invitation again (or a new one). If you do that, your local copy of the note will be merged with new changes from the cloud. If you don’t want this, make a copy of the note first, and delete the original.
When the last person leaves a collaboration, the data stored in the cloud is removed. You can see this is about to happen because instead of the button reading Leave, it will read Unshare. After clicking on Unshare, the collaboration will be removed from the cloud, and nobody can join that collaboration in future. (If you want to collaborate on that note again, simply setup a new collaboration for it.)
Shared with You
Shared with You is a feature introduced by Apple in iOS 16, iPadOS 16, and macOS 13. It provides a means to invite others to a collaboration via the Messages app, but also to easily couple content to a Messages thread. This allows you to easily jump between the content you are working on, and a Messages thread where you can carry out discussions with other participants.
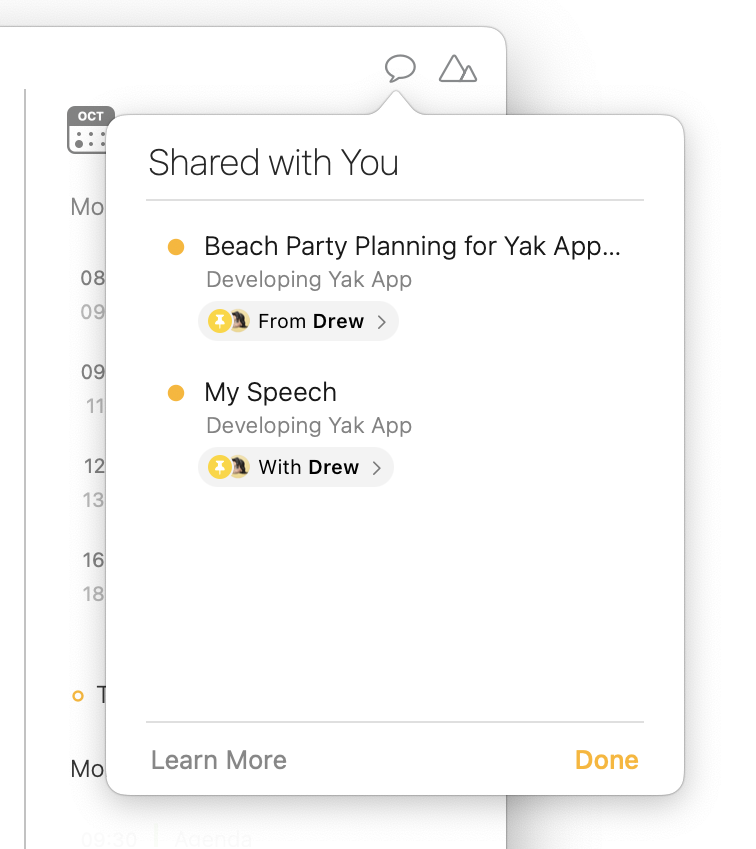
The Shared with You shelf
The Shared with You shelf is a panel that contains a list of the invitations you have received via Shared with You in the Messages app. From this panel, you can accept invitations to new collaborations, but also navigate to the notes created when you accepted invitations, and navigate to Messages threads discussing the notes.
To open the Shared with You shelf on macOS:
- Click on the speech bubble button top-right in the window.
To open the shelf on iPadOS/iOS:
- Open the right panel
- Tap on the speech bubble button at the bottom.
Note: The Shared with You shelf button will only be shown if there is at least one invitation in Messages app.
Navigating from a note to a Messages thread
If you accept an invitation to a collaboration via Shared with You in Messages app, a connection is formed between the note and the Messages thread. This allows you to keep discussing the note in Messages, while you edit it in Agenda.
To jump from a shared note to the corresponding Messages thread
- Click/Tap on the user bubbles top-right on the note. This brings up the Participants panel.
- There is a link to the chat shown at the bottom of the list of partipants. Click/tap that to jump to the Messages thread.
Navigating from a Messages thread to an Agenda note
You can jump from Messages straight to the Agenda note by clicking on the original invitation in the Messages thread.
Note that you can also find the note by clicking on the Shared with You shelf button in Agenda, and clicking/tapping the note there.
Tip: By default, Messages will only put pinned invitations in the Shared with You shelf. To make sure you see all the invitations there, go to Messages app, and choose Messages > Settings…. In the Shared with You tab, make sure Agenda is checked.
How sharing works behind the scenes
We’ve tried to make collaborations easy to setup and manage, but there is a lot going on under the covers. Here will will give you some more insight into important aspects of the system.
Encryption on device
Collaboration notes are not stored in iCloud with the rest of your data. To fully protect note content, shared note data is encrypted on device before being uploaded, and it stays encrypted in the cloud. Only those who join the collaboration can decrypt the data, which also happens after downloading to a device.
The keys for encrypting the data are not stored with the data itself, and they are also encrypted before being stored. In order for someone to get to the note content and read it, several cloud systems would need to be compromised.
Note: You will find our privacy policy and terms of use here.
Inviting existing connections
When you invite an existing connection, they receive an email, but neither party can see the email address of the other. How does this work?
At Agenda, we store as little data about our customers as we possibly can, but we do have an email address on record for each Agenda Account. When you choose to invite known connections, the Agenda server finds those connections, and uses their email to send the invitations, without every revealing the email address.
Seeing it in Action
You can see collaboration in action, as well as the Shared with You feature here: